Page 8 of 25
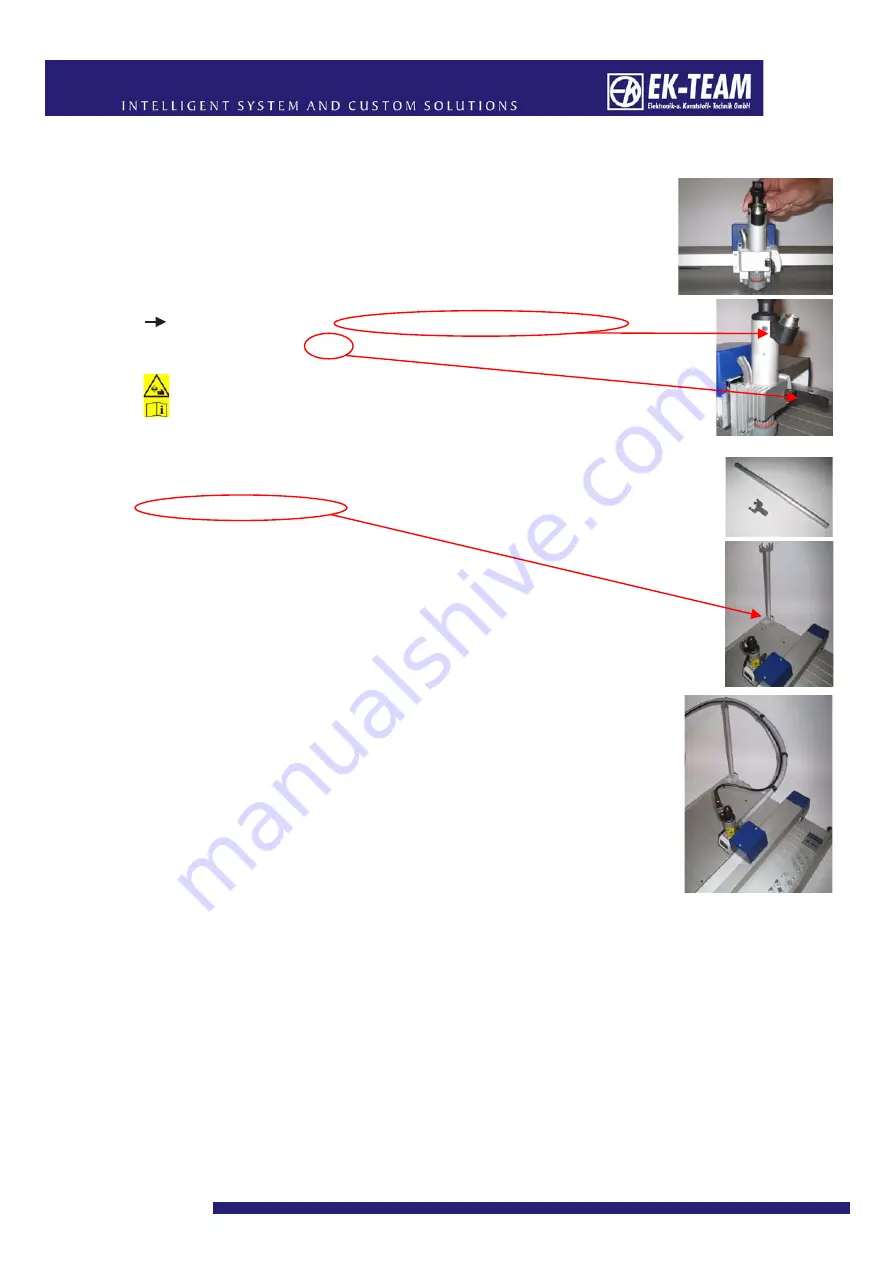
4.3 Insert the engraving spindle into the engraving head
As shown in the illustration, place the engraving spindle into the
engraving head and clamp the spindle tight with the quick-action
tightener. The engraving spindle is already fitted with an
engraving needle.
Note:
Make sure the connection of the engraving spindle is
pointing towards the lever.
Caution:
Please read and take note of the safety instructions
for operation
4.4 Fitting the cable and hose stand
Insert the aluminum tube into the mounting.
Insert the clamping element for the engraving cable and the suction
hose into the aluminum tube.
4.5 Connections at the engraving head
Place the engraving head by hand (the engraver must be switched off)
into the bottom right-hand corner.
Connect the engraving spindle cable to the spindle and
tighten the screw connection of the plug to hand tightness. Now, as
shown in the illustration, lay the cable in a loose loop and clamp it
into the clamping element of the stand. Connect the other end of
the cable to the
VE 600
and likewise tighten the screw connection
to hand tightness. Now plug the suction hose onto the engraving
head and lay the hose, like the cable, in a loose loop, then clamp
the hose into the clamping element of the stand.
4.6 Vacuum cleaner connection
You have the option of using the
VC 500
vacuum cleaner, which is part of the product
range, or a conventional commercial vacuum cleaner for the suction clearance of the
engraving chips.
Caution:
Under no circumstances should you work without vacuum cleaning, since
otherwise the chips will cause serious dirt contamination of the engraver


