18
Chapter 2 Adjusting Screens
When using video signal input
●
When displaying HD signals (720p, 1080i, 1080p)
Setting
Function
Enlarged
As far as possible, images are enlarged to full screen without changing the aspect ratio.
Blank borders may appear at the top and bottom of the screen to maintain the aspect
ratio.
Dot by Dot
Displays images with the specified resolution.
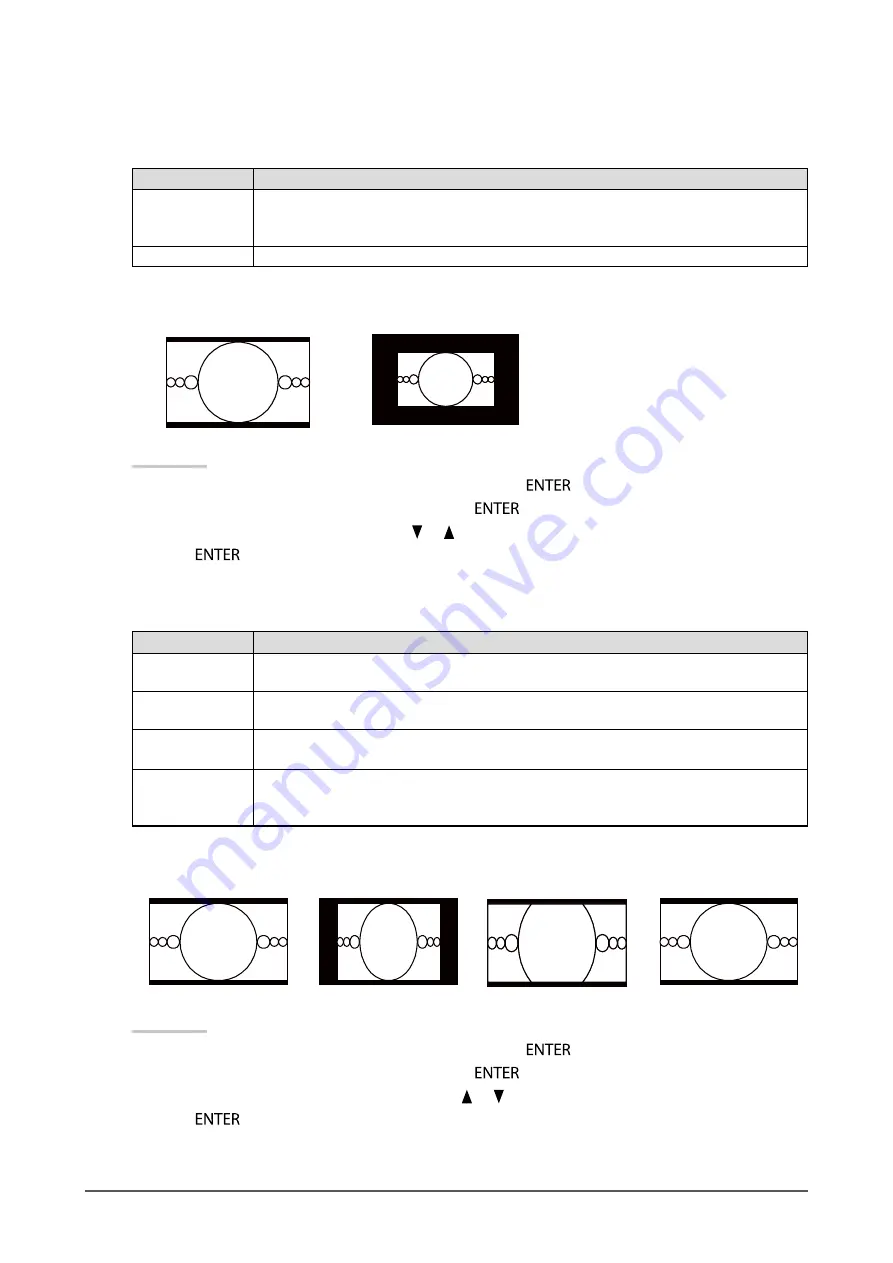
Example: 720p
Enlarged
Dot by Dot
Procedure
1. Choose “Screen” from the Adjustment menu, and press
.
2. Choose “Screen Size” from “Screen”, and press
.
3. Select “Enlarged”, or “Dot by Dot” with
or
.
4.
Press
after completing the setting.
●
When displaying SD signals (640 × 480, 480i, 480p, 576i, 576p)
Setting
Function
Auto
The monitor automatically changes the screen size according to the aspect ratio sent
from the auto input signal.
4:3
Displays images in a 4:3 format screen. Black bars appear on both sides of the screen.
16:9 images are horizontally compressed.
Letter Box
Displays 16:9 letterboxed images in full screen.
Images other than the letterboxed ones are partly cut on top and bottom.
16:9
Displays the entire 16:9 image in full screen. Black bars appear on the top and bottom of
the screen.
4:3 images are horizontally expanded.
Example: 480i/480p (16:9)
Auto
4:3
Letter Box
16:9
Procedure
1. Choose “Screen” from the Adjustment menu, and press
.
2. Choose “Screen Size” from “Screen”, and press
.
3. Select “Auto”, “4:3”, “Letter Box”, or “16:9” with
or
.
4.
Press
after completing the setting.


