23
3.
Set the correct time and time zone for your AP using the drop down
menus. The AP also supports NTP (Network Time Protocol).
Alternatively, you can enter the host name or IP address of a time
server. Click “Apply” when you are finished.
You can use the “Acquire Current Time from Your PC” button if you
wish to set the AP to the same time as your PC.
Congrats! The basic settings of your AP are now configured and your AP is up
and running!
V.
CAX1800 Settings
The CAX1800 features a range of advanced functions. Please open a browser
and enter the CAX1800 default IP address “192.168.2.2” to access the AP
configuration webpage.
V-1.
Information
Summary of Contents for CAX1800
Page 1: ...CAX1800 User Manual 11 2019 v1 0...
Page 7: ...iv Advanced 235 VI 10 Toolbox 240 i Network Connectivity 240 VII WPS 242 VIII Reset 244...
Page 10: ...3 Screws Size...
Page 18: ...11 E G G E A A F F B B C C D D...
Page 22: ...15 3 Home screen will be shown...
Page 27: ...20 If multiple SSIDs are used specify which SSID to configure using the SSID drop down menu...
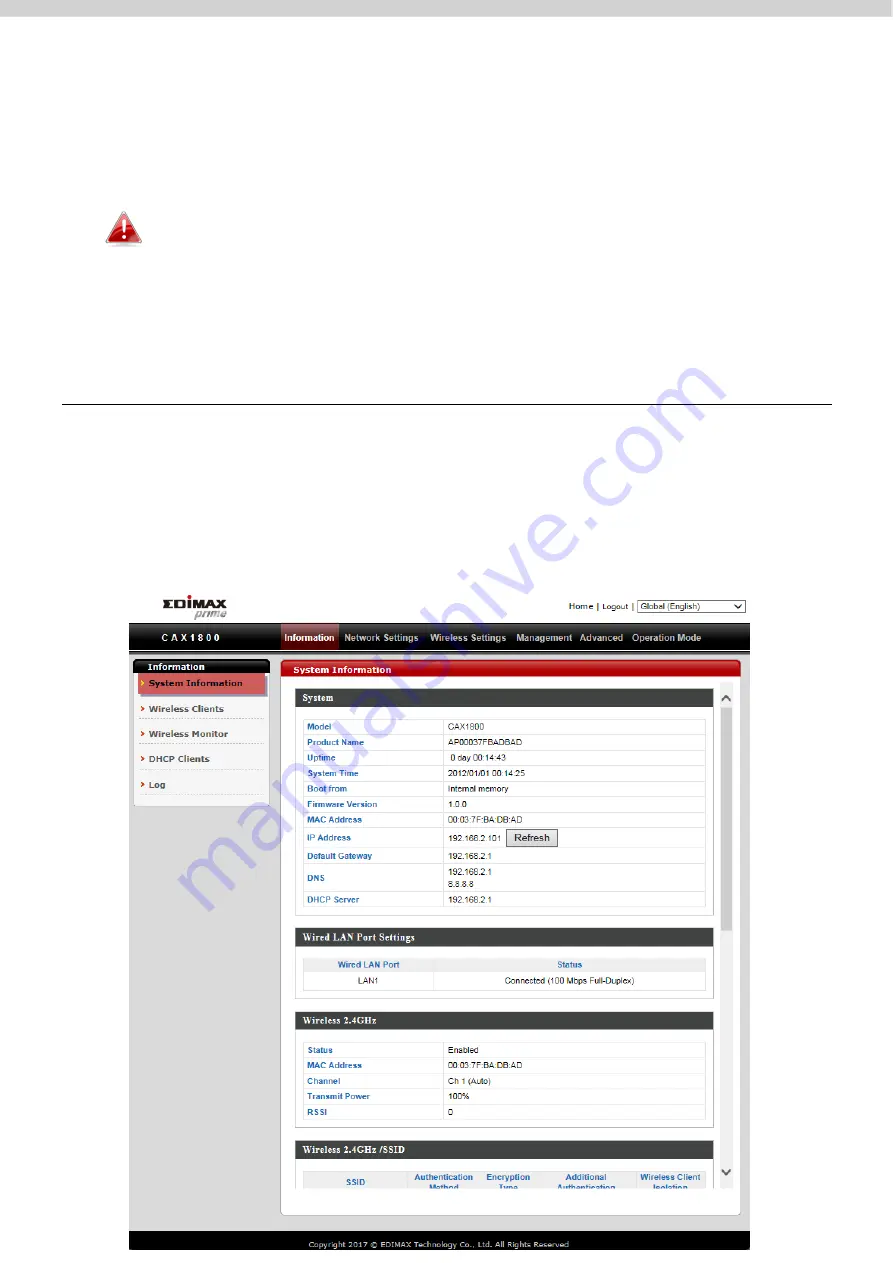
Page 31: ...24 i System Information System Information page displays basic system information...
Page 44: ...37 V 3 Wireless Settings...
Page 45: ...38 i Basic 2 4GHz 11bgn You can set up basic settings for AP 2 4GHz Wi Fi network...
Page 70: ...63 V 4 Management...
Page 91: ...84 If any of your Managed APs cannot be found reset it to its factory default settings...
Page 98: ...91 Toolbox The Toolbox panel provides network diagnostic tools Ping Traceroute and IP Scan...
Page 128: ...121...
Page 141: ...134 Edit Radio Group Settings...
Page 144: ...137 Edit WMM EDCA Settings Edit BandSteering Settings...
Page 146: ...139 Edit Group Settings...
Page 148: ...141 Add Edit WLAN...
Page 156: ...149...
Page 164: ...157 Add Edit Guest Network Click Add to enter the page shown below...
Page 172: ...165 Static Users Guest Portal Type...
Page 204: ...197...
Page 230: ...223 System Information System Information page displays basic system information...


