EdilKamin Iris Plus Installation & Operation Manual Download Page 13

PAGE 13

Weekly Timer Program built into the Little Control Panel

Weekly time programmer built into panel

Using the weekly time programmer built into the central panel 
it is possible to set 3 ignition programmes: 

• Pr01 with settable on and off times;
• Pr02 with settable on and off times;
• Pr03 with settable on and off times.

One or more of the three programs can be enabled for 
each day of the week (day1=Monday;day2=Tuesday…
day7=Sunday).

When on standby the display alternates between displaying 
the ignition mode (P1, P2 or P3 or a temperature) and the 
current time.

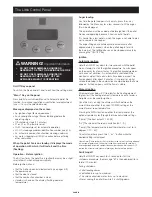
Refer to page 12 for each of the buttons to be pressed.

Setting the clock

1.  Hold the MENU key down for about two seconds until IP 

appears then release, tS appears.

2.  Press (-) and “Prog” will appear.

3.  Press “Menu” and “ProF” will appear. Press the (-) key 

and “SEt” will be displayed.

4.  Confirm with the “Menu” key, which will display 

HOUR:MIN, values can then be varied with the (-) 
and (+) keys.

5.  Once the hour has been set, confirm with “Menu” and the 

day number will appear (day 1=Monday, day2=Tuesday...
day7=Sunday) which can be varied with the (-) and (+) 
keys.

6.  Confirm with “Menu” and “Prog” will appear.

7.  Press “ON/OFF” to exit from setting.

Enabling programmes

1.  Hold the MENU key down for about two seconds until IP 

appears then release, tS appears.

2.  Press (-) and “Prog” will appear.

3.  Press “Menu” and “ProF” will appear.

Note: PrON will be displayed if programming has previously been enabled. 
If so you can exit thie section by pressing O/1 and proceed to setting 
program section.

4.  Confirm by pressing the “Menu” key, pass now to “on” 

with the (-) or (+) keys.

5.  Confirm with the “Menu” key and “Prog” will appear. 

Press “ON/OFF” to exit from setting.

6.  The pellet fire is now in “PrOn” mode and will accept 

timed on and off commands.

Setting a program (e.g. Pr01)

1.  Hold the MENU key down for about two seconds until IP 

appears then release, tS appears.

2.  Press (-) and “Prog” will appear.

3.  Press “Menu” and “ProF” or “PrOn” will appear. Press (+) 

until “Pr 1” appears (after PrOn has been set previously).

4.  Confirm with the “Menu” key and OnP1 will appear and 

then the desired set hour for programme 1 ignition.

5.  The time can be changed using the On/off (-) or (+) keys. 

6.  Press the “MENU” key to confirm.

7.  OFd1 appears (indicating that program 1 is not enabled 

for day1, continue to go through the days, disabling/
enabling as required).

8.  Press (+) to enable it, after which Ond1 appears, 

indicating that program 1 is enabled for Monday.

9.  Press the “MENU” key to move on to the second day, 

Tuesday, and so on until day7.

10.  Press the “On/off” to exit.

11.  Pr02 and Pr03 on and off times and the days on which 

they are enabled can be set in a similar way.

12.  A small green bar will light-up in the bottom right corner of 

the control panel when a program is enabled for that day.

Note: You can override the pre-programmed settings if need be.

Note: Automatic cleaning .. every 20 minutes the combustion fan will 
speed up for 10 seconds to blow excess ash from the burn pot.

Summary of Contents for Iris Plus

Page 1: ...Manual Important information 2 Operation and fuel 3 Technical specifications 4 Assembly installation 5 Pellet fire vent systems 6 Dimensions 8 Installation clearances 9 Control panels weekly timer 10...

Page 2: ...eded Please take particular note of the following Never put foreign substances in the firebox or hopper Do not use flammable products to clean the smoke duct Firebox and hopper components must only be...

Page 3: ...filled through a lid found at the back of the top The internal structure of the pellet fire is completely made of cast iron The external covering of the Iris Plus is ceramic and the external covering...

Page 4: ...optional infrared Electronic circuit board protection 5 x 20 2 A 250 VAC fuse IRIS PLUS TECHNICAL HEATING SPECIFICATIONS Hopper capacity 15kg Efficiency 71 Heat Output 3 4 8kW Burn time min max 7 5 1...

Page 5: ...the vent system will be clear of ceiling joists trusses etc 9 Once you are satisfied you have the pellet re in its final position secure it to the oor using suitable anchors Drill through the oor prot...

Page 6: ...he air intake through the pellet fire and pushes it out the venting Air passing through the burn pot is used to burn the pellets Proper vent pipe sizing is very important to ensure the pellet fire ope...

Page 7: ...We recommend sufficient space be provided minimum 200mm on each side of the pellet fire to service the unit If this is not possible provision must be made available to remove the unit for servicing Pe...

Page 8: ...PROFILE Little Iris Plus Little FRONT PROFILE Little REAR PROFILE IRIS PLUS side PROFILE IRIS PLUS FRONT PROFILE IRIS PLUS REAR PROFILE 600mm 480mm 600mm 950mm 375mm 320mm 500mm 530mm 215mm 106mm 77...

Page 9: ...ry hour There are three methods of supplying the pellet fire with combustion air They are as follows DV WALL KIT ducts through an outside wall DV FLOOR KIT ducts through the floor directly behind the...

Page 10: ...able to pick up Ignition Automatic ignition Hold the 0 1 key down for two seconds with the pellet fire on standby to start the ignition procedure Ac appears on the display for a few minutes the igniti...

Page 11: ...been enabled If so you can exit thie section by pressing O 1 and proceed to setting program section 4 Press the MENU key until OFF appears 5 Press the or key until PrOn appears 6 Confirm with the MENU...

Page 12: ...OFF key down for two seconds with the pellet fire on standby to start the ignition procedure Ac will appear on the display for a few minutes The ignition procedure does not have a set duration it is a...

Page 13: ...isplayed if programming has previously been enabled If so you can exit thie section by pressing O 1 and proceed to setting program section 4 Confirm by pressing the Menu key pass now to on with the or...

Page 14: ...ion is suspected If the value displayed does not vary when the conditions are changed for example the door is opened then the sensor is faulty The low pressure alarm may also occur during ignition as...

Page 15: ...ing a vacuum pot connected to your vacuum cleaner which are available from your Metro Dealer The whole process takes only a few minutes a day Vacuum clean the door vacuum clean the hearth and vacuum c...

Page 16: ...arising from the failure of any part or operation of the appliance A claim under this warranty should be directed to the retailer who supplied the EdilKamin Pellet fire or if this is not possible wri...

Reviews: