


PAGE 12
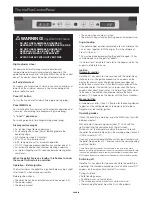
On/Off Key on panel
To switch the fire on and off, and to exit from the setting menu.
“Menu” Key on the panel
Press briefly to switch from Manual to Automatic pellet fire
function. Also allows regulation air ventilation level adjustment
(use +/- to vary the selected mode).
Messages displayed on the screen
• Ac: ignition stage (flame appearance)
• Ar: second ignition stage (flame stabilizing) before the
operating stage
• Off: shutdown stage (10 minutes)
• P1 or P2 or P3: power level set
• 10-30: temperature set for automatic operation
• H1..H7: stoppage problem identification number (see p14)
• Pu: automatic combustion chamber cleaning under way
• nn: motor stopping;
wait 20-30 seconds before entering
other commands.
When the pellet fire is on standby, it displays the mode
of operation with which it will restart and the time
(flashing).
Operation –
Before ignition
The first few times the pellet fire is ignited there may be a slight
smell of paint, which disappears rapidly.
Before ignition, check:
• that the fire has been installed correctly (see pages 5-9)
• the power supply
• that the door is closed
• that the combustion chamber is clean
• standby is shown on the display (flashing power or
temperature).
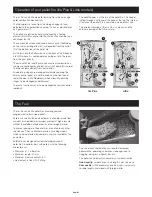
Auger loading
Any time the pellet hopper is fully empty, press the + key
followed by the Menu key for a few seconds to fill the auger.
IR will be displayed.
This operation must be carried out before ignition if the pellet
fire ceased operating because it had run out of pellets.
It is normal for a few pellets, which the auger is not able to pick
up, to remain in the hopper.
The auger filling phase will deactivate automatically after
approximately 4 seconds, when the pellets begin to fall in
the burn pot. The refilling phase can be stopped manually by
pressing the “ON/OFF” key.
Ignition
Automatic ignition
Hold the ON/OFF key down for two seconds with the pellet
fire on standby to start the ignition procedure. Ac will appear
on the display for a few minutes. The ignition procedure does
not have a set duration: it is automatically shortened if the
electronics detect that certain tests have been passed. The
flame appears after about 5 minutes. It is normal for a bit of
smoke to develop in the combustion chamber before the flame
appears. Ar then appears until the flame is stable.
Manual ignition
At temperatures below 3°C (too low for the heating element
to glow) or if the heating element is temporarily out of order, a
firelighter may be used for ignition.
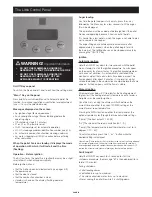
Once the fire is running the display will flash between the
current time and either the current POWER setting or the
current preset room temperature.
Pressing the MENU button on either the front panel or the
optional remote cycles through the three adjustable settings.
“Power” [The heat output P1 P2 P3]
“Air” [The speed of the room circulation fan 1 - 9]
“Temp” [The temperature the inbuilt thermometer is set to in
degrees C 10 - 30]
To adjust one these press the “+”or “-“ button while the
desired setting is displayed.
Please Note: (Flame variability): Any variations in the state of the flame depend
on the type of pellet used, the normal variability associated with solid fuels
and the periodic automatic combustion chamber cleaning (which does NOT
replace the essential cold vacuum cleaning by the user before ignition).
Switching off
Hold the ON/OFF key down for 2 seconds to start the
shutdown procedure; the message “of” is then displayed (for a
total of 10 minutes).
During shutdown:
• Pellet loading ceases.
• Ventilation turns up to maximum.
• The smoke expulsion motor turns up to maximum.
• Never unplug the pellet fire while it is shutting down.
The Little Control Panel
• DO NOT USE FLAMMABLE LIQUIDS OR
AEROSOLS TO START OR REKINDLE THE FIRE
• DO NOT USE FLAMMABLE LIQUIDS OR
AEROSOLS IN THE VICINITY OF THIS
APPLIANCE WHEN IT IS OPERATING
WARNING!
Important Information