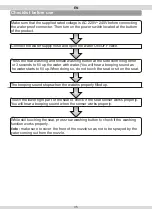
Make sure that the supplied rated voltage is AC 220V~240V before connecting
the water proof connector. Then turn on the power switch located at the buttom
of the product.
Connect the water supply hose and open the water ON/OFF valve.
Press the rear washing and female washing button at the side control together
for 3 seconds to fill up the water with water.(You will hear a beeping sound as
the water starts to fill up.When doing so, do not touch the seat or sit on the seat.
The beeping sound stops when the wateris properly filled up.
Touch the lower right part of the seat to check if the seat sensor works properly.
You will hear a beeping sound when the sensor works properly.
While still touching the seat, press rear washing button to check if the washing
function works properly.
Note:
make sure to cover the front of the nozzle so as not to be sprayed by the
water coming out from the nozzle.
Checklist before use
EN
35
Summary of Contents for VitrA V-Care Basic 5674/431465
Page 124: ...V Care V Care V Care RU 123...
Page 125: ...1 2 3 4 5 6 7 8 9 10 ID 11 12 13 14 124 RU...
Page 127: ...Warn ng Caut on Never D sassemble V Care 126 RU...
Page 128: ...Warn ng 1 2 3 4 5 6 7 8 127 RU...
Page 129: ...Warn ng 128 RU...
Page 130: ...129 RU...
Page 131: ...130 RU...
Page 132: ...131 RU...
Page 134: ...220 240 3 133 RU...
Page 135: ...40 3 Comfort Bas c 134 RU...
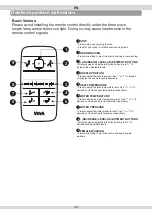
Page 136: ...Comfort 135 1 2 3 4 5 9 8 11 10 6 7 12 13 14 15 3 1 2 3 4 5 6 7 8 9 10 11 12 13 14 15 RU...
Page 137: ...Bas c 136 1 2 3 4 5 9 8 7 6 3 1 2 3 4 5 6 7 8 9 RU...
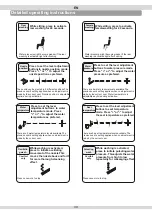
Page 138: ...40 40 5 5 5 5 Comfort Comfort 137 RU...
Page 139: ...3 3 5 Comfort Comfort 90 90 Comfort Comfort 1 V Care 90 V Care 38 C 10 38 C 3 Comfort 138 RU...
Page 142: ...141 A 3 20 B C D 3 3 V Care 3 40 40 40 10 1 125 3 A B C D RU...
Page 143: ...1 V Care a b c 2 3 3 1 2 3 3 142 RU...
Page 144: ...LR03 AAA 1 2 3 1 143 10 RU...
Page 145: ...144 3 RU...
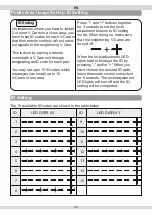
Page 146: ...145 RU LED LED LED LED LED 1 30 LED LED LED LED...
Page 147: ...146 RU...
Page 148: ...www vitra com tr...


