2
Manual for CON1
2. Compatible products
SolarStinger® SunStrip 35 Fresh
SolarStinger® SunStrip 70 Fresh & Marine Serie
SolarStinger® SunStrip 140 Marine Serie
SolarStinger® SunStrip WaterTube Day & Moon Serie
SolarRaptor® SunStrip 35 Reptile Serie
SolarRaptor® SunStrip 20 Day & Moon Serie
SolarRaptor® HeatStrip Series
The power of the connected product
power supply).
3. Firmware updates
To update the CON1 firmware you need
Firmware tool & Firmware
Mini USB cable
PC ( with Windows XP or latest version
Remove all connected products and the DRV (switching power supply
using the tiny USB cable.
The only connection CON 1 should have right now is the USB cable one
during the update is done via the USB
Should you connect CON1 for the first time with your
driver“ (http://www.econlux.de/update
1.
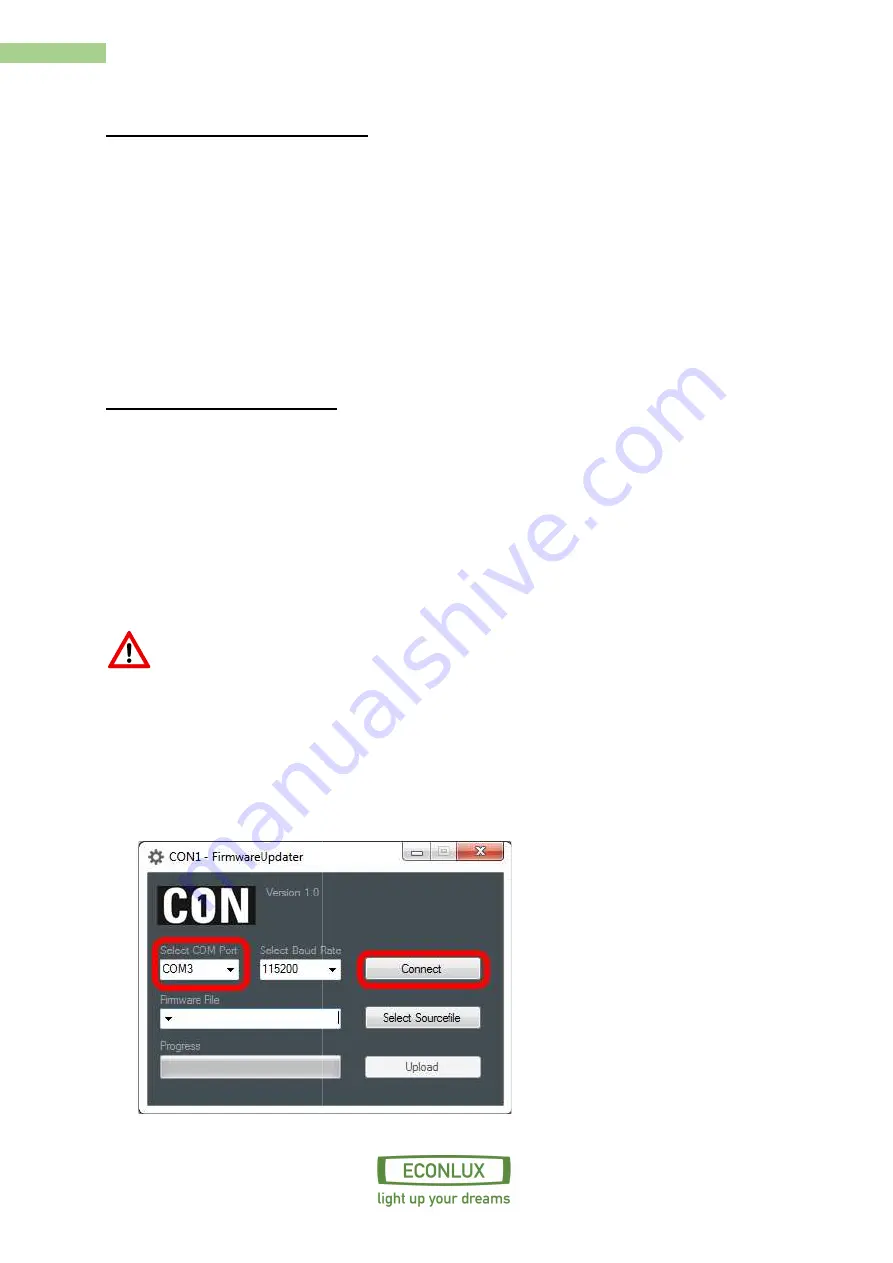
Please choose the COM p
Compatible products
® SunStrip 35 Fresh Series
® SunStrip 70 Fresh & Marine Series
SolarStinger® SunStrip 140 Marine Series
WaterTube Day & Moon Series
SolarRaptor® SunStrip 35 Reptile Series
SolarRaptor® SunStrip 20 Day & Moon Series
HeatStrip Series
product shall not exceed the maximum power of the
pdates
To update the CON1 firmware you need:
ool & Firmware
PC ( with Windows XP or latest version)
Remove all connected products and the DRV (switching power supply) from CON1 and connect to PC
only connection CON 1 should have right now is the USB cable one. The power supply
during the update is done via the USB cable.
for the first time with your PC, it is necessary to install the „CP210x VCP
http://www.econlux.de/updates). Now you can start the software with „CON1
Please choose the COM port which is connected to the CON1 and click the button „c
he DRV (switching
) from CON1 and connect to PC
The power supply
it is necessary to install the „CP210x VCP
„CON1 - Tool“.
CON1 and click the button „connect“.


