10
11
email - [email protected]
tel - 866-931-8021
email - [email protected]
tel - 866-931-8021
NOTE:
The Micro add-a-circuit fuse tap adapter is included in the package.
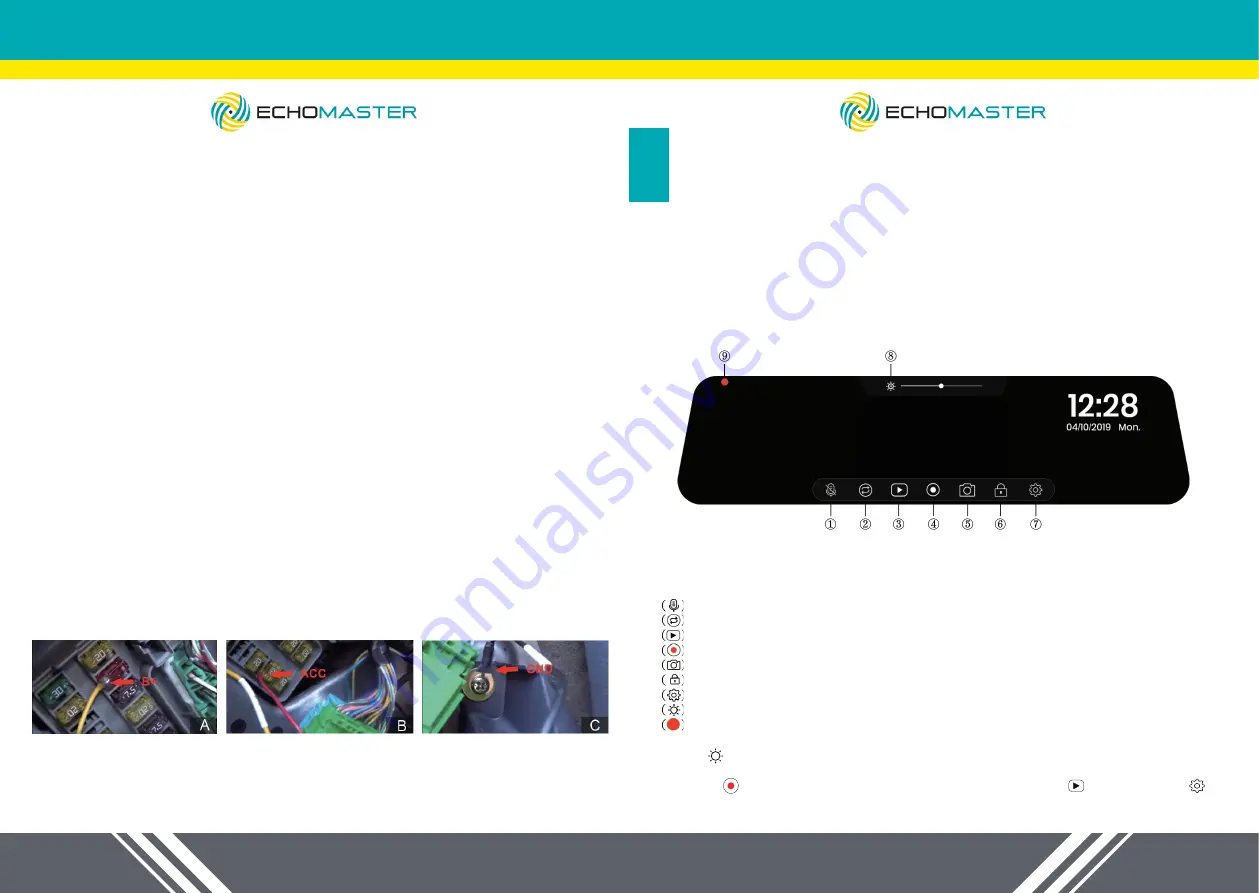
A:
Connect the
yellow wire (B+)
to the fuse box (Please be sure the fuse tap
adapter is connected to the other end)
This wire needs to be connected to the fuse which is a constant power
source.
How to find it:
Using a test light, check the fuses if you can get power or not when the car is
in OFF state.
If the bulb of the car test light is on, then you have found the correct one.
B:
Connect the
red wire (ACC)
to the fuse box. (Please be sure the fuse tap
adapter is connected to the other end )
This wire needs to be connected to the fuse which can get power when the car
in the ACC state.
Switching the key to the ACC state, then using the test light, check which
fuses get the power.
If the bulb of the test light is on, switch the car to the OFF state. If the bulb
turns off, you have found the correct one.
C: Black Wire (GND / GROUND)
This wire needs to be connected to the met-
al part of the car (ground). Most cars have at least one obvious ground point
near the fuse box, please connect the ground lug to the ground point (as seen
in the photo).
3. Connect the
4 pin connector
of the
power cable
to the
video cable
after
installing the rear camera. And connect the
video cable of the monitor
to the
camera wire.
Finally, connect the
red wire
to the
reverse light
.
MONITOR SETTINGS
STEP 6:
Turn ON/OFF the Monitor
1.Turn ON
The monitor will automatically turn on when the vehicle turns on. It is not
necessary to press the power button.
2.Turn OFF
The monitor will turn off when the engine shuts off .
To operate the mirror dash cam, simply touch the screen with your fingertips, using the
icons below to access the functions and settings.
1.
Mute:
Mute or unmute the current recording
2.
Switch Views:
Switch between display views (Front or Rear; Front & Rear)
3.
Playback:
Playback videos and photos
4.
Start/Pause:
Start or pause recording manually
5.
Shutter:
Take pictures
6.
Emergency Record:
Start emergency recording manually
7.
Settings:
Open system settings
8.
Screen Dimmer:
Manually or automatically dim or increase the screen brightness
9.
Recording Indicator:
Red/yellow indicates loop recording or emergency recording
1. Tap ( ) to be able to adjust screen light manually or automatically. Slide the dot on
the lightness bar to dim or brighten the screen.
2. Pause ( ) current recording to enter into “Playback mode ( )” or “Settings ( )”.


