English
English
9
•
There is a risk of suffocation! Keep the packaging materials away from the children.
1. Remove the cardboard box and polystyrene wrapping.
2. Pull out the washing machine and remove the base packaging. Make sure the small foam triangle has been
removed together with the bottom one. If not, place the appliance side down and then manually remove
the small foam insert from the bottom of the appliance.
3. Remove the tape securing the power cable and the drain hose.
4. Remove the hose from the drum.
Shipping screws removal
Before starting the washing machine, remove the 4 shipping screws and rubber washers from the back of the
washing machine. If the screws are not removed, they can cause strong vibrations, noise and malfunction of
the washing machine and will void the warranty.
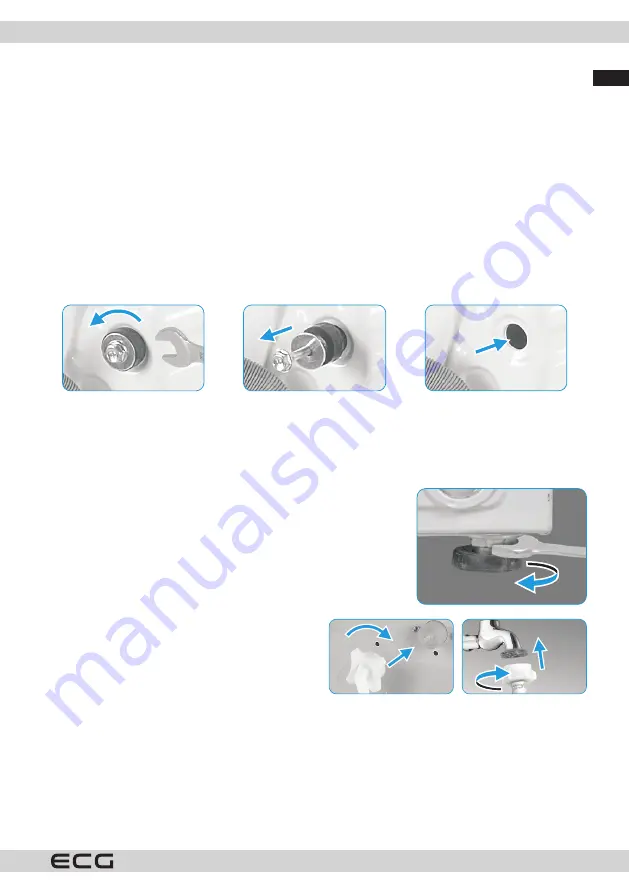
1. Loosen the shipping screws by turning them counterclockwise with a suitable wrench.
2. Remove the transport screws.
3. Insert the plastic plugs provided in the accessories bag into the holes left after removing the screws.
Shipping screws should be stored for future use.
Loosen the 4 transport screws with a spanner.
Remove the screws including the rubber parts
and store them for future use.
Seal the holes with plugs.
Levelling the washing machine
Warning:
•
The locking nuts on all four feet must be screwed firmly to the frame of the washing machine.
1. Loosen the lock nut.
2. Turn the foot until it reaches the floor.
3. Adjust the position of the feet and secure the nuts with a spanner.
Make sure the appliance is horizontal and stable.
Connecting the supply hose
Warning:
•
To prevent leakage or water damage, carefully follow the instructions
in this chapter.
•
Do not bend, squeeze or adjust the water supply
hose.
Connect the supply hose to the water inlet valve and to
the cold water tap, see illustration. Tighten the hose by
hand, do not use tools. Check that the connections are
tight.
Summary of Contents for EWS 60103
Page 2: ......


