


20111028#4.2
EBS Ink-Jet Systeme
EN
27
EN
•
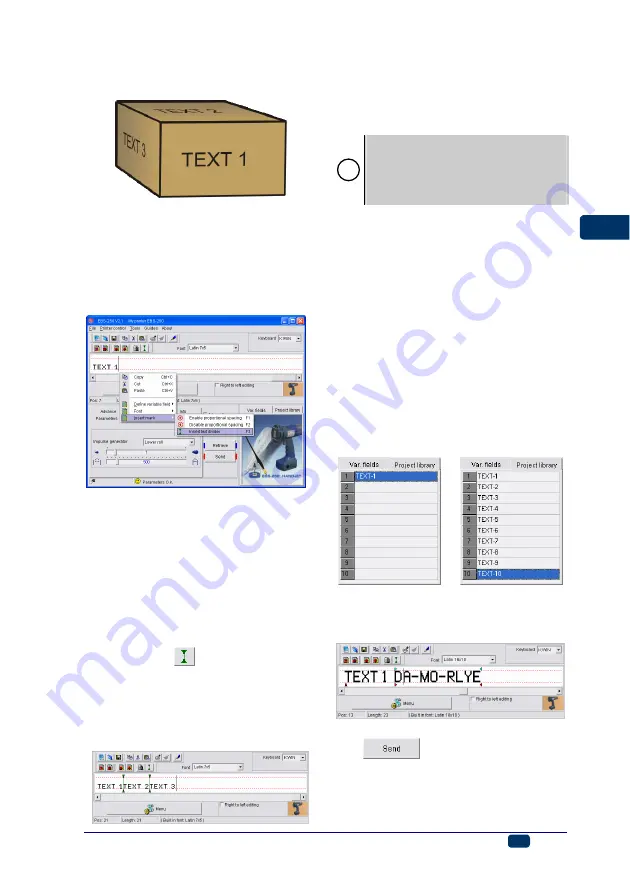
or in different places on an object
as shown in the figure below:
Create texts to be printed in the fol-
lowing way:
1. Create
TEXT 1
in the text edit
line. Every line of the text can
have all the text elements (such
as variable fields, various fonts,
etc.) described previously.
2. Place the cursor at the end of
text
TEXT 1
and insert a text-
change marker. You can do that
in a few ways:
•
while holding the cursor on the
text edit line press the right
mouse button
(or the MENU but-
ton) and select the commands
Insert mark
and
Insert text di-
vider
in the menu displayed,
•
press
the key on the tool bar
of the text edit window,
•
use the F3 shortcuts.
3. Type in successive texts separat-
ing them with the text-change
marker.
4. Transfer the text to the printer
and you can start printing.
Each text is selected and printed with
release button
!
The number of texts to be printed in
separate lines is not limited. Instead,
the total number of characters in all
lines is subject to limitation: it must
not exceed 1300 characters.
Using a Number of Texts
You can store up to 10 projects (30
optionally) in the printer memory. Each
project can contain any of the text ele-
ments described previously (such as
variable fields, various fonts, etc.), and
also the line printing function.
Creating a Text Library in the
Printer
1. In the
Project library
window,
type in the name of a first text
and confirm the name with the
V
key.
Ö
2. In the text edit line create a com-
plete text and set print parame-
ters for the text.
3. When the printer is on, click the
key of the printer con-
trol program in order to send the
text file to the printer.


