


4
Quick Start Guide
MN0480001E
Effective February 2011
XV Operator Interface Models
with Visual Designer
eaton Corporation
www.eaton.com
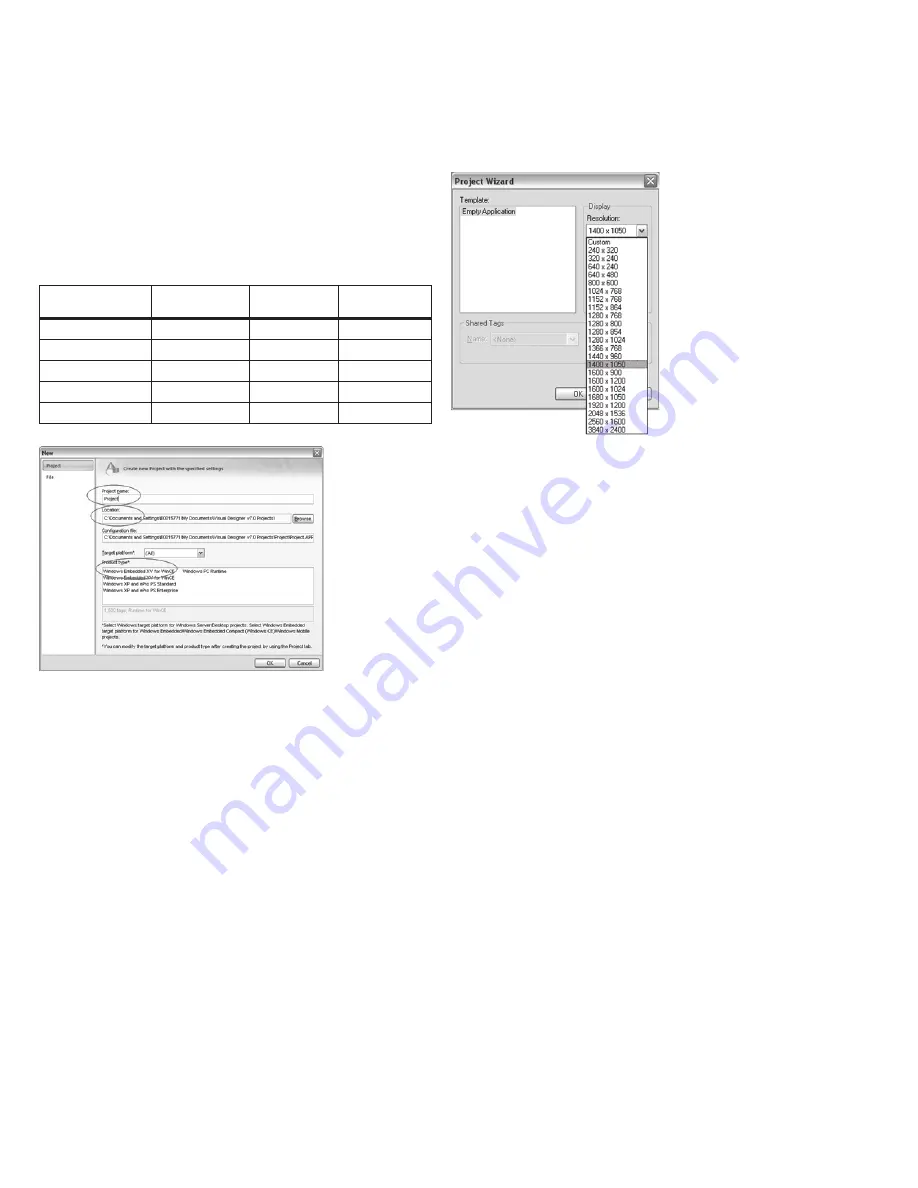
3.1 Creating a new Project
Start the Visual Designer development software and from the Main
Menu Bar select File
à
New. The New dialog box will appear. From
the Project tab’s Project Name field, type the name of your new
Project. The Folder (directory) to store your new application will be in
the Location field; you can use this folder or specify another folder
by selecting the Browse button. Your application file will be stored
in the folder specified in Location, as a filename as specified in the
Project Name field, with a .APP file extension. This is shown in the
Configuration File field. Select your Target Platform along with the
Eaton license type, by choosing XV for WinCE (1500 tags).
Eaton License
Max Tag Count
Win CE
Win XP/7 Server
2003/2008
XV for WinCE
1,500
•
XV for WinCE
4,000
•
XP & ePro Standard
4,000
•
XP & ePro Enterprise
64,000
•
PC Runtime
64,000
•
When you are done, select the OK button. You have now created a
new Project.
At this point, don’t worry whether you have enough tags to meet
your application requirements. You can adjust the license configura-
tion for your software by selecting the following from the Ribbon:
Project
à
Options
Using the Target System combo box, select a new target platform
configuration to meet your application requirements.
3.2 Select a Display Resolution
Next, a Project Wizard dialog box will appear, as shown to the right.
Select the radio button corresponding to the screen resolution for
your target platform and press the OK button. For the XV-102 3.5”
model, choose 320x240, for the XV-102 5.7”, XV-152 5.7”, 8.4”, or
10.4” choose 640x480. For the XV-102 7” widescreen model choose
“Custom” then set the resolution to 800x480.
The Resolution setting in the Project Wizard defines the default
screen resolution for your application. As will be explained later,
when you create a screen you have the option of defining the resolu-
tion of an individual Screen. If you are creating a Screen Group for
a Multiple Document Interface (MDI) interface (i.e. a collection of
smaller Screens that make up a Screen Group), it is quite normal
that each screen is smaller than the default resolution. However, the
collection of smaller (MDI) screens typically combines in a manner
to fill the default screen size.
New Project
Dialog Box
If you later decide to change the resolution of your target platform,
this can be easily accommodated. In the Ribbon Home tab under
Tools, there is a Convert Resolution Tool that will allow you to change
the screen resolution to that of your target platform.
3.3 Saving Your Project
Saving your new Project is easy. You should save changes to any
Screen or Worksheet. But if you attempt to Exit (i.e. exit by selecting
File
à
Exit) or close the Visual Designer development environment
(i.e. select the “x” Close button in the top right corner of the Visual
Designer development environment window), you will be offered the
option of saving any changes before the Visual Designer develop-
ment environment closes.
3.4 Tags - Overview
Tags are a core component of any Visual Designer (Visual Designer)
application. From a simple viewpoint, tags are variables used by
Visual Designer for a variety of purposes, such as to store the cur-
rent data points obtained from communication with plant floor
devices (e.g. PLC’s) and storing the results of calculations. Tags are
used to display information on screens (and web pages), to manipu-
late Visual Designer Objects, and with worksheets (Math, Scheduler,
Alarm, Trending, Event Management, Communications, Recipes, and
Reports).
But tags are more than simple variables. Visual Designer includes
a real-time database manager for project tags that provides a
number of sophisticated functions such as time stamping of any
value change, checking tag values against runtime minimum and
maximum values, comparing tag values to alarming limits, etc. A
Visual Designer tag has a value and various properties that can be
accessed, some at development and others only at runtime.
Project Wizard
Dialog Box


