Model PV5580/PV6080 User Guide
HD Widescreen Television
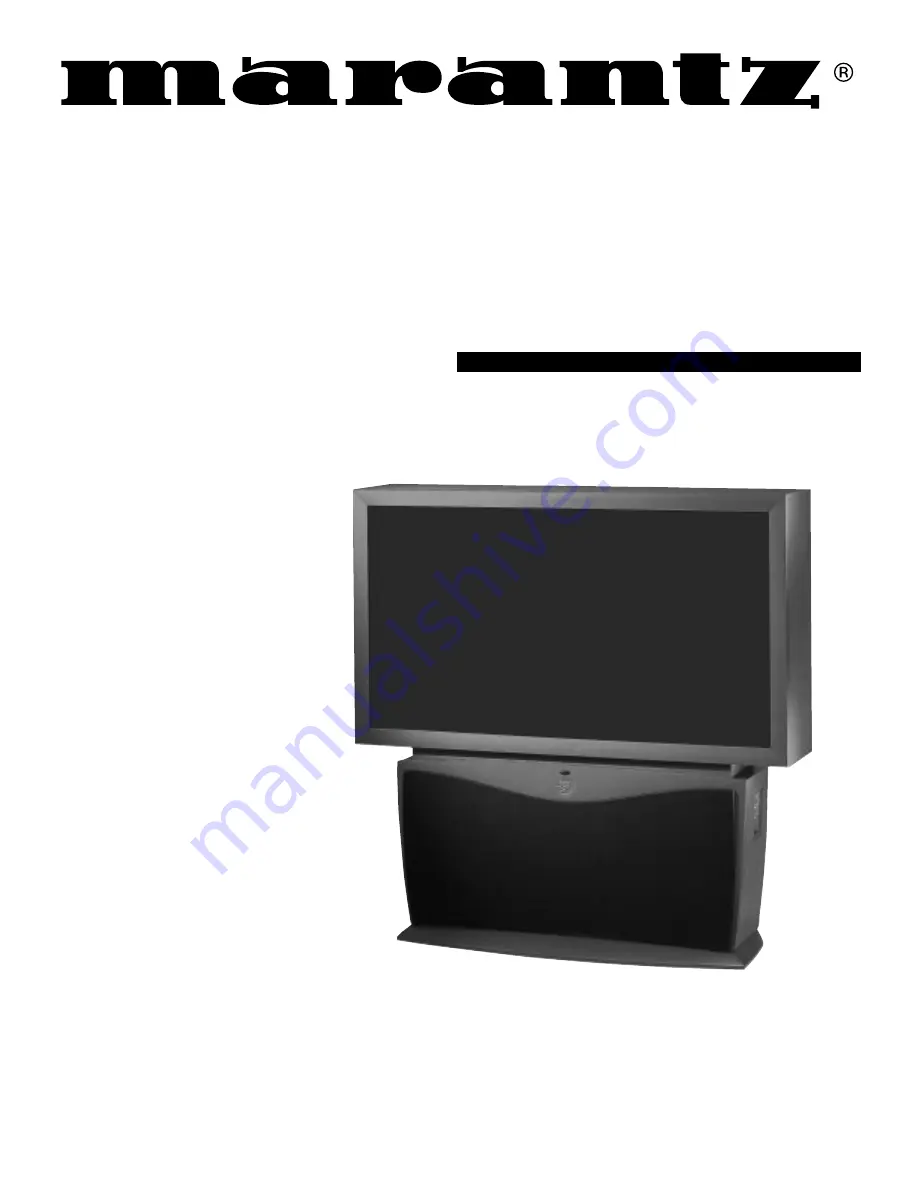
Page 1: ...Model PV5580 PV6080 User Guide HD Widescreen Television ...
Page 2: ...nclosed literature closely to prevent operating and maintenance problems WARNING TO PREVENT FIRE OR SHOCK HAZARD DO NOT EXPOSE THIS EQUIPMENT TO RAIN OR MOISTURE CAUTION To prevent electric shock match wide blade of plug to wide slot and fully insert ATTENTION Pour éviter les chocs électriques introduire la lame la plus large de la fiche dans la borne correspondante de la prise et pousser jusqu au...
Page 3: ...nstructions or as marked on the appliance 11 Power Cord Protection Power supply cords should be routed so that they are not likely to be walked on or pinched by items placed upon or against them paying particular attention to cords and plugs convenience receptacles and the point where they exit from the appliance 12 Cleaning The appliance should be cleaned only as recommended by the manufacturer 1...
Page 4: ...etain all these materials and keep them handy for future reference Your TV has two sepa rate ANT enna Cable inputs on the rear of the set These two signal inputs offer convenient hook up options for both normal TV program view ing and Picture In Picture PIP features The ANT enna A input is intended for use and view ing on the TV s main screen Your home s pri mary Antenna or Cable TV signal should ...
Page 5: ...V programming to select video level adjustments for a variety of program sources and to make quick one button channel selection of up to 10 of your favorite channels FEATURES As you unpack your TV please note that the following items have been included with your set Owner s Manual Safety Tip Information Factory Service Center Locations Warranty Registration Card Remote Control Transmitter Batterie...
Page 6: ...ess the STATUS button to clear the screen SMART HELP Remember When the bar scale is centered control settings are at normal mid range levels BRIGHTNESS Press or until dark parts of the picture show good detail PICTURE Press or until whitest parts of the picture are as bright as you prefer COLOR Press or to add or eliminate color TINT Press or to obtain natural skin tones Also see Flesh Correction ...
Page 7: ... the PICTURE MENU on screen move the RED highlight with the outer OK arrow buttons Then press the center OK button to select the feature Press the outer OK arrow buttons to move the RED highlight Press the center OK button to select U the ENHANCED mode Press the STATUS button to clear the screen CLEARVIEW BEGIN 7 Note An additional Picture Menu VIDEO ENHANCEMENT control similar in function and use...
Page 8: ...n to select the Align Red or Align Blue Convergence control Press the OK arrow buttons to move the red or blue cross directly over the white cross on the TV screen The red or blue cross is properly adjusted when it is completely merged with the white cross No color appears around the edge of the white cross Press the STATUS button to clear the screen when convergence adjustments are complete SMART...
Page 9: ...UX TAPE CD TV TUNER CD R MD DSS VCR2 VCR1 MUTE GUIDE AMP 1 4 7 M 2 5 8 0 3 6 9 C 1 3 1 2 2 Use the Flesh Correction control to keep skin tone hues or facial tint from varying from TV channel to TV channel Select FLESH CORRECTION control With PICTURE MENU 2 of 3 on screen move the RED highlight with the outer OK arrow buttons Then press the center OK button to select the feature Press the OK arrow ...
Page 10: ...lect the desired screen aspect ratio Note Not all of the MODE 2 LCD display settings may be available for use with your select model HD PTV SMART HELP Note In the past the relationship between a TV screen s width to height or aspect ratio has historically been 33 wider than the picture screen height or a 4 3 aspect ratio The widescreen format of your TV screen is nearly 80 greater than its measure...
Page 11: ...xample ALWAYS ON and CAPTION 1 CAPTION 1 2 3 4 dialogue and descriptions for the action on the captioned TV program shows on screen See Important Note on this page TEXT 1 2 3 4 often used for channel guide schedules or bulletin board information for CC programs After making your Caption mode selection press the STATUS button to clear the TV screen The selected Closed Caption mode will be active To...
Page 12: ...able TV signal or a normal antenna to its ANTENNA plug NOTE If you went through First Time Setup in your Quick Use Guide this task has already been completed for you Select CABLE CHANNEL TUNING control With the FEATURES MENU on screen move the RED highlight with the outer OK arrow buttons Then press the center OK button to select the feature Press the OK arrow buttons to move the RED highlight Pre...
Page 13: ... you went through First Time Setup in your Quick Use Guide this task has already been completed for you Select CHANNEL MEMORY START AUTO PROGRAMMING control With the FEATURES MENU on screen move the RED highlight with the outer OK arrow buttons Then press the center OK button to select the feature Press the center OK button to turn AUTO PROGRAMMING ON The TV shows which channel numbers are SAVED U...
Page 14: ...ist of channels in the TV s memory Select CHANNEL MEMORY ADD DELETE CHANNELS control With the FEATURES MENU on screen move the RED highlight with the outer OK arrow buttons Then press the center OK button to select the feature Press the CHANNEL or number buttons to select the channel you want to add or delete Press the outer OK arrow button on the Right to ADD the channel into the TV s memory Pres...
Page 15: ...K Your TV comes with an on screen clock During normal operation the clock appears on the screen with every channel change and when the STATUS button is pressed Select SET CLOCK control With the FEATURES MENU 2 of 5 on screen move the RED highlight with the outer OK arrow buttons Then press the center OK button to select the feature Press the remote s number buttons to set the time clock Press the ...
Page 16: ...ff Press the SLEEP button on the remote control LCD Display Mode 1 screen D6 button Press the SLEEP button repeatedly to pick the amount of time 15 minutes to 2 hours ahead before the TV will turn itself off Press the STATUS button to clear the screen after you have set the time for the TV to turn off Remember to see how many minutes are left before the TV shuts itself off reselect the SLEEP TIMER...
Page 17: ... VCR1 MUTE GUIDE AMP 1 4 7 M 2 5 8 0 3 6 9 C 1 3 1 2 2 With the Channel Display control you can change the size and location of the on screen channel and clock information Select CHANNEL DISPLAY control With the FEATURES MENU 2 of 5 on screen move the RED highlight with the outer OK arrow buttons Then press the center OK button to select the feature Press the OK arrow and center OK buttons to high...
Page 18: ...R2 VCR1 MUTE GUIDE AMP 1 4 7 M 2 5 8 0 3 6 9 C 1 3 1 2 2 With the Half Hour Reminder control the TV automatically shows you the current time and channel every thirty minutes Select HALF HOUR REMINDER control With the FEATURES MENU 2 of 5 on screen move the RED highlight with the outer OK arrow buttons Then press the center OK button to select the feature Press the OK arrow and center OK buttons to...
Page 19: ...t the feature CHANNEL BLOCKING and SETUP CODE show on screen Press the OK arrow and center OK buttons to highlight and select the SETUP CODE item Press 0 7 1 1 on the remote XXXX shows on the ACCESS CODE SETUP screen as you press the number buttons INCORRECT ACCESS CODE TRY AGAIN will also show on the screen Press 0 7 1 1 on the remote again Next Enter Your New Access Code shows on the screen Ente...
Page 20: ...ant to block out or censor Select the BLOCK CHANNELS control With the FEATURES MENU 3 of 5 on screen move the RED highlight with the outer OK arrow buttons Then press the center OK button to select the feature Press the OK arrow and center OK buttons to highlight and select the CHANNEL BLOCKING item Enter the correct Parental Code number Press Channel or Channel Number buttons to select the channe...
Page 21: ...censoring Refer to the following page sections for explanations on the different Rating system levels and their uses Select the CONTENT ADVISORY Menu option With PARENTAL CONTROL Menu on screen move the RED highlight with the outer OK arrow buttons Then press the center OK button to select the feature A Parental Guideline Movie Rating status screen will appear with a review of currently BLOCKED Co...
Page 22: ...pe of programming contains little or no violence no strong language and little or no sexual dialogue or situations PG Parental Guidance This programming contains material that parents may find unsuitable for younger children It may contain one or more of the following Moderate violence some sexual situations infrequent coarse language or some suggestive dialogue PG 13 This programming contains mat...
Page 23: ... or individually adjusting the L V S D settings for any one rating will set all other higher level ratings to be automatically blocked as well TV Y Appropriate for all children Designed for a very young audience including children ages 2 6 This type of programming is not expected to frighten younger children TV Y7 Appropriate for children seven and older It may be more appropriate for children who...
Page 24: ...shown Enabled On or Disabled Off CONTENT ADVISORY BLOCKING OPTIONS The Content Advisory system also has Blocking Option controls which can be used to deny viewing access for channel programs and movies even when they are unrated or contain no rating information as broadcasted Select the BLOCKING OPTIONS Menu control With CONTENT ADVISORY Menu on screen move the RED highlight with the outer OK arro...
Page 25: ... outer OK arrow buttons Then press the center OK button to select CHANNEL LABELS Press the OK arrow and center OK buttons to highlight and select either MANUAL to create your own label for a channel PRESETS to choose from a list of prewritten channel labels See instruction details on this page Press the STATUS button to clear the screen CHANNEL LABELS MANUAL To create your own Channel Label Press ...
Page 26: ...d for you For our Spanish and French speaking TV owners an on screen LANGUAGE option is present With the LANGUAGE control you can set the TV s on screen features to be shown in either English Spanish or French Select the LANGUAGE DISPLAY control With FEATURES MENU 3 of 5 on screen move the RED highlight with the outer OK arrow buttons Then press the center OK button to select the feature Press the...
Page 27: ... SURROUND 1ST TIME SETUP POSITION DN PIP D1 D2 D3 D4 D5 D6 D7 D8 POWER SOURCE OFF ON ON OFF CLONE MACRO MODE LEARNING REMOTE CONTROL RC 18SR MACRO MACRO 1 2 3 4 OK VOL CH LD DVD AUX TAPE CD TV TUNER CD R MD DSS VCR2 VCR1 MUTE GUIDE AMP 1 4 7 M 2 5 8 0 3 6 9 C 1 3 1 2 Your TV also has individual sound adjustment controls The BASS low frequency TREBLE high frequency and Speaker BALANCE may all be us...
Page 28: ...the center OK button to select the feature Press the OK arrow and center OK buttons to highlight and turn ON U the STEREO mode Press the STATUS button to clear the screen t o d a y s a n d f o r n e w s a n d t o d a y s a n d f o r n e w s a n d SECOND AUDIO PROGRAM EXIT NORMAL SOUND SECOND PROGRAM SOUND SOUND MENU SECOND AUDIO PROGRAM EXIT 2 OF 3 TV SPEAKERS MORE DISPLAY VOLUME STEREO SECOND PRO...
Page 29: ...RE FEATURES SOUND EXIT SOUND MENU SECOND AUDIO PROGRAM EXIT 2 OF 3 TV SPEAKERS MORE DISPLAY VOLUME EXIT NEVER DURING ADJUSTMENT DISPLAY VOLUME SOUND MENU BASS BOOST EXIT 1 OF 3 BASS TREBLE MORE BALANCE STEREO 1ST TIME SETUP INCREDIBLE SURROUND POSITION DN PIP D1 D2 D3 D4 D5 D6 D7 D8 POWER SOURCE OFF ON ON OFF CLONE MACRO MODE LEARNING REMOTE CONTROL RC 18SR MACRO MACRO 1 2 3 4 OK VOL CH LD DVD AUX...
Page 30: ... button to clear the screen BACK OF TV AUDIO SYSTEM AUDIO IN RED WHITE BEGIN VARIABLE AUDIO OUTPUT JACKS SMART HELP Remember the audio system may have to be in AUX iliary mode to play sound from the TV Outputs Note When the TV SPEAKER control is set to NORMAL for TV speaker operation make sure the VARIABLE AUDIO OUTPUT control see next page is also set to STEREO in order for the TV s AUDIO OUTPUT ...
Page 31: ...for the playback of Surround Sound Connect the R ight and L eft VARIABLE AUDIO OUT jacks on the TV to the R and L Audio Input jacks on your amplifier or sound system Turn TV ON and place the VARIABLE AUDIO OUTPUT on screen control to the SURROUND U position Sound Menu 3 of 3 Note This will change the Left Right channel audio line level signal at the Audio Output jacks to the same signal found at t...
Page 32: ...ght Speakers 1 Center Channel Speaker 2 Rear Surround Speakers The Front Left Right Center and Rear Surround Speakers have their signals supplied by the connections located on the back of the Dolby ProLogic Audio Receiver Note A CENTER CHANNEL AMP plifier INPUT is also located on the TV This input can be used to connect the external Audio Receiver s Center Channel Output in order to play Center Ch...
Page 33: ...ack on the TV Connect the AUDIO OUT jacks R ight and L eft from the DVD to the AUX 1 AUDIO IN jacks on the TV Select the AUX 1 DVD VIDEO Picture Source control on the TV Press the A V button on the remote or the Source Select button on the front of the TV to display the TV s Input Source control screen Press the OK arrow and center OK buttons to highlight and select U the AUX 1 DVD VIDEO mode Turn...
Page 34: ...the TV Connect the VIDEO OUT jack from the Camcorder to the VIDEO IN jack on the side of the TV Connect the AUDIO OUT jacks R ight and L eft from the Camcorder to the AUDIO IN jacks on the side of the TV Select the AUX 3 VIDEO Picture Source control on the TV Press the A V button on the remote or the Source Select button on the front of the TV to display the TV s Input Source control screen Press ...
Page 35: ...IN put jacks on the TV Select the AUX 1 S VIDEO Picture Source control Press the A V button on the remote or the Source Select button on the front of the TV to display the TV s Input Source control screen The AUX 1 S VIDEO picture source option appears only when a S VIDEO cable has been connected to the TV s AUX 1 IN puts Press the OK arrow and center OK buttons to highlight and select U the AUX 1...
Page 36: ...s the A V button on the remote or the Source Select button on the front of the TV to display the TV s Input Source control screen Press the OK arrow and center OK buttons to highlight and select U the AUX 1 Y PB PR mode Turn the DVD player ON and press PLAY to view the source material playback on the TV COMPONENT VIDEO INPUTS COMPONENT VIDEO OUTPUTS AUDIO OUT L R RED WHITE Optional Video Audio Cab...
Page 37: ...N jack on the VCR Connect the AUDIO OUT jacks R ight and L eft from the TV to the AUDIO IN jacks on the VCR Select the ANTENNA A Picture Source control on the TV Press the A V button on the remote or the Source Select button on the front of the TV to display the TV s Input Source control screen Press the OK arrow and center OK buttons to highlight and select U the ANTENNA A mode Select the channel...
Page 38: ...t a 15 pin VGA signal cable optional from the VGA or SVGA jack on the select auxiliary equipment example DVX8000 MMHT to the VGA Input jack on the TV Connect the Left Right HD INPUT AUDIO IN jacks on the TV to the L R Audio Output jacks labeled Front on the DVX8000 MMHT Press the A V button on the remote or the Source Select button on the front of the TV to select the AUX 5 HD RGB VGA Monitor Inpu...
Page 39: ...he screen after you have finished with all of your feature control adjustments BEGIN Use the Brightness and other Monitor picture features such as Picture Sharpness etc to adjust overall TV screen intensity for optimum light dark screen areas and shading details Turn the Volume Bar Sound Menu control ON to display the volume level settings for external audio sourced material on the TV screen Selec...
Page 40: ...quickly reselect these personalized settings contained within the memory of the TV See the next page for more details on the labeling options and use of Auto Picture Press the SMART AUTO button on the remote LCD Display D4 button Press the center OK button on the remote to select the Auto Picture feature highlighted in RED Press the outer OK arrow buttons to highlight the category list for Auto Pi...
Page 41: ... and video control settings for that particular title Press the STATUS button on the remote to clear the screen BEGIN SMART AUTO PICTURE REMOTE CONTROL OPERATION CONTINUED The CHANGE LABEL control can be used to change the title of a AUTO PICTURE setting into a name or label that may be easier for you to remember With the AUTO PICTURE CHANGE LABEL control on the screen press the outer OK arrow top...
Page 42: ... occur during commercials Press the SMART AUTO button on the remote With the AUTO Menu on screen move the RED highlight with the outer OK arrow buttons Then press the center OK button to select the highlighted Auto Sound control Press the OK arrow and the center OK buttons to turn the Auto Sound control ON or OFF Press the STATUS button to clear the screen when completed BEGIN SMART AUTO SOUND Rem...
Page 43: ...n the center OK button to select either Auto Surf or 2 Channel Surf See explanation of Surf options with the illustration on this page Press STATUS button on the remote control to clear the screen BEGIN 2 CHANNEL SURF AUTO SURF 2 CHANNEL SURF Current and one previous channel in the ring AUTO SURF Current and up to nine additional channels available in the ring Note The Channel Surf ring can be use...
Page 44: ... the ANT A and ANT B Inputs on the rear of the TV continue to next page PIP WINDOW Display signal supplied primarily through ANT B Input on rear of TV BACK OF TV SMART HELP For other possible PIP connections see page 53 for the More PIP Connections section If you need any accessories or parts to complete the described PIP connections contact your dealer or our Parts Information Center at 1 800 851...
Page 45: ...rs with the channels displayed on the Main screen PIP SOURCE SELECT SET TO ANT B NOTE Sound for TV programs displayed in the PIP window can also be heard through the use of PIP AUDIO OUT jacks on the rear of the TV Just connect the TV s Left Right PIP AUDIO OUTPUTs to the correct AUX iliary Inputs on an external stereo sound system through which the PIP audio will be played SMART HELP Remember if ...
Page 46: ...e PIP window will automatically appear Press FRZ repeatedly to update the frozen PIP with current pictures from the Main screen You cannot reposition a frozen PIP picture Press the PIP ON OFF button to drop the frozen PIP picture from the screen Press the PIP POSITION D4 button to move the PIP picture from corner to corner on the TV screen This feature allows you to move PIP and avoid blocking off...
Page 47: ...ith FEATURES MENU 4 of 5 on screen move the RED highlight with the outer OK arrow buttons Then press the center OK button to select the feature Note The remote control s PIP SOURCE D7 on LCD PIP Display button can also be used to quickly select picture source inputs on the rear of the TV for the PIP window Press the OK arrow and center OK buttons to highlight and select the desired U PIP Picture S...
Page 48: ...rol With FEATURES MENU 5 of 5 on screen move the RED highlight with the outer OK arrow buttons Then press the center OK button to select the feature Press the outer OK arrow buttons to move the RED highlight Press the OK button to turn U the PIP COLOR or TINT control ON The PIP automatically comes on to show the PIP window on the TV screen Press the outer OK arrow Left and Right buttons to adjust ...
Page 49: ...the AUDIO OUT R and L jacks from the VCR to the AUDIO IN jacks on the TV SIGNAL SPLITTER Contact the Parts Information Center 1 800 851 8885 to order any optional accessories CABLE TV CONVERTER VCR REAR OF TV AUDIO VIDEO CABLES RCA Plug Cables optional Remember to use the Cable TV Converter Box to select channels for PIP the VCR must be set to the same channel as the channel selection switch on th...
Page 50: ...t Work TV Displays Wrong Channel or No Channels Above 13 This TV is equipped with protective circuitry that shuts the TV off in case of moderate power surges Should this occur turn the TV back on by pressing the POWER button once or twice or unplug and then replug the power cord at the AC outlet This feature is NOT designed to prevent damage due to high power surges such as those caused by lightni...
Page 51: ...shown on the TV screen at the same time The smaller PIP picture is supplied by a VCR or other tuner video playback source The PIP picture can also be moved and swapped with the TV s main screen picture Programming The procedure of adding or deleting channel numbers into the TV s memory circuits In this way the TV remembers only the locally available or desired channel numbers and skips over any un...
Page 52: ...Up Q U 2 Inputs Audio and Video 33 37 44 49 Language 26 39 Menu Q U 2 4 Minus Plus Buttons Q U 3 4 Monitor HD Features 38 39 Movie Ratings 21 22 Parental Control 19 24 Parental Guidelines 23 Picture In Picture PIP 44 49 Q U 2 PIP Audio Output jacks 30 31 45 Programming Channels 13 Q U 2 Remote Control 40 43 46 Q U 2 3 4 Requesting Service 50 53 54 56 Reminder Time and Channel 18 Safety Precautions...
Page 53: ...ffira de présenter une preuve d achat pour bénéficier d un service sans frais Pour les produits non couverts par la garantie contactez le centre le plus près de chez vous NOTA Si Ud reside en una de nuestras zonas para sucursales Philips de servicio al de fábrica ver directorio más abajo Ud puede comunicarse con la sucursal de servicio más cercana para obtener una reparación oportuna y eficaz de s...
Page 54: ...A RECEPCION DE PRODUCTOS NECESITADOS DE REPARACIONES COMUNICARSE CON EL CENTRO DE SERVICIO DE FABRICA MAS CERCANO PARA ESTOS LUGARES DENTRO DE UN RADIO DE 80 A 120 KM 50 A 75 MILLAS DEL CENTRO DE SERVICIO LOCAL GEORGIA Philips Factory Service of Georgia 200 N Cobb Pkwy Suite 120 Marietta GA 30062 770 795 0085 FLORIDA Philips Factory Service of Florida 1911 US Highway 301 North Tampa FL 33619 813 6...
Page 55: ...55 NOTES ...
Page 56: ... Consumer Electronics Company In countries where Philips Consumer Electronics Company does not distribute the product the local Philips service organization will attempt to provide service although there may be a delay if the appropriate spare parts and technical manual s are not readily available MAKE SURE YOU KEEP Please keep your sales receipt or other document showing proof of purchase Attach ...