background image

Publication Number AD05006002E  

Page 6 


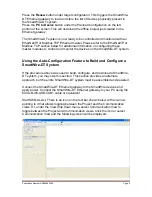
Press the 

Renew 

button under target configuration. This triggers the SmartWire-

DT Ethernet gateway to read and store the list of devices physically present in 
the SmartWire-DT system.  
Press the 

PC to Device

 button under the Planned Configuration on the left 

portion of the screen. This will download the offline project just created to the 
Ethernet gateway. 
 
The SmartWire-DT system is now ready to be controlled and monitored with an 
EtherNet/IP or Modbus TCP Ethernet master. Please refer to the EtherNet/IP or 
Modbus TCP section below for additional information on configuring these 
master modules to control and monitor the devices on the SmartWire-DT system. 


Using the Auto-Configuration Feature to Build and Configure a 
SmartWire-DT System 
 

If the procedure above was used to build, configure, and download a SmartWire-
DT system, you may skip this section. This section provides an alternate 
approach, but the entire SmartWire-DT system must be assembled and powered. 
 
Connect the SmartWire-DT Ethernet gateway to the SmartWire devices and 
apply power. Connect the SmartWire-DT Ethernet gateway to your PC using the 
EU4A-RJ45-USB-CAB1 cable or equivalent. 
 
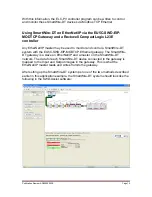
Start SWD-Assist. There is an icon on the tool bar shown below with an arrow 
pointing to it that allows toggling between the Project and the Communication 
views. Or, under the View drop down menu, select Communication View to 
toggle between the Project and Communication views. Click the icon or select 
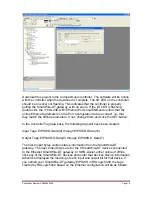
Communication View and the following screen will be displayed: 


Summary of Contents for SmartWire-DT

Page 1: ...onfigure a SmartWire DT system and how to set up an Ethernet master to control and monitor all devices on that SmartWire DT system A Rockwell CompactLogix controller will be used to demonstrate EtherN...

Page 2: ...hernet gateway 3 DIL SWD 32 002 contactor modules 1 M22 SWD LED R red LED module 1 M22 SWD K22LED W start stop pushbutton with white LED module 1 M22 SWD K22LED G selector switch with green LED module...

Page 3: ...ab drag and drop it onto the project screen over the PROFIBUS DP gateway It will drop onto the other gateway replacing it Then click the gateway s icon on the project screen Then click the Device Para...

Page 4: ...nclosure on the project screen This is indicating that the flat cable must be converted to the round cable for connection to the M22 enclosure First we need to add an adapter that converts the flat ca...

Page 5: ...oject and the Communication views Or under the View drop down menu select Communication View to toggle between the Project and Communication views This icon contains a gear and if you hold the cursor...

Page 6: ...the SmartWire DT system Using the Auto Configuration Feature to Build and Configure a SmartWire DT System If the procedure above was used to build configure and download a SmartWire DT system you may...

Page 7: ...part numbers shown earlier in this document 3 Add the following flat to round cable adapter between the M22 SWD K22LED G and the M22 I3 enclosure SWD4 8FRF 10 Note that when the software allows you to...

Page 8: ...ges in the gateway This is what the Modbus TCP master reads and writes from to the gateway In SWD Assist in the offline mode the SmartWire DT gateway will display the total number of input and output...

Page 9: ...nder each device s Device Information tab the actual Modbus Data Address for each bit will be displayed Note that the high byte of the first input and output data register is where the input and outpu...

Page 10: ...portion of the screen above to modify the Ethernet parameters online Apply the changes and they will be saved in the gateway Gateway SWD and System settings may also be viewed or modified from this sc...

Page 11: ...Input and Output data is shown above Double click the ELCSoft icon to open the ELC programming software ECISoft must have been previously installed then the ECISoft icon on the ELCSoft toolbar will o...

Page 12: ...Publication Number AD05006002E Page 12 ECISoft will look like the following...

Page 13: ...nline to configure the Ethernet master module Then click the M icon on the tool bar indicated by the arrow in the screen shot above and the software will find the ELC COENETM module Double click the m...

Page 14: ...ws SW Device Modbus Data Address ELC PV data table DIL SWD 32 002 1 Input 0 8 0 15 D300 high byte Output 2048 8 D310 high byte DIL SWD 32 002 2 Input 0 0 0 7 D300 low byte Output 2048 0 D310 low byte...

Page 15: ...l a SmartWire DT system with the EU5C SWD EIP MODTCP Ethernet gateway The SmartWire DT gateway is a slave on EtherNet IP and a master on the SmartWire DT network The data for each SmartWire DT device...

Page 16: ...D EIP MODTCP Ethernet gateway to control and monitor the connected SmartWire DT devices Another piece of necessary information required by the Ethernet master is the IP address of the gateway EU5C SWD...

Page 17: ...Name EIPSWD Comm Format Data Sint IP Address 192 168 1 3 Input Assembly Instance 101 Size 11 bytes 8 bit Output Assembly Instance 100 Size 8 bytes 8 bit Configuration Assembly Instance 102 Size 0 byte...

Page 18: ...P MODTCP module Then double click the 1769 L23E QB1 Ethernet Port LocalENB also under Ethernet to open the EtherNet IP master port s Property Pages On the General Tab enter the IP address for the Comp...

Page 19: ...change them and click the SET button In the Controller Tag data base the following tags will have been created Input Tags EIPSWD I Data 0 through EIPSWD I Data 10 Output Tags EIPSWD O Data 0 through E...

Page 20: ...Publication Number AD05006002E Page 20 With this information the CompactLogix controller program can be written to control and monitor these SmartWire DT devices via EtherNet IP...

Page 21: ...1 877 ETN CARE or 1 877 326 2273 All other supporting documentation is located on the Eaton web site at www eaton com plc or www eaton com smartwiredt SmartWire DT and SWD Assist are registered tradem...

Reviews: