background image

Hardware Installation 

Unpacking 

Carefully remove all equipment from the packing 
cartons and inspect all parts for damage in 
shipment. Check packing cartons for all items 
shown on the packing list. Keep the cartons and 
packing materials for future shipment. 
 
If there is equipment damage due to shipment, 
report the damage to the carrier who delivered the 
equipment. 
 

Note:

 The Interstate Commerce Commission has a 

time limit on reporting concealed damage. 

 
Parts Checklist 

Your packing carton contains one parts kit 
containing: 

• 

1 three-terminal connector (24VDC power) 

• 

1 packet containing a fuse 

 
Mounting 

Proper installation and enclosure sizing is essential 
to ensure long life and trouble-free operation. Your 
PanelMate ePro unit should always be mounted in 
a vertical position. Flat or angled mounting 
positions will severely shorten the unit's life. 
 
Refer to Eaton’s Cutler-Hammer PanelMate ePro 
Users Guide for panel sizing and cabling 
recommendations.  The guide is available on the 
Cutler-Hammer website:  

www.cutler-hammer.eaton.com 

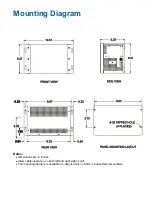
Mounting dimensions are shown on the Mounting 
Diagram page of this document. The Mounting 
dimensions also available on the Cutler-Hammer 
website. 


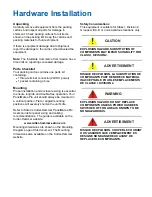
Safety Considerations 

This equipment is suitable for Class I, Division 2, 
Groups A,B,C,D or non-hazardous locations only. 
 

CAUTION


EXPLOSION HAZARD. SUBSTITUTION OF 
COMPONENTS MAY IMPAIR SUITABILITY FOR 
CLASS I, DIVISION 2. 
 

ADVERTISSMENT


RISQUE D'EXPLOSION. LA SUBSTITUTION DE 
COMPOSANTS PUET RENDRE CE MATERIAL 
INACCEPTABLE POUR LES EMPLACEMENTS 
DE CLASSE I, DIVISION 2. 
 

WARNING


EXPLOSION HAZARD. DO NOT REPLACE 
COMPONENTS UNLESS POWER HAS BEEN 
SWITCHED OFF OR AREA IS KNOWN TO BE 
NON-HAZARDOUS. 
 

ADVERTISSMENT


RISQUE D'EXPLOSION. COUPER LE COURANT 
OU S'ASSURER QUE L'EMPLACEMENT ES 
DESIGNE NON DANGEREUX AVANT DE 
REPLACER LE COMPOSANTS. 


Summary of Contents for Cutler-Hammer PanelMate ePro 7500 Series

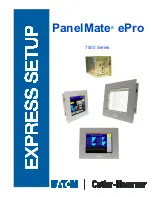
Page 1: ...PanelMate ePro 7500 Series ...

Page 2: ...ANT DOWN ONLY 800 809 2772 selection 5 5PM 8AM EST 414 449 7100 selection 5 5PM 8AM EST EMAIL CHATechSupport eaton com If you are in the US or Canada and have OI PLC IPC questions you can take advantage of our toll free line for technical assistance with hardware and software product selection system design and installation and system debugging and diagnostics Technical support engineers are avail...

Page 3: ...itions will severely shorten the unit s life Refer to Eaton s Cutler Hammer PanelMate ePro Users Guide for panel sizing and cabling recommendations The guide is available on the Cutler Hammer website www cutler hammer eaton com Mounting dimensions are shown on the Mounting Diagram page of this document The Mounting dimensions also available on the Cutler Hammer website Safety Considerations This e...

Page 4: ...Catalog Number 1219B is available for converting 120 230VAC to 24VDC CAUTION Your PanelMate ePro unit could be severely damaged if it is connected to voltages outside the range of 18 to 30VDC While your PanelMate ePro unit is fully protected against polarity reversal damage can occur if the unit is not wired correctly GND GND CAUTION If you are converting from a PanelMate powered from a 24VDC powe...

Page 5: ...on 2 environment then the external power supply must be appropriately rated Use single point grounding The external power supply and the PanelMate should be grounded to the same point This should be practiced even when the devices are located in separate enclosures This will help prevent ground loop issues Install a power supply solely for the PanelMate If the present external power supply is used...

Page 6: ...terface cards in your PanelMate ePro unit complete the following steps 1 Disconnect power from your PanelMate ePro unit 2 Use a Phillips screwdriver to unscrew the six screws located on the back of your PanelMate ePro unit and remove the back cover 3 Use a Phillips screwdriver to remove the screw that secures the slot cover and remove the slot cover 4 Place the interface card in the slot and secur...

Page 7: ... PanelMate ePro unit comes pre loaded with the M Systems DiskonKey USB driver Simply plug a DiskonKey device into the USB port of your PanelMate ePro unit and wait for the LED to stop flashing Use Explorer to find the files on the device which is listed as Removable Disk Z Note that the Iomega USB driver is also pre loaded on the ePro but it is disabled See the PanelMate ePro Users Guide for instr...

Page 8: ...Mounting Diagram Notes Dimensions are in inches Allow cable clearance on both left and right side of unit The mounting diagram is available in dwg format on Eaton s Cutler Hammer website ...

Page 9: ... interface board 1 1 A with optional communication interface board Peak Inrush Current 16 A System Ambient Temperature Operating 0 50 C 32 122 F Non operating 20 60 C 4 140 F System Vibration Operating 1 G at 10 500 Hz Non operating 1 G at 10 500 Hz System Shock Operating 30 G Non operating 30 G Relative Humidity Operating 20 90 non condensing Non operating 20 90 non condensing Altitude Operating ...

Reviews: