I.B. 48003
Page 2
Effective 11/97
THE CONTROLLER (Cont.)
While this instruction booklet is dedicated to full-voltage
starting, the other applications listed are an expansion of
the same principles shown.
MEDIUM-VOLTAGE COMPONENTS
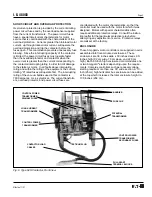
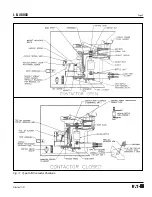
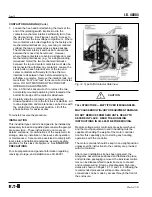
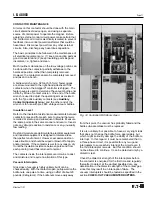
The flow of current through a vacuum-break controller
(starter) can be traced by referring to the upper portion of
Figure 4, where the controller is shown in the energized
position. The line stab assembly mounted at the back of
the enclosure also serves as the controller line terminals
(1). The stabs themselves are engaged by the fuse jaws
(2) of the isolating switch which is mounted on rails above
the contactor. The ferrules (3) of the current-limiting
motor-starting power circuit fuses (4) clip into the fuse
jaws, and the load ferrules (5) fit into the fuse holders (6)
which are part of the contactor line terminals. Current
flows through the contactor from the load ferrules of the
power circuit fuses, through the shunts (7), and the
vacuum interrupters (bottles) of the contactor (8), to the
contactor load terminals (9). Cables (10) pass through
current transformers and connect the contactor load
terminals to the controller load (motor) terminals mounted
on the enclosure wall to the left of the isolating switch.
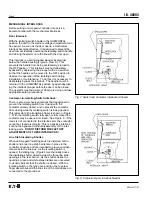
See Figure 2. Connect the conductors from the motor to
these latter terminals.
LOW-VOLTAGE CONTROL COMPONENTS
The low-voltage components consisting of an interposing
relay, protective relays, and optional equipment are
generally mounted on a slide-out panel. The single-
phase control power transformer is bolted to the
contactor frame. The capacity of this transformer ranges
from 600 VA to 2 kVA, depending upon requirements.
The primary winding of the control power transformer is
connected to the line through the power circuit fuse
assembly, and is protected by two additional low rating
current-limiting fuses mounted on the contactor. See
Figure 6. The secondary of the control power transformer
supplies power to the 120 (or 240) volt grounded control
circuit through secondary fuses mounted next to the test-
run plug.
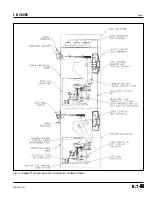
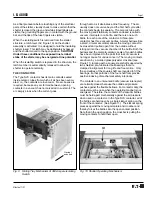
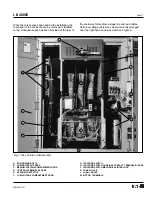
The slide-out panel and attached door constitute the low-
voltage compartment for most Ampgard motor controls.
This panel and door combination may be removed from
the base enclosure by first removing four machine screws
from the top and bottom rail bayonets on the back side of
the panel and lifting the panel up until the bayonets clear
their slots. These screws must be replaced when the
panel is reinstalled to maintain stability. Pull-apart
terminal blocks permit mechanical and electrical separa-
tion from the contactor. See Figure 6.
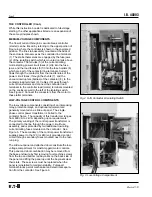
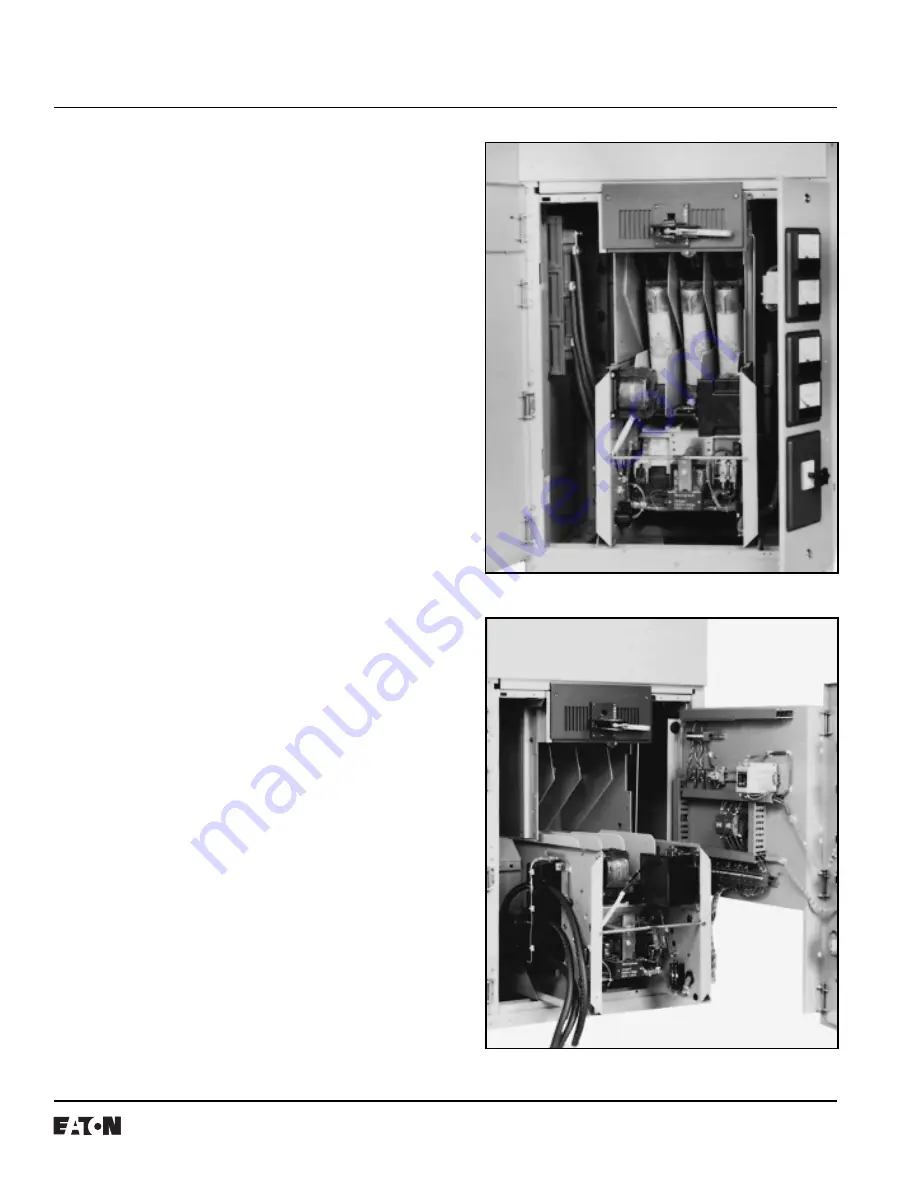
Fig. 2 SJS Contactor & Isolating Switch
Fig. 3 Low-Voltage Compartment


