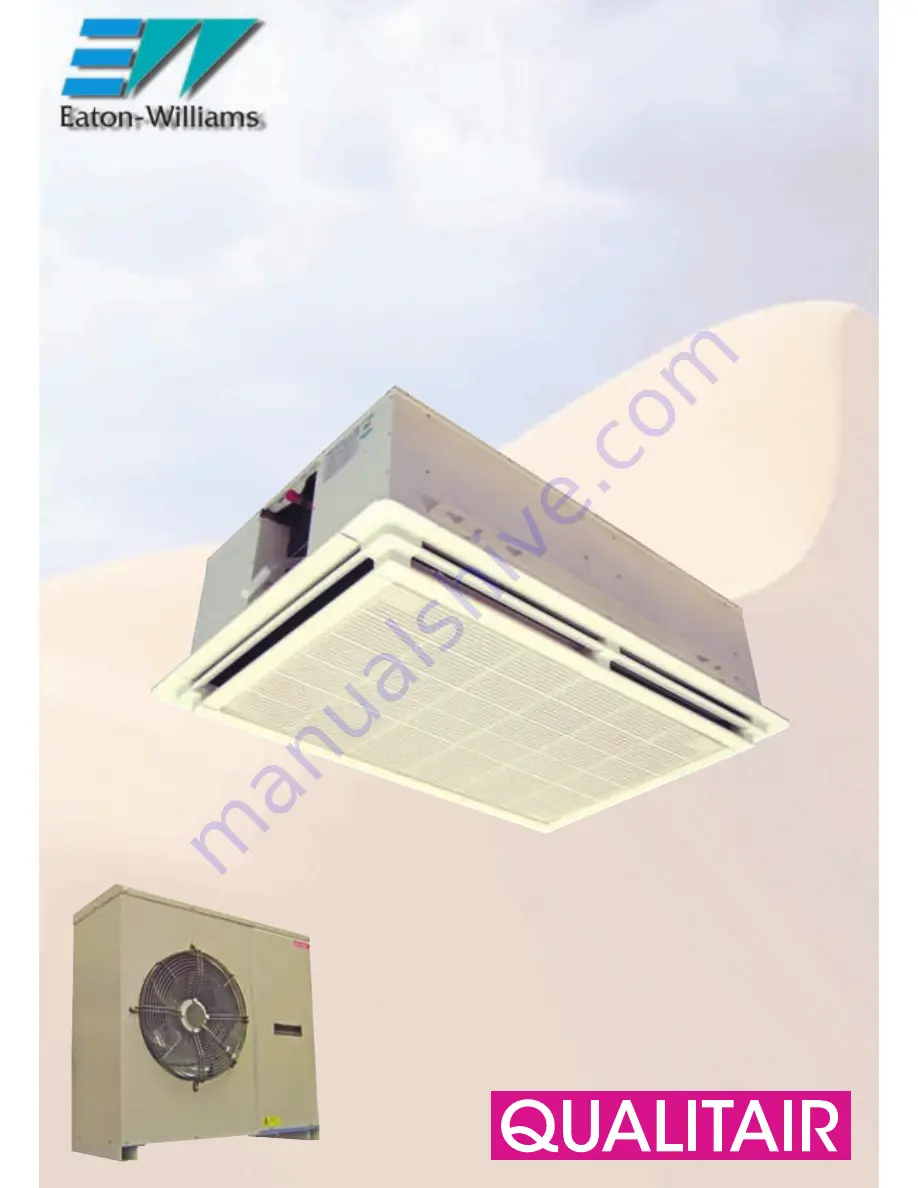
QLC
Low Temperature DX Cassette
Installation Manual
Document 0412124
Issue 2.1 05/06
Page 1: ...QLC Low Temperature DX Cassette Installation Manual Document 0412124 Issue 2 1 05 06...
Page 2: ...Bracket Fixing 8 ICU Wall Bracket Fixing 8 ICU Unit Positioning 8 Location Mounting of Outdoor Unit ICU 8 Location 8 Fixing 8 Service Connections 8 Air Entry 8 Outdoor Unit Access ICU 9 General Servic...
Page 3: ...imum 3 The equipment has been fitted with doors and covers to prevent access during operation These must be kept in place and additional guards fitted if necessary 4 The equipment must be connected to...
Page 4: ...ICU Wall Bracket Option Kit The unit is supplied complete with axial fan and guard hermetic compressor shut off service valves fan speed controller and low and high pressure switch Option Kits The QL...
Page 5: ...e two screws at one end of the fan tray Slide the fan tray assembly towards the screws to disengage the opposite end and then raise the fan tray assembly to clear the joggle strips in the slots at the...
Page 6: ...ength mm 1245 1245 B Facia Width mm 650 850 C Facia Depth mm 60 60 D Body Length 1165 1165 E Body Width 535 735 F Body Height 299 349 G Refrig Connection 59 50 H Refrig Connection 59 86 J Refrig Conne...
Page 7: ...Deck Assembly 2 off screws and slide out 8 Controller N A 9 Outlet Air Assembly Swing Bolts N A 10 Air Outlet Channel N A 11 Electrical Connections N A 12 Duct Distribution Outlet N A 13 Cooling Coil...
Page 8: ...The refrigerant pipe 4 and electrical connections 5 are located at the right hand end of the unit and the condensate drain for the heat pump unit is located on the base of the unit Air Entry Ensure th...
Page 9: ...Access from rear of unit 4 Compressor Remove service access panel 5 Removable top panel Front and side access screw fixings 6 Service access panels Front access screw fixings 7 HP LP cut outs winter...
Page 10: ...7 8 3 4 C QLC Refrigerant Connections QLC10 QLC15 QLC20 Liquid Connections 1 4 1 4 3 8 Suction Connections 5 8 5 8 3 4 D ICU Refrigerant Connections QLC10 QLC15 QLC20 Liquid Connections 1 4 1 4 3 8 S...
Page 11: ...nations and interconnections are shown above Note A wiring diagram is located within both the indoor unit and the outdoor units SPECIAL NOTES REFER TO KIT INSTRUCTIONS FOR ELECTRICAL CONNECTION OF SIT...
Page 12: ...s manual Place flare nuts onto the copper tube before preparing the tube with a flaring tool above right When connecting to the male flares ensure both surfaces are clean and coat the flared surface w...
Page 13: ...both the outside unit shut off valves 7 8 to release the factory refrigerant into the system Weigh in the site top up charge using a charging station and any additional extended pipe run charge as det...
Page 14: ...nection of the unit Condensate Connection When using gravity drainage connect the flexible hose onto 15mm copper or similar and secure using a jubilee clip or similar Ensure the clip is not over tight...
Page 15: ...drains if required been adequately insulated 4 Has the correct HRC external fusing isolation been installed 5 Has the additional site top up and extended pipe run refrigerant charge been measured int...
Page 16: ...1732 866055 Facsimile 44 0 1732 866653 www eaton williams com We reserve the right to alter specifications without notice and products will sometimes be supplied with modifications which do not stric...