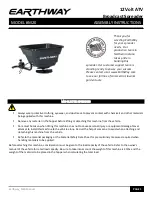
Assembly and Operation Instructions
Earthway_M20 Manual
PAGE 3
HOW TO OPERATE SAFELY:
▪
Read, understand, and follow all product label information provided on the material being applied.
▪
An adjustable solid stop is provided that allows the operator to adjust to the desired opening position on the rate setting
control prior to operation of the vehicle. This allows repeatability to the stop without the need to look at the control
while operating the vehicle.
▪
Establish the correct rate and then lock the stop in that position using the thumb wing nut on the setting control.
OPERATING INSTRUCTIONS:
Before filling hopper, become familiar with the operation of this spreader. (Practice the following steps)
▪
Turn the motor switch to the ON POSITION, so that the impeller is turning before going on to the next step.
▪
While driving forward pull the lever back to the stop, this opens the shut off plate on the spreader.
▪
To stop the
flow of material, Push the lever to “0” or closed position, then turn the motor off when finished.
▪
When finished empty any remaining material from hopper.
▪
Thoroughly wash spreader and allow to dry before storing. A light coating of oil will help prevent corrosion of all metal
surfaces.
MOUNTING INSTRUCTIONS:
Position the M20 on the vehicle so that the impeller is positioned to be able
to spin clear of any part of the vehicle, this will allow a full 180 degree
spread pattern. Secure the frame to the mounting location with the
enclosed J-Bolts at positions that will secure the spreader so that it will not
move when operating the vehicle. For best results mount the spreader so
that the impeller is as close to the vehicle as possible, but clears any parts on
the vehicle and place the J-Bolts as shown below.
Connect the black wire (ground) to the negative (-) post on the battery and
the fused wire to the positive (+) post on the battery.
If for any reason the impeller rotates counter clockwise,
reverse the battery connection of the spreader. Correct
rotation is clockwise.
SPREADER CALIBRATION INSTRUCTIONS:
▪
Loosen stop on the gauge and set to #30
▪
Open the lever to #30 and make sure that the shut-off is fully open
▪
Loosen the cable clamp on the bottom of the hopper and slide the outer cable IN/Out until the shut-off is fully
OPEN. Tighten the cable clamp and retest.
▪
Calibration is now complete
▪
TO CALCULATE THE SETTING:
▪
Determine how much material is to be applied per 1,000 sq/ft.
▪
Measure off a distance of
50 feet
, preferably on a paved surface such as a parking lot.
▪
Weigh out enough of the material to be applied to fill the hopper at least half full. Record the weight for future
use.
▪
With the unit mounted on the vehicle and the hopper at least half full of the material to be spread, position the
vehicle far enough before the beginning of the 50 foot test area so that the vehicle will achieve the desired
speed before you reach the starting line.


