


13
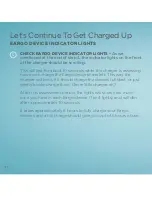
Let’s Continue To Get Charged Up
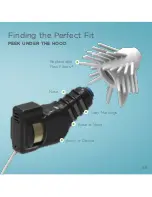
CHARGING YOUR EARGO DEVICES
When it comes time to recharge your Eargo devices, there are
FIVE SIMPLE STEPS
to follow.
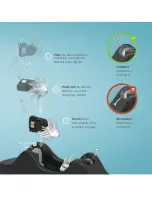
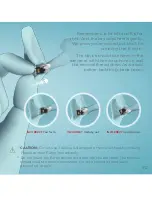
FLIP
• When you remove the Eargo device from your ear, the
removal thread will be facing down. Before inserting your Eargo
device into the charger, flip the device so that the removal thread
is facing up.
POSITION
• Position the Eargo device into the cradle with the
speaker and Flexi Fibers facing inward. Remember, the removal
thread should be out and up. Do not force it into place. With a
little wiggle, it will slide right into the cradle.
PUSH
• Gently push straight down on the black body of the
Eargo device above the gold contacts, not on the white Flexi
Fibers. When it is correctly positioned, the cradle light will
change from blue to white.
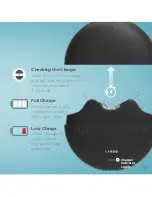
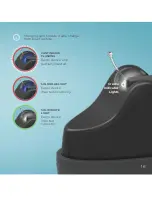
CHECK CRADLE INDICATOR LIGHTS
• When the cradle lights
change from solid blue to solid white, charging will begin. For
full details, turn to page 15. Replace the top of the charger.
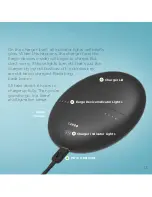
CHECK EARGO DEVICE INDICATOR LIGHTS
• Remove the top
of the charger. Indicator lights scroll for 10 seconds to assess
your charge level. For full details, turn to page 17.
1
2
3
4
5
Summary of Contents for Max
Page 1: ...Eargo Plus User Guide ...
Page 11: ...6 ...
Page 24: ...19 ...
Page 38: ...33 ...
Page 40: ...35 ...
Page 45: ...40 ...
Page 46: ...41 ...
Page 49: ...44 ...
Page 58: ...53 Replaceable Flexi Fibers Replaceable Wax Guard ...
Page 73: ...68 ...
Page 85: ...80 NOTES ...