AVIIVA® EM1
20
1043D - AVIIVA EM1 –04/11
e2v semiconductors SAS 2011
6.2
Getting started with GigE Vision interface
This chapter shows how to connect a GEV camera for the first time.
6.2.1
Network setup
The following is the simplest example of a Gigabit IP network.
A single Ethernet cable is connected in R
J
45 receptacles of GEV camera and PC. Select a "CAT6"
shielded twisted pair quality to get a reliable 1Gbit/s. This cable is available at any computer shop.
Recent PC have a gigabit RJG45 plug on the motherboard.
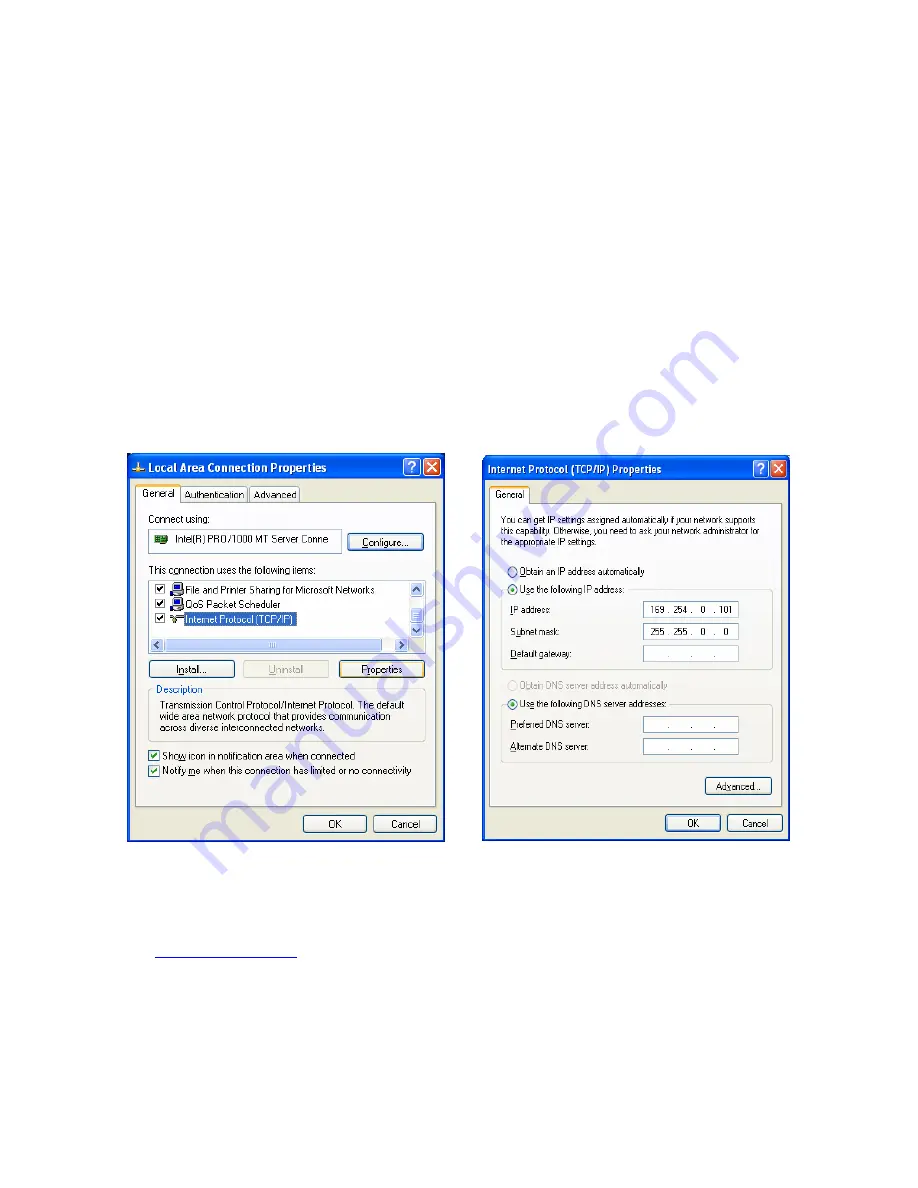
Factory setup has set the camera to the default IP subnet 169.254.X.X. The PC interface is set to this
default IP subnet as follows:
Open the Network interface properties. Settings are shown on Windows XP.
Set TCP-IP v4 interface properties to IP address 169.254.0.101 and subnet mask to 255.255.0.0
6.2.2
Software installation
A GigE Vision software is required. Use your own or install PureGEV, downloadable from
www.e2v.com/cameras
site. A PureGEV license is included in camera package. Refer to PureGEV
installation manual for instructions. The following assumes Pleora's PureGEV is installed.
To keep things simple, the firewall should be temporary turned off.


