background image

FT

-3

0


5.10.01 

© E.L.B. Ex-Geräte Bachmann 

Rev. 1.9     Page 7      

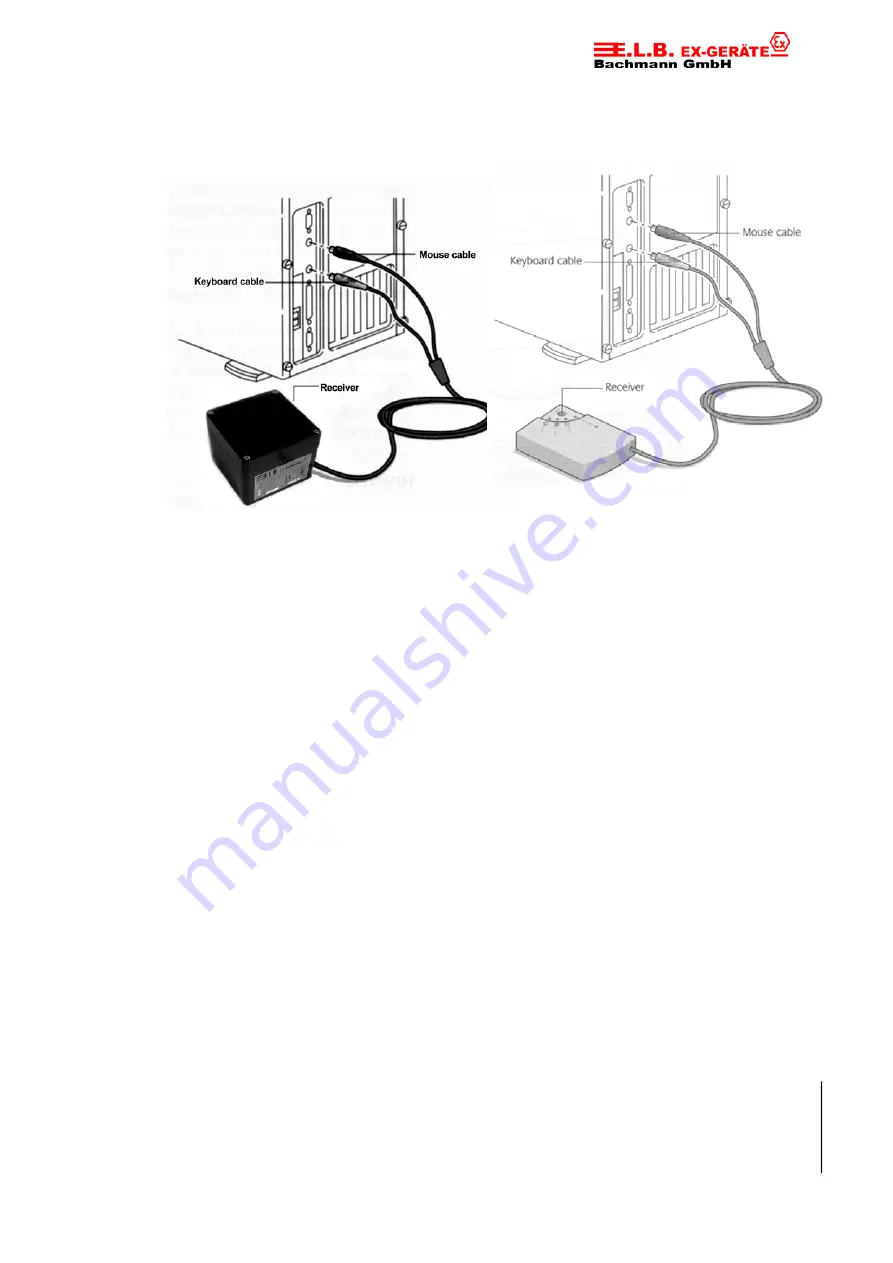
4.  Connect the receiver’s orange keyboard cable to the computer’s keyboard 

port. 

Make sure to match up the keyboard icon on the cable end with the 

keyboard icon next to the keyboard port on your computer. (Some computers 

may not have this keyboard icon.)


If you are installing the keyboard cable to an IBM AT keyboard port, use the 5-pin 
DIN connector already attached to the keyboard cable. If you are connecting the 
cable to a 6-pin mini-Din port, remove the AT adapter.  


5  Installing the Software  


To take advantage of all the features of your Cordless Desktop, please install the 
software that comes with the product.  


1.  Turn on your computer and Start Windows 95/Windows 98 (or Windows 

3.1x or Windows NT 4.0).  

 
2.  Insert the software diskette into drive A or B.  


3.  For Windows 95, Windows 98 or Windows NT 4.0, press Start on the 

Taskbar and select Run.  


4.  For Windows 3.1x, open the File menu and choose the Run command.  

Windows displays the Run dialog box.


5.  For Windows 95, Windows 98, or Windows NT 4.0, from the Run dialog box, 

select (or type) A:\SETUP or B:\SETUP in the Run dialog box.  

Click OK.


6.  For Windows 3.1x, in the Command Line text box, type: A:\SETUP (or 

B:\SETUP).   

Click OK.


Summary of Contents for FT-30

Page 1: ...FT 30 Technical Documentation FT 30 Rev 1 9 CordlessDesktop ...

Page 2: ...rements 4 3 Installing the Batteries 4 4 Connecting the Receiver 6 5 Installing the Software 7 6 Using the Cordless EEx Desktop 8 7 EEx Desktop maintenance 12 8 Troubleshooting 13 System 9 Realizations 14 10 Connecting Examples 15 Technical Data 11 Technical Data 16 12 Safety Advice 17 Appendix 13 Dimensions 18 14 Certificate of Conformity 19 ...

Page 3: ...ts working under voltage with the exception of intrinsically safe current circuits are forbidden as a matter of principle because of the given explosion risk Before switching on it has to be ensured that the batteries correspond with the named type Energized parts can be exposed when opening guards or removing parts except when this is possible by hand Connection parts can also be under voltage If...

Page 4: ...00 2x AA Batteries Duracell type MN1500 2x Softwarediscs Technical documentation 3 Installing the Batteries Cordless Wheel Mouse The Cordless EEx Mouse uses two AAA alkaline batteries Duracell Alkaline Batteries Type MN2400 It s not allowed to use other types of batteries 1 Remove the battery compartment cover outside the Ex area on top of the mouse To release the cover press the tab on the bottom...

Page 5: ...esting that you change the batteries It is recommended that when you change batteries you change them for the mouse and keyboard at the same time to optimize performance When replacing the batteries use only Duracell alkaline batteries Note that the battery level indicator in the Cordless tab of the Keyboard Properties or the Mouse Properties is calibrated for Duracell alkaline batteries only Disc...

Page 6: ...you need to connect this cable to your computer s serial port CAUTION Before installing the receiver s cables turn off your computer Plugging or unplugging cables to your computer s mouse port while the computer is on can damage the mouse port or your computer 1 Make sure that your computer is turned off 2 Note the difference between the mouse and keyboard cable ends The mouse cable end is green a...

Page 7: ...the AT adapter 5 Installing the Software To take advantage of all the features of your Cordless Desktop please install the software that comes with the product 1 Turn on your computer and Start Windows 95 Windows 98 or Windows 3 1x or Windows NT 4 0 2 Insert the software diskette into drive A or B 3 For Windows 95 Windows 98 or Windows NT 4 0 press Start on the Taskbar and select Run 4 For Windows...

Page 8: ...ve the mouse And for the keyboard your keystrokes will not register when you type 6 Using Your Cordless Desktop By assigning the scrolling function to a mouse button you can scroll in Windows 95 Windows 98 and Windows NT4 0 using your Cordless Wheel Mouse The following table tells you how to scroll Using Your Cordless Wheel Mouse Your mouse has a wheel that functions both as a wheel and as a butto...

Page 9: ...ress any mouse button Zoom Use Zoom to either magnify or demagnify the view of a document in an application that supports it Place the cursor in an application that is Microsoft Office 97 compatible Press and hold the Ctrl key on the keyboard then to zoom in move the wheel forward to zoom out move the wheel backwards Using the Software under Windows 95 Windows 98 and Windows NT 4 0 The Mouse Ware ...

Page 10: ...ve property sheet in which you can specify options Standard keyboard functions are also conveniently displayed on the Taskbar which give the status of Num Lock Caps Lock and Scroll Lock When mouse or keyboard battery power is low a warning icon appears to let you know that it is time to change the batteries Whenever you change the batteries it is a good idea to change the batteries in both the key...

Page 11: ...the Windows Start Menu Go Back Returns to previous page HyperJump for Windows 95 Windows 98 and Windows NT 4 0 Menu Activates the HyperMenu Minimize Minimizes the window Close Closes the window Vertical Scroll Jumps to the vertical scroll bar Resize Jumps to the Size Grip resizes window Horizontal Scroll Jumps to the horizontal scroll bar Start Activates the Windows Start Menu Recall Recalls the l...

Page 12: ... application specific feature press the Control key while clicking the button to be overridden Note that scroll and zoom functions are not supported under Windows 3 1x as well as Cordless Desktop battery warning icons and keyboard status icons on the Windows Taskbar 7 Desktop Maintenance If the cursor skips or moves abnormally clean the ball of your mouse 1 Remove the retainer ring to remove the b...

Page 13: ...other electrical devices such as the computer the computer monitor or external drives Make sure you have installed the batteries correctly Manually establish communication between the receiver and the mouse keyboard Non Ex version of receiver FR 30 Press the Connect button on the receiver then press the channel button on the mouse see picture Press the Connect button again on the receiver then pre...

Page 14: ...ect may be interfering with the receiver s radio reception Try moving the receiver and or mouse to improve reception Or the mouse batteries may be nearly dead Check the mouse batteries as described in Mouse or Keyboard Does Not Work upon Installation and replace the batteries if required You may also need to change the channel for the keyboard mouse The computer must be on and the receiver plugged...

Page 15: ...FT 30 5 10 01 E L B Ex Geräte Bachmann Rev 1 9 Page 15 10 Connecting examples ...

Page 16: ... Current 1 mA Capacity of Batteries 1150 mAh Transmitting power 25 mW Transmitting frequency 26 995 27 195 MHz Ex approval II 2G EEx ia IIC T4 Tamb 20 40 C DMT 00 ATEX E 047 other approvals FCC ID DZL201135 ICP 032TC 98 CEPT LPD I DGPGF 4 2 03 339503 F0 0002097 CEPT LPD DK 9814 CEPT LPD D CTC R000 003K CEPT LPD NL ISC RSS CNR210 RTT D X 1624 SRD MPT 1346 GB BAKOM 98 0085 K P L 2438 10371 01l EEx R...

Page 17: ...batteries only outside the Ex area Alterations and changes on the devices are not allowed E L B Ex Geräte Bachmann GmbH is not responsible for any damage which results in disregard of this direction Only the newest technical documentation or technical supplement is valid The operating voltage of the device has to be in the limits that are given in this technical documentation under technical data ...

Page 18: ... L B Ex Geräte Bachmann Rev 1 9 Page 18 196 48 481 23 38 124 60 92 3 106 3 122 139 1 120 70 113 100 25 13 Dimensions EEx Cordless keyboard FT 30 EEx Cordless mouse FM 20 Non EEx receiver FR 30 EEx receiver type FR 10 ...

Page 19: ...FT 30 5 10 01 E L B Ex Geräte Bachmann Rev 1 9 Page 19 14 Certificate of conformity ...

Page 20: ...FT 30 5 10 01 E L B Ex Geräte Bachmann Rev 1 9 Page 20 Certificate of conformity for Ex receiver ...

Reviews: