background image

15

IV – Menus

2.


Launch a planned dataset

A planned dataset is composed of several locations. For each location, the operator can enter a theorical value and a tolerance for the 
parameter to be controlled. Planification must be made via the software.

a

. Click on 

OK 

or  

 to enter into sub function.

b

. Select 

Planned 

 with 


and


. Confirm wih 

OK

c

. Choose dataset name


 with 


and


. Confirm wih 

OK

d

. Select the location with 


and


. Confirm wih 

OK

.   

3. Preview of dataset graphic

a.

 Go to 

Recording 

menu.

b. 

Select 

Display

. Click on 

OK

 to validate.

c. 

Select dataset name with arrow keys 


and 

. Click on 

OK

.

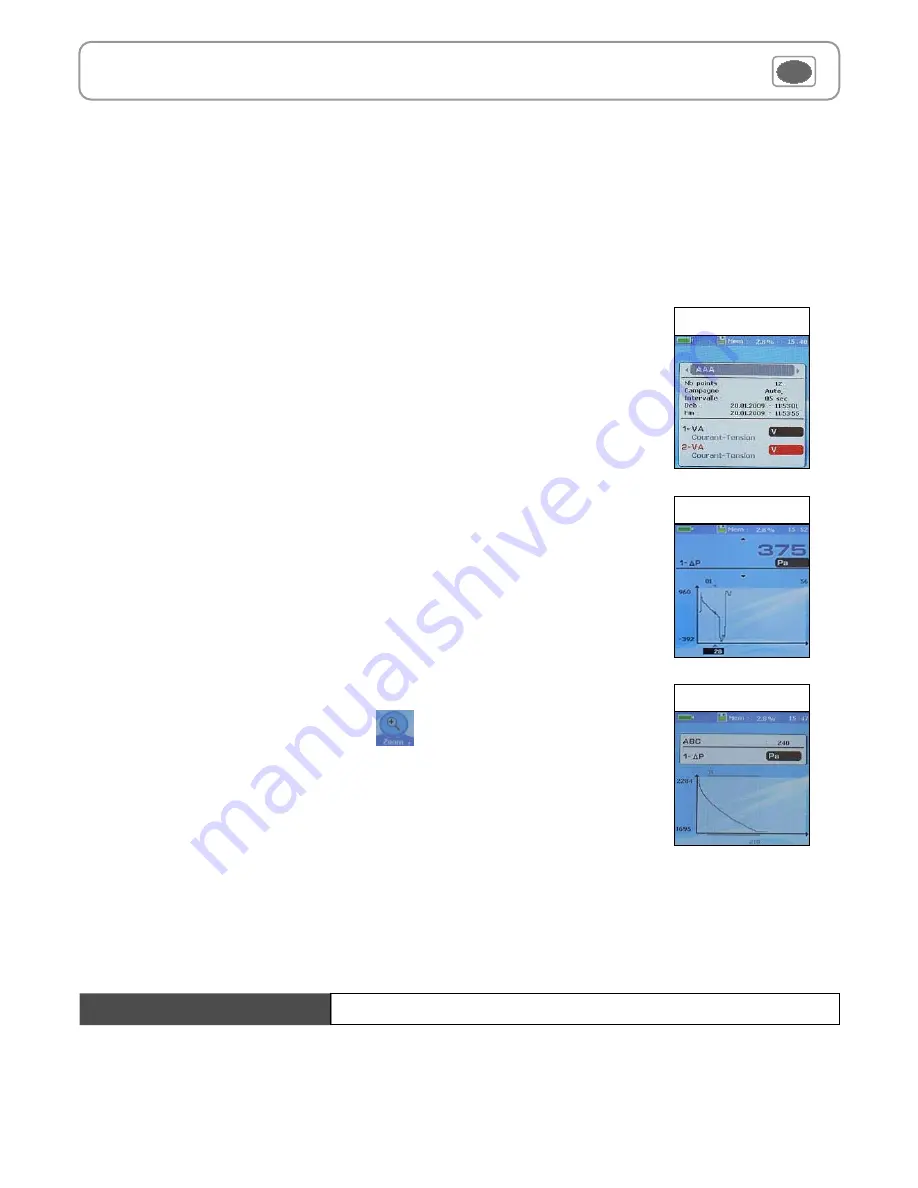
Summary screen of selected dataset is displayed. From this screen, you can :  

 Select other dataset using arrow keys 

 and 

.

 Dislplay data of other channels using arrow keys 


and 

.

d.

 Click on 

OK

 to display selected dataset graph.

From this screen you can : 

 Browse on the curve with arrow keys 

 and 


to display values of pionts.

 Select the channel using arrow keys 


and 

You can display a graph of datasets performed on the device.

Note

 : if selected dataset has more than 180 points, the device will display a global view of dataset. To 

zoom on a dataset part, use arrow keys and press 


key. 

The device displays graph of the interval of selected points.

Dataset summary

Dataset graph

Global graph of 

dataset

4. Delete all datasets

 Select 

Delete

 with 


and


. Confirm wih 

OK

.  

see DataLogger-10 user manual chapter

 III – Read device

 page 6.

Downloading data

Summary of Contents for AMI 300

Page 1: ...Multifunctional IAQ Monitor AMI 300 P a Supplied with Calibration certificate...

Page 2: ...Airflow 11 Area 11 Duct type 11 Sizes 11 K2 factor 11 Units 11 COmax 11 Air velocity 12 Average 12 Point point average 12 Automatic average 12 Automatic point point average 12 Configuration 12 Thermo...

Page 3: ...ug of thermocouple K J or T type Class 1 as per IEC 584 3 Pressure 2 pressure connectors 6 2 mm made of nickel brass 2 threaded pressure connectors 4 6 mm made of nickel brass for 500 and 200 mbar 1 t...

Page 4: ...0 03 area cm2 1 m3 h m3 h cfm l s m3 s 14 mm VANE PROBE PITOT TUBE DEBIMO BLADES C F ppm ppm RH From 20 to 80 C 0 1 C From 0 to 5 000 ppm From 0 to 1 000 ppm From 5 to 95 RH 1 ppm AIR QUALITY PROBES C...

Page 5: ...r protection Top view Module connections mini Din C1 connector Mini Din C2 connector Graphic display Hour Value Unit Channel Circular menu Memory status used Battery level Keypad On Off key Access key...

Page 6: ...2 channels with current voltage input cables or ammeter clamps 2 Pressure module It allows differential pressure air velocity or airflow measurements with Pitot tube or Debimo on two pressure inputs...

Page 7: ...a connection with right and left keys Connections can be activated or deactivated with or Info Measure Params Select a sub menu with access keys Measurement Communication interrupted Check probes conn...

Page 8: ...Del a RF probe B Select a wireless probe already created B1 Power up the RF probe short press on Multifunction button B2 Go to Probe menu B3 With arrows keys and go to RF probes Display All the RF pr...

Page 9: ...ulb globe temperature For hygrometry probe coupled with black ball thermometer If WBGT index is selected press then OK or and a list appears Select Inside or Outside with arrow and Confirm with OK The...

Page 10: ...F with and in order to enable or disable this function Confirm with OK Units K2 factor IV Menus Sizes Press or OK to enter into sizes sub function You can choose an air vent already registered by sele...

Page 11: ...on beforehand defined You must enter duration click on the Period icon Select minutes or seconds with arrow buttons and Scroll digits with and Confirm with OK The numbers of points is displayed Press...

Page 12: ...allows to enable or disable the screen saving Click on OK or to enter and a list appears Enter the delay before the sreen saving activation with and Confirm wih OK Screen Saving IV Menus This sub fun...

Page 13: ...ng Pitot tube Dynamic pressure PT PS Static pressure PS Total pressure PT 1 Connect the pitot tube to AMI 300 2 The probe must be placed at the center of the duct and parallel to the air flow 3 Press...

Page 14: ...ed dataset is displayed From this screen you can Select other dataset using arrow keys and Dislplay data of other channels using arrow keys and d Click on OK to display selected dataset graph From thi...

Page 15: ...r After Sales Service required for appraisal Maintenance Warranty Battery When battery indicator flashes it is recommended to change the batteries 1 Remove the front part at the back of the instrument...

Reviews: