18
Table 4
Max. operating gas pressure (mbar)
11,2
Natural Gas
Min. operating gas pressure (mbar)
1,9
Max. operating gas pressure (mbar)
28
LPG
Min. operating gas pressure (mbar)
4,9
Replacement Of The Burner Injectors
WARNING: Keep the gas valve
on the water heater and electricity supply closed
during replacement of the burner injectors.
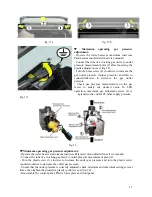
- Shut off the water heater by turning the ON/OFF knob to OFF position and turn off the gas valve
on the gas circuit to the water heater.
- First, Undo screw (A) securing the plastic lower plate (B) then slide forward and remove it. (see
fig.16)
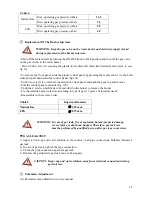
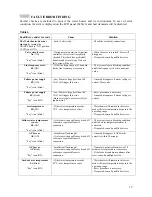
- To remove the front panel, slide the plastic control panel by pressing the secure tabs (1) to the both
sides and, pull downward the control panel (fig.17a)
- Undo two screws (3) which are located on the front panel and push the panel up and remove.
- Pull the control panel outwards (fig. 17b).
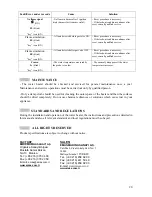
- Undo the 4 screws which fasten the manifold to the burner to remove the burner.
- Fix the suitable burner injectors according to type of gas (11 pieces of injectors used)
- Reassemble in the reverse order.
Table 5
Injectors Diameter
Natural Gas
∅
1,25 mm
LPG
∅
0,75 mm
WARNING: In case of gas leak, fire or explosion hazard, property damage,
severe injury or death can happen. Therefore, gas leak test
must be performed by qualified person after gas type conversion.
¨
GAS LEAK TEST
¾
Apply a rich soap and water solution to the surface of all pipe connections. Bubbles indicate a
gas leak
¾
In case of gas leak, tighten the pipe connection.
¾
Check the pipe connection again for gas leak.
¾
Replace the part/parts if gas leak can not be stopped.
CAUTION: Keep soap and water solution away from electrical connections during
gas leak test.
Parameter Adjustment
Use Parameter menu detailed in service manual.


