background image


Instruction Manual 


4812325555EN 

Operation and Maintenance 


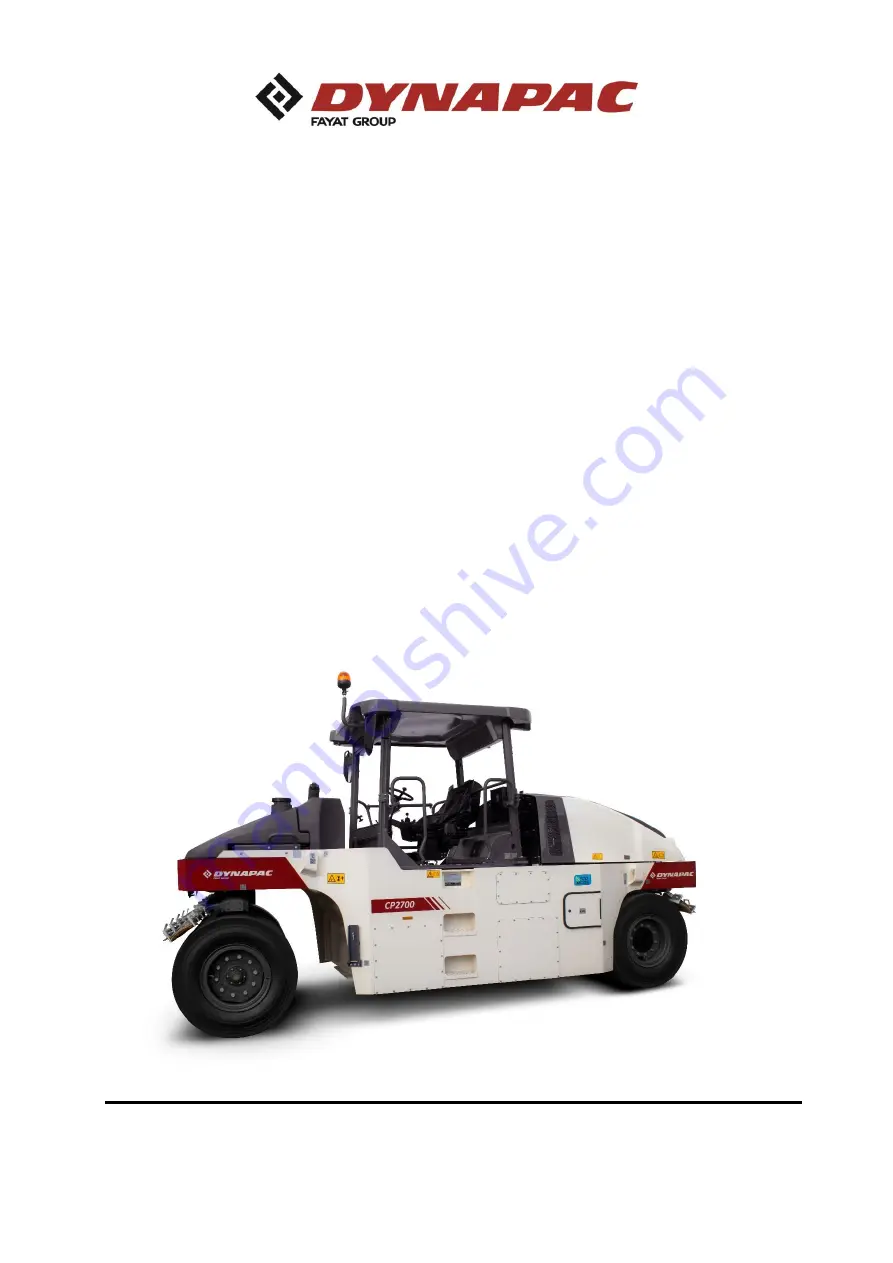
Pneumatic Tire Roller 

CP2100 / CP2100W 


Diesel Engine


Cummins QSB 3.3 

– Tier III 

Cummins QSF 3.8 - Tier IV 


Serial number 

100005x1xxB005446 


It is reserved the right to make any changes 


Printed in Brazil 


Summary of Contents for CP2100

Page 1: ...5555EN Operation and Maintenance Pneumatic Tire Roller CP2100 CP2100W Diesel Engine Cummins QSB 3 3 Tier III Cummins QSF 3 8 Tier IV Serial number 100005x1xxB005446 It is reserved the right to make any changes Printed in Brazil ...

Page 2: ......

Page 3: ... Brake 50 Long term storage 53 Lifting 55 Towing 56 Transport 59 Operation instructions Overview 60 MAINTENANCE Page Preventive maintenance 61 Preventive maintenance Symbols and lubricants 62 Specifications 65 Maintenance and lubrication points 69 Scheduled maintenance and lubrication 70 Maintenance and lubrication procedures 70 Daily Every 10 hours of operation 74 Weekly Every 50 hours of operati...

Page 4: ...2018 02 08 4812325555EN ...

Page 5: ...ypes of ground Warning symbols WARNING Damage to the machine or its parts CAUTION Risk of death or injures Safety information The Safety Manual delivered with the machine shall be read by the operator Always follows the safety instructions and keep the Manual inside the machine It is recommended to at least train the operators on daily handling and maintenance of the machine according to the Instr...

Page 6: ...spose oil fuel or other hazard substances to the environment Always dispose correctly used filters draining oil and fuel residues This manual contains instructions for periodic maintenance which is usually performed by the operator Other engine instructions can be found at the manufacturer s manual CE Marking and Statement of Compliance APPLIED TO MACHINES SOLD WITHIN THE EUROPEAN COMMUNITY This m...

Page 7: ...d during the travel Always look up and down during the travel Make sure there are no obstacles in the direction of travel on the ground in front or behind the roller 11 Drive particularly carefully on uneven ground 12 Follow all the safety rules and use the protection equipment proper to the work to be performed 13 Keep the roller clean Clean immediately dirt oil and grease accumulated on the oper...

Page 8: ...EN 2018 02 08 19 For your own protection always wear Helmet Working boots with steel toecaps Ear protectors Reflecting clothing Working gloves 20 If there is a cab in the machine operate it always with the doors closed and with the seat belt ...

Page 9: ...ionary position The steering angle is zero the tires pressure is normal and all the tanks are full Always remember that loosen ground the steering of the machine different tire pressures the operation speed and the gravity center raising may cause the machine to turn even on slopes smaller than the ones stated here If you need to leave the cab in emergency situations take off the hammer at the rea...

Page 10: ... steep ground Always drive the machine in slow speed when operating or during transport on steep ground 15 To drive or stop the machine the rear wheels shall always be towards the slope that is the roller shall go up normally and shall go down in reverse Make sure there are no obstacles both in front or behind your work area Driving near edges When driving close to edges or holes make sure that at...

Page 11: ...ctions with the system loaded The system must be refilled with approved coolant when necessary Refer to the safety decal next to the replacement and filling place Edge cutter The operator must make sure that nobody is in the work place when the machine is operating The edge cutter has rotating components which may cause crushing Immediately after use the tool shall always be put back on the transp...

Page 12: ...nce on the lighting system shall be performed by authorized technicians and the main power source shall be off CAUTION Environmentally hazardous waste The xenon lamps of the working lights contain mercury Hg A defective lamp is considered a hazardous waste and shall be disposed of properly according to the applicable local directives Contact an DYNAPAC dealer Fig Xenon working lights ...

Page 13: ...he 2 5 m s action value as specified in the same abovementioned directive the limit is 5 m s Noise level The sound levels are measured according to the operational cycle described in the EU directive 2000 14 EC on machines equipped for the EU market with the operator s seat in the transport position Guaranteed sound power level LwA 103 dB A Sound pressure level at the operator s ear platform LpA 8...

Page 14: ...8 Technical specifications Dimensions Dimensions Dimensions mm inches A Between axles 4 000 157 B Total width 2 032 80 H1 Height with attachment 3 344 132 H2 Total height 2 990 118 K Height from the ground 250 9 8 L Total length 5 180 204 A L H2 H1 B K ...

Page 15: ...on Millimeter Inch R Outer radius 7994 315 r Inner radius 5249 207 x Tire width 300 11 8 CP2100W Dimensions Millimeter Inch R Outer radius 8164 321 r Inner radius 5022 198 x Tire width 360 14 1 Dimension Degree O Vertical oscillation 4 5 D Direction angle 33 X O R r D ...

Page 16: ...y decals description and location 12 4812325555EN 2018 02 08 Safety decals description and location 10 13 15 16 1 23 15 15 8 7 12 13 2 3 17 18 9 14 17 18 24 20 4 6 15 21 5 22 15 1 13 15 16 23 10 11 12 13 19 ...

Page 17: ...omponents be careful Keep your hands off the danger zone 3 WARNING Hot surface Keep your hands off the surface 4 WARNING Read carefully the towing chapter before releasing the brakes Crushing injury danger 5 WARNING The operator must read the Safety and Engine Manuals as well as the Operation and Maintenance instructions 6 WARNING High pressure fluid Make sure to release the pressure from the accu...

Page 18: ...4 4812325555EN 2018 02 08 Safety decals Description and location cont 10 Emergency exit Cab 11 Fire extinguisher 12 Hoisting plate 13 Tire pressure 14 Diesel oil 15 Securing point 16 Lifting point 17 Hydraulic oil 18 Bio hydraulic oil option ...

Page 19: ... description and location 2018 02 08 4812325555EN 15 Safety decals Description and location cont 19 Handbook compartment 20 Master switch 21 Battery voltage 22 Sound power level 23 Water tank 24 Hydraulic oil level ...

Page 20: ...e power and the manufacturing year machines delivered outside EU do not present CE marking and in some cases they also do not present the manufacturing year NOTE State the machine plate s serial number when ordering spare parts PIN Product Identification Number at the frame The PIN product identification number 1 is punched on the right side of the right frame It is the same number of the machine ...

Page 21: ...code B Sorocaba Brazil F Serial number from 000001 to 999999 Engine plate The engine plate 1 is on the cylinder head cover 1 and it can be accessible when the hood is open The plate is also on the top step of the operator s platform It contains information like the serial number and the engine specifications NOTE State the engine plate s serial number when ordering spare parts 100 00123 V E A 1234...

Page 22: ...matic sprinkler OPTION 12 increase of the sprinkler interval timer OPTION 13 decrease of the sprinkler interval timer OPTION 14 Working lights OPTION 15 Horn 16 Emergency stop button 17 Eco mode 18 Enable regeneration Tier iV engine 19 Disable regeneration Tier iV engine 20 Hazard warning lights OPTION 21 Rotating beacon OPTION 22 Control panel 23 Function buttons 5 24 Brake test pedal 25 Parking ...

Page 23: ...12325555EN 19 Pedals The roller has two pedals 1 Throttle pedal 2 Brake pedal Steering column multiple switch option Switch functions 1 Forward reverse lever 2 Central warning lights 3 Direction lights Fig Steering column multiple switch option 1 Fig Pedals 2 ...

Page 24: ...Central warning lights Appoints general fault See the control panel 22 for the description of the fault 6 High beam lights It shows that the high beam lights are on via switch at the steering column 7 increase in the tire pressure When activated it increases the tires pressure 8 decrease in the tire pressure When activated it decreases the tires pressure 9 High low speed The roller starts always i...

Page 25: ...witch Press to sound the horn 16 Emergency stop button Press it to turn off the machine and the engine All the power supply is also turned off 17 Eco mode When activated maintain speed reducing the engine rotation thus saving fuel up to 30 economy 18 Button to enable the regeneration Tier IV Engine Press to execute the regeneration 19 Button to disable the regeneration Tier IV Engine Press to disa...

Page 26: ...rting 23 Function buttons 5 24 Brake test pedal Press it to test the brakes 25 Parking brake When it is pressed the parking brake is activated To turn it off slide the red part backwards towards you and change the switch position NOTE to start the machine the parking brake shall be activated 26 Edge cutter The edge cutter can be moved up and down when machine is in work postion 27 Edge cutter spri...

Page 27: ...ified in percentage The screen remains visible until the Diesel engine is turned on or if one of the function buttons below the screen is pressed If the engine starts before you choose the screen it will switch to the main screen This screen provides an overview and it remains on during the operation The speed is shown in the middle of the screen The high low speed mode is shown with a symbol in t...

Page 28: ...arm log button to show the alarms of the engine and machine Settings menu selection button which opens the main menu Settings can be changed in the main menu Exit return button returns 1 step at once Pressing the button for approximately 2 seconds displays the main menu again The temperature screen shows the engine oil top of the screen and hydraulic oil temperature bottom of the screen The values...

Page 29: ...e value shown in the top of the main screen starts to flash The temperature value is continuously on when it is in the right limit When an engine motor alarm is activated it is shown in the screen The alarm is sent from the engine s ECM which tracks its functions The message displays SPN and FMI codes and can be read via the engine supplier error code list To erase the message press OK When a mach...

Page 30: ...rning symbol engine temperature If this symbol appears the engine is too hot Stop immediately the engine and find the fault Refer also to the engine manual Warning symbol hydraulic oil temperature This symbol appears when the hydraulic oil is too hot Do not drive the roller put the engine on idle wait until the oil cools down and find the fault Warning symbol low fuel level This symbol appears whe...

Page 31: ...ror Feedback Resistance Valve out of range Limited Mode 12 3 2 Error in the Motor Control Valve Error Feedback Resistance Valve out of range Limited Mode 13 3 3 Hydraulic motor valve BPD Error Feedback Limited Mode 14 2 3 Error in the rotation of the pump diesel engine Input Frequency 10 000 Hz Limited Mode 15 2 0 Short circuit on FNR Safe Mode 16 2 1 Inch sensor error Limited Mode 17 2 2 Throttle...

Page 32: ...2018 02 08 Control panel Alarms cont Alarms received are stored logged and can be seen by selecting Display Alarms ENGINE ALARM Stored logged engine alarms MACHINE ALARM Stored logged machine alarms They come from other systems on the machine ...

Page 33: ...812325555EN 29 USER SETTINGS Users can change lighting settings choose between Metric or Imperial system and set warning sounds on off Adjustment of light and contrast settings on the display including brightness of the panel light Operator help when starting ...

Page 34: ...he low speed low slow speed not all the models refer to the manual to know if your model fits in this condition Operator help when activating When trying to activate the edge cutter option with the machine in high speed the display will show the slow speed mode for a few seconds To activate the previous function make sure the low speed mode is activated Eco mode This equipment has a new fuel econo...

Page 35: ...is initiated it is advisable to wait with the equipment on and stopped to completion The equipment controls the level of contamination of the DPF in 5 stages Empty Low Medium High and Service When the accumulation in the DPF reaches the low level Low contamination the alert will be shown regeneration indicating that the machine will trigger automatic regeneration if the machine is stopped When the...

Page 36: ...tion of the DPF reaches maximum level Service equipment is locked and the system is unable to regenerate itself Under these conditions cleaning the filter can only be performed manually by a skilled technician Cummins Attention Inhibition should only be used in exceptional cases when the machine has to be stopped and there is still a small part of work to be completed Instruments and Controls Cab ...

Page 37: ...Instruments controls Cab 2018 02 08 4812325555EN 33 Radio CD player option 9 3 10 1 4 5 6 7 3 2 8 9 Radio Option 11 ...

Page 38: ...top to activate the front washers Press the bottom to activate the rear washers 6 Asymmetric front wiper switch Press to operate the front side windshield wiper 7 Asymmetric rear wiper switch Press to operate the rear side windshield wiper 8 Asymmetric side windshield washers switch Press the top to activate the front side washers Press the bottom to activate the rear side washers 9 Fuse box Conta...

Page 39: ...or The set point temperature will flash on the display press until reaches desired temperature Display The display shows set point value bar graph evaporator speed active function and other information It also serves to allow the operator to view the coil and return temperature as well as the parameters It also serves to alert when there is some system flaws Operation Mode To change the operation ...

Page 40: ...nual ventilation The manual ventilation has three speeds When some function cooling heating or automatic mode is active the ventilation function is always on To change the fan speed press the key Ventilation mode and after set the desired speed with the keys or After press the key to confirm or wait a few seconds and the speed will be saved ...

Page 41: ...raise the inner lever 1 The transverse travel brake will be released For rotation raise the outer lever 2 Make sure the control unit is in the correct position before operating the machine For steering column angle release the locking lever 3 Fix it again in the new position To adjust the operator s seat refer to the next section Perform all the control and operation unit adjustments when the mach...

Page 42: ...LWAYS make sure the seat is locked before starting the operation Always use the seat belt 4 Comfort operator s seat option adjustment Adjust the operator s seat so all the controls are within easy reach and the machine operation is comfortable 1 Length adjustment 2 Height adjustment 3 Seat cushion inclination 4 Back support inclination 5 Armrest inclination 6 Lumbar support adjustment 7 Seat belt ...

Page 43: ...d adjust and lock the railings in the desired position Make sure the anti slip protections 4 of the platform are in good condition and replace them for new ones if they are worn If the machine is fitted with a cab make sure the door is always closed when in motion Interlock The roller is equipped with Interlock The Diesel engine turns off after 4 seconds if the operator leaves the seat when the ma...

Page 44: ...n is shown in the Control panel 2 Check if the voltmeter 3 appoints at least 24 volt and if the fuel 4 and water 5 levels show a percentage value The hourmeter 6 records and shows the total quantity of the engine working hours 1 2 Fig Side panel 1 Ignition key 2 Control Panel 6 4 5 3 Fig Status screen 3 Voltmeter 4 Fuel level 5 Water level 6 Hourmeter ...

Page 45: ...gnition key 3 to the right the first position I and then to the start position Release the switch as soon as the engine starts Do not try to run the start engine for too long max 30 seconds If it does not work wait 60 seconds to try again Let the engine idle for a few minutes or more if the environment temperature is below 50 F 10º C When the engine is running indoors make sure if there is proper ...

Page 46: ...it with the engine in maximum rpm it shall be necessary to replace the hydraulic oil filter Warning lamp air filter If the lamp is lit with the engine in maximum rpm it shall be necessary to clean or replace the air filter Warning lamp battery charging If the lamp is lit with the engine running the alternator is not charging Stop the engine and find the fault Warning lamp engine temperature If the...

Page 47: ...g asphalts do not forget to activate the sprinkler system 1 or 2 Release the parking brake button 5 by sliding the red lock on the button backwards and changing the lever position Remember that the machine can roll if you are on a slope 4 Activate the low speed 3 5 Move the forward backward lever 4 carefully to any direction you desire 6 Increase or decrease the machine speed using the throttle co...

Page 48: ...on the main tank and it is the same used in the standard sprinkler system Tire pressure adjustment option The operator can vary the pressure during the operation with the tire air pressure control It can be variable adjusted with the keys 2 and 3 on the keypad within the interval from 240 kPa to 830 kPa 35 to 120 PSI and can be reduced with the key 3 The tire pressure level is shown in the lower l...

Page 49: ...lder 2 Make sure the lock pin 4 releases properly from the locking hook 3 and allow the scraper to rest against the tires in the working position To release the coconut mats Hold and lift the handle in the middle of the scraper holder 2 Make sure the lock pin 4 fits well in the locking hook 3 1 2 3 4 Fig Scraper bars adjustment 1 Coconut mats 2 Scraper holder 3 Locking hook 4 Lock pin ...

Page 50: ... water may leak when the ballast is filled with it Fill the ballast box when necessary with gravel sand and steel The water shall be added when it is filled with sand so it can fill all the spaces between the ballast When using the roller with mixed ballast start using the steel objects available and then add the requisite amount of sand and water Distribute the ballast evenly Fig Ballast box cove...

Page 51: ... in the steel ballasts Remove the bedplate 4 off the ballasts assembly 3 Install or remove the ballasts according to the necessity using the forks from a standard forklift The ballasts grooves 5 were projected so the forklift forks fit perfectly and to easy their removal installation and transport 4 After installing or removing the ballasts in the box mount the bedplate performing the reversal ste...

Page 52: ...40 1 125 163 181 188 228 261 290 1 375 220 260 300 330 350 380 1 375 175 193 199 240 276 308 1 825 240 280 340 380 400 430 1 825 194 212 219 261 301 339 2 250 250 310 360 410 440 480 2 250 211 229 236 280 326 370 2 750 260 320 390 440 480 520 2 750 231 248 256 303 356 408 3 000 270 330 410 460 490 540 3 000 242 257 267 315 373 430 Tire TIRE PRESSURE psi Tire TIRE PRESSURE psi 11 20 18 35 50 70 90 ...

Page 53: ... the larger surface area Normal tire pressure 480 kPa 69 6 PSI Used for degradation session High tire pressure 830 kPa 120 4 PSI The higher the tires pressure the higher the pressure on the contact surface due to the smaller surface area Fig Low ground pressure larger contact area Fig Normal ground pressure Fig High ground pressure smaller contact area ...

Page 54: ...onds the engine will turn off and the brakes will be activated To check if the emergency stop works correctly the operator shall press the corresponding button with the roller moving forwards and backwards perform the test in both ways Next the operator must hold the steering wheel firmly and be ready for a sudden stop The engine will be turned off and the brakes will be activated To check if the ...

Page 55: ...kward lever shall be in the neutral position and the parking brake shall be on Turning off the engine Allow the engine to cool down in low idle for a few minutes Check if the Display 1 shows any indication of faults Turn off all the lights and other electric functions Press the parking brake switch 3 Turn the ignition key 2 to the left to turn it off Fit and fix the cover of the instruments panel ...

Page 56: ... In extremely cold weather some components may freeze Drain the water tanks and pipings Master switch At the end of the working shift turn off the battery master switch 1 and remove the handle This will prevent the battery discharging and will also make it difficult to start and drive the machine if unauthorized people try to use it Close and lock the maintenance covers and doors 1 Fig Choking the...

Page 57: ...nstruction manual supplied with the roller Battery Remove the batteries from the roller clean their outside parts and recharge them once a month Air cleaner exhaust pipe Close the air tube refer to the sections Every 50 Hours of Operation and Every 1 000 Hours of Operation or the respective intake opening with plastic or tape Also cover the exhaust pipe opening with sealing material to avoid moist...

Page 58: ... over the instrument panel Cover the entire roller with a tarpaulin It shall have a gap between it and the ground If possible store the machine indoors and preferably in a place with regular temperature When stopping and parking the equipment always apply the parking brake As a precaution measure chock the roller tires when parking on slopes and turn off the engine To prevent accidents when parkin...

Page 59: ...eck the machine gross weight and the compatibility of the lifting equipment Lifting the roller with a jack The machine s gross weight is specified in the hoisting plate 1 Refer also to the Technical Specifications Lifting devices such as a jack 2 or equivalents must be dimensioned according to the safety regulations for lifting devices Do not go under or next to the machine when it is being lifted...

Page 60: ...the pump are freely connected to the pressure side This function allows the machine to be moved without the drive shaft rotating 4 Start the Diesel engine and run it in idle 5 Move the forward backward lever in one of the two positions If it is in a neutral position the hydraulic engine brakes are activated 6 The roller can be towed and even steered now if the steering system is working 7 To leave...

Page 61: ...achine to be moved without the drive shaft rotating 4 The brake release pump is at the right side of the engine compartment 5 Pump with the arm 3 until the brakes are released 6 So the brake release pressure is quickly drained turn on the start engine for a few seconds 7 If you cannot start it turn the towing valve four times to the left remember always to turn it four times later to the right 8 T...

Page 62: ...ters During the roller towing its devices shall be connected in both lifting holes The pulling forces shall act to the machine s longitudinal axis as illustrated in the figure Refer to the table below to know the maximum pulling force allowed for this machine model MODEL kN Lbf CP2100 CP2100W 324 72 900 Trailer eye option The roller can be equipped with a trailer eye It shall only be used for towi...

Page 63: ...er the frame 2 to ensure that the chains remain tensioned if the air goes out of the tires Block up the machine according to the figure Secure the roller with chains in all four corners The attachment points are shown in the safety decals Put the chains in symmetrical pairs crossing each other Make sure the chains supports and attachments of the transport vehicle are approved and have the proper t...

Page 64: ...e engine and warm it Always check the brakes Before starting the working shift carry out a test in the system and remember that if the hydraulic oil is cold the brake distance will be longer When operating the roller use carefully the forward backward lever Make sure the tires are well sprinkled when necessary In an emergency apply the emergency stop hold well the steering wheel and be ready for a...

Page 65: ...leaving the plant The inspection shall happen in the moment it arrives to the client following the list in the warranty document Any transport damage shall be immediately reported to the carrier company Warranty The warranty is only valid if the inspections were carried out at the time of the delivery as well as the maintenance inspections according to the warranty The warranty is not valid if the...

Page 66: ... Shell Tellus V100 or equivalent BIOLOGICAL HYDRAULIC OIL When leaving the plant the machine may be filled with biologically degradable oil When replacing or filling with oil use the same type of oil used previously PANOLIN HLP Synth 46 www panolin com GREASE Shell Retinax LX2 or equivalent FUEL Refer to the engine manual instructions COOLANT Antifreeze protection effective down to 34 6 F 37ºC 50 ...

Page 67: ...e maintenance Symbols and lubricants 2018 02 08 4812325555EN 63 Engine oil level Engine oil filter Hydraulic fluid level Air filter Hydraulic fluid filter Transmission oil level Fuel filter Battery Coolant level ...

Page 68: ...Preventive maintenance Symbols and lubricants 64 4812325555EN 2018 02 08 Lubricating oil Air pressure Sprinkler Sprinkler water Recycling ...

Page 69: ...er combination to obtain the maximum of the ballast The roller working weight consists of the machine weight and the ballast weight Thicker layers demand a heavier machine for compacting and thinner layers do not need a machine that heavy FILLING VOLUMES Hydraulic oil reservoir 95 L 25 09 gal Hydraulic oil system 35 L 9 24 gal T engine lubricant oil 2x8 L 0 5x2 11 gal Diesel engine lubricating oil...

Page 70: ...m 50 1 lb ft 76 N m 56 05 lb ft M12 70 N m 51 6 lb ft 78 N m 57 5 lb ft 98 N m 72 2 lb ft 110 N m 81 1 lb ft 117 N m 86 3 lb ft 131 N m 96 6 lb ft M14 110 N m 81 1 lb ft 123 N m 90 7 lb ft 156 N m 115 lb ft 174 N m 128 3 lb ft 187 N m 138 lb ft 208 N m 153 4 lb ft M16 169 N m 124 6 lb ft 190 N m 140 1 lb ft 240 N m 177 lb ft 270 N m 200 lb ft 290 N m 213 9 lb ft 320 N m 236 01 lb ft M20 330 N m 24...

Page 71: ... m 172 5 lb ft M16 240 N m 177 lb ft 304 N m 224 2 lb ft 290 N m 213 9 lb ft 360 N m 265 5 lb ft M20 470 N m 346 6 lb ft 585 N m 431 4 lb ft 560 N m 413 03 lb ft 698 N m 514 8 lb ft M22 626 N m 461 7 lb ft 786 N m 579 7 lb ft 752 N m 554 6 lb ft 944 N m 696 2 lb ft M24 800 N m 590 lb ft 1 010 N m 744 9 lb ft 960 N m 708 05 lb ft 1 215 N m 896 1 lb ft M30 1 580 N m 1 165 3 lb ft 1 990 N m 1 467 7 l...

Page 72: ...n R134a Coolant weight when full 1 000 g 2 20 lbs Engines ENGINE Manufacturer and model Cummins QSB 3 3 TIER 3 Power SAE J1995 99 HP 74 kW 2 200 rpm ENGINE Manufacturer and model Cummins QSB 3 8 TIER 4 Power SAE J1995 121 HP 89 kW 2 200 rpm Lamps when installed LAMPS Drive lights front 75 70 W P43t H4 Front lights 21 W BA9s Side lights 5 W SV8 5 Brake position lights 21 5 W BAY15d Rear lights 21 W...

Page 73: ...and lubrication points 1 Engine oil 9 Coolant 17 Cab air filter 2 Oil filter 10 Engine air filter 18 Cab air conditioning 3 Fuel filter 11 Fuel supply 19 Edge cutter 4 Hydraulic oil filter 12 Scrapers 20 Lower pivot bearing 5 Hydraulic oil level 13 Water supply system 21 Upper pivot bearing 6 Hydraulic oil supply 14 Sprinkling system 22 Pivot bearing 7 Hydraulic oil reservoir 15 Seat bearing 23 Wh...

Page 74: ...manufacturer instructions For further information refer to the Engine Manual DAILY Every 10 hours of operation POSITION IN THE FIGURE ACTION NOTES Before starting the engine 1 Check the Diesel engine oil level Refer to the engine manual instructions 9 Check engine coolant level 5 Check the hydraulic oil level 11 Fill the fuel tank 13 Fill the water tanks 14 Check the sprinkler system 14 Clean the ...

Page 75: ...ace the hydraulic oil filters 20 Lubricate the lower pivot bearing 21 Lubricate the upper pivot bearing 23 Replace the wheel gear oil WEEKLY Every 50 hours of operation POSITION IN THE FIGURE ACTION NOTES Check the engine air intake system Refer to the engine manual instructions Check the tires air pressure Retighten the wheel nuts 10 Check and clean the engine air filter elements Replace them if ...

Page 76: ...ngs 20 Lubricate the lower pivot bearing 21 Lubricate the upper pivot bearing Replace the air dryer filter Machine equipped with AOR EVERY THREE MONTHS Every 500 hours of operation POSITION IN THE FIGURE ACTION NOTES 3 Replace the Diesel engine fuel filter Refer to the engine manual instructions Replace the Diesel engine pre filter Refer to the engine manual instructions Check the bolted joints 7 ...

Page 77: ...with AOR 4 Replace the hydraulic oil filters 17 Replace the cab air filter 20 Lubricate the lower pivot bearing 21 Lubricate the upper pivot bearing 23 Replace the wheel gear oil 23 Check the wheel gear oil level ANNUALLY Every 2 000 hours of operation POSITION IN THE FIGURE ACTION NOTES 6 Replace the hydraulic oil 11 Clean the fuel tank 13 Clean the water tank 14 Clean the sprinkler system Check ...

Page 78: ...n the upper and lower parts For further information refer to the Engine Manual instructions Check the engine coolant The expansion tank is placed in the center between the operator platform and the engine compartment To access the expansion tank 3 remove both retaining bolts 1 and also the protective plate 2 Check if the coolant level is between the MAX and MIN marks in the expansion tank 3 If nec...

Page 79: ...rting the operation or fuel the tank when the work is done Unscrew the tank cap 1 and check up to the lower edge of the filler pipe The tank capacity is of 55 4 gal 210 liters of fuel For further information about the fuel grade refer to the Engine Manual Before filling stop the machine on a safe place with level surface turn off the engine and ground the filling pipe putting it in contact with th...

Page 80: ...re is excessive wear on the roller tires Do not add flammable fluids or those which are hazardous to the environment in the emulsion tank Clean the sprinkler injector Dismantle the blocked nozzle by hand 1 Use compressed air to clean the nozzle 1 and the strainer 2 It is also possible to use the spare parts and to clean the blocked ones later on NOZZLE COLOR Ø mm l min 2 0 bar gal min 40 PSI Stand...

Page 81: ...scraper blade 1 firmly while pressing the locking hook 2 The scrapers can be easily removed for cleaning and inspection 1 First fix the scraper in the locking hook 3 at the scraper attachment 4 to prevent the scraper to fall onto the ground 2 Remove the pin 1 on the hook axle removing the hairpins 2 on both sides of the pin Grip the hook axle up and pull it straight out To put the scraper back aft...

Page 82: ...ck 3 and clean the filter and its housing Check if the rubber gasket of the filter housing is in intact After the cleaning and inspection put again all the components on their right places and start the system to check if it works correctly Another drain cock 5 is under the water tank on the left side of the front of the frame It can be used to drain the water tank and the pumping system It is als...

Page 83: ...um allowed value for used belts Drain the fuel filter To drain the fuel filter follow the instructions below 1 Unscrew the drain plug 1 in the bottom of the filter 2 With the hand operated secondary pump 2 make sure all the sediments were removed For further information refer to the Engine Manual instructions 3 When only clean fuel is coming out of the filter close the drain plug TAKE CARE OF THE ...

Page 84: ...and protective goggles to prevent the hot oil getting in contact with the skin which can cause burns 1 Remove the hexagon nut 1 take off the hose 2 and loose the oil drain plug 3 2 Let all the oil come out to the container and when the operation is done fix the drain plug 3 back to its place and fit the hose 2 back again 3 Next tighten the hexagon nut TAKE CARE OF THE ENVIRONMENT All the used oil ...

Page 85: ...ilter 4 2 If necessary clean the air filter according to this page instructions 3 When replacing the main filter 3 put a new one in its place and fit back all the air filter components in the reverse order 4 Check if the dust valve 6 is in good conditions and replace it if necessary 5 When fitting the cap make sure the dust valve is positioned downwards To clean the air filter follow the instructi...

Page 86: ...older install a new on and fit the components back in the reverse order 2 Clean the main filter if necessary Replace the engine fuel filter The fuel filter is located in front of the accumulators on the left side of the engine compartment 1 Unscrew the bottom of the filter and drain the water Next screw the unit back in its place 2 Fit the fuel filter in the correct place turn on the engine and ch...

Page 87: ...ter 4 Fit manually the filter first until the filter gasket manages to reach the holder Next tighten it with one more turn 5 Check the hydraulic oil level on the sight glass 2 and adjust if necessary Refer to the section Every 10 Hours to obtain further information 6 Turn on the engine and check if the filter is well sealed Check the tires air pressure To check the pressure use an air pressure gau...

Page 88: ... to prevent the hot oil getting in contact with the skin which can cause burns 1 Unscrew the drain plug 1 2 Put a container with 5 28 gal 20 liters of capacity under the drain plug 3 Unscrew the drain plug 1 and the filling plug 2 to evacuate the air Allow all the oil to drain out to the container and refit the plugs TAKE CARE OF THE ENVIRONMENT All the used oil shall be properly stored for subseq...

Page 89: ...tes that the coolant level is too low Turn off the air conditioning to prevent damages and fill it with coolant Clean the air conditioning If there is a significant loss of cooling capacity clean the condenser element 3 located on the rear of the cab s roof Check and lubricate the edge cutter if equipped Refer to the Operation section to obtain more information about how to work with an edge cutte...

Page 90: ... and protective goggles to prevent the hot oil getting in contact with the skin which can cause burns 1 Remove the hexagon nut 1 take off the hose 2 and loose the oil drain plug 3 2 Let all the oil come out to the container and when the operation is done fix the drain plug 3 back to its place and fit the hose 2 back again 3 Next tighten the hexagon nut TAKE CARE OF THE ENVIRONMENT All the used oil...

Page 91: ...he coolers is unobstructed If the cores are dirty wash them with flowing water with the engine cold and blow them with compressed air When using compressed air always use protective goggles Whenever possible clean the cores on the opposite direction to the fan air flow Every time you clean the core cover the electric and electronic components Check the air conditioning if equipped Check the coolan...

Page 92: ...he batteries When working with batteries protect your face and eyes using the proper equipment for individual protection and always provide the proper ventilation as well 3 Take off the cell caps and check the electrolyte level which must be at least 10mm above the plates If necessary fill the level with the battery fluid solution If the operation room temperature is below 32 F 0ºC allow the engin...

Page 93: ...Use the grease according to the lubricant specifications recommended by DYNAPAC Replace the air dryer filter To replace the filter empty the compressed air and unscrew the cartridge with suitable tool Clean and grease the sealing surfaces and the fixing screw Manually screw the cartridge until there is resistance and tighten half turn Fig Air dryer filter 1 Cartridge 1 2 Fig Pivot bearings 1 Upper...

Page 94: ... fuel filter is located in front of the accumulators on the left side of the engine compartment 1 Unscrew the bottom of the filter and drain the water Next screw the unit in its place again 2 Fit the fuel filter in the correct place turn on the engine and check if the filter is well sealed Replace the air dryer filter To replace the filter empty the compressed air and unscrew the cartridge with su...

Page 95: ...rotation bearing with three strokes of a hand operated grease gun 2 Clean and lubricate the chain 3 with grease between the seat and the steering column 3 Also lubricate the slide rails 4 of the seat with grease 4 If the chain gap is next to the sprocket wheel 5 loose the bolts 6 and move the steering column forward Tighten the bolts and check if the chain is with the proper gap 5 Do not tension t...

Page 96: ...e gun manually with five pump strokes 2 Use the grease according to the lubricant specifications recommended by DYNAPAC Lubricate the pivot bearing 1 Lubricate each grease fitting 1 with five hand operated strokes 2 Use the grease according to the lubricant specifications recommended by DYNAPAC 1 Fig Rear cylinder 1 Grease fittings 1 2 Fig Pivot bearings 1 Upper pivot bearing grease fitting 2 Lowe...

Page 97: ... it is obstructed the engine will lose power and the exhaust will let the smoke black besides the risks of damaging the engine Replace the secondary air filter Replace the secondary air filter for a new one when you clean or replace the main filter for the fifth time The secondary air filter shall not be cleaned To replace it for a new one follow the instructions below 1 Remove the old backup filt...

Page 98: ...ter 4 Fit manually the filter first until the filter gasket manages to reach the holder Next tighten it with one more turn 5 Check the hydraulic oil level on the sight glass 2 and adjust if necessary Refer to the section Every 10 Hours to obtain further information 6 Turn on the engine and check if the filter is well sealed Replace the cab air filter There is an air filter 1 on the left side of th...

Page 99: ... prevent the hot oil getting in contact with the skin which can cause burns 1 Unscrew the drain plug 1 2 Put a container with 5 28 gal 20 liters of capacity under the drain plug 3 Unscrew the drain plug 1 and the filling plug 2 to evacuate the air Allow all the oil to drain out to the container and refit the plugs TAKE CARE OF THE ENVIRONMENT All the used oil shall be properly stored for subsequen...

Page 100: ...o the manufacturer specifications Drive the machine until the level plug 2 is in the horizontal position Check if the oil level reaches the bottom of the plug opening Clean and fix the plugs again Check the wheel gear oil level Drive the machine until the level plug 2 is in the horizontal position Clean the place around the level plug 2 and then unscrew it Check if the oil level reaches the bottom...

Page 101: ...ydraulic tank oil follow the instructions below 1 Park the roller on a level surface and turn off the engine 2 Use a container with the proper capacity to drain the hydraulic circuit tank 13 20 gal or 50 liters 3 Remove the battery cap in front of the wheel rears on the left side of the frame There is a drain cock 1 and a plug 2 on the right side inside the frame 4 Remove the hose connected to the...

Page 102: ...of the machine in a proper compartment 3 Unscrew the drain plug 2 and drain the remaining fuel inside the tank 4 Refit the drain plug and tighten it Using adulterated contaminated dirty or bad quality fuel damages the injection system and engine components The repairs due the conditions above are NOT covered by the warranty TAKE CARE OF THE ENVIRONMENT All the used waste shall be properly stored f...

Page 103: ...ather Empty the tanks compartments filters and tubes during such period or mixed fluid with water and antifreeze The coarse filter is inside the frame s upper compartment on the right side of the machine The filter housing 1 contains a drain cock 2 on the pumping system in the water tank The tank and pumping system parts can be drained through this cock The water hoses are connected to the pump wi...

Page 104: ...ainer to collect the coolant with 3 69 gal or 14 liters of capacity Be careful when draining the product Use gloves and protective goggles TAKE CARE OF THE ENVIRONMENT All used coolant shall be properly collected and store for subsequent recycling Do not dispose of the coolant on the ground sewage system or other place which can harm the environment 4 Unscrew the hexagon nut 1 remove the hose 2 an...

Page 105: ...ed Also check if the system hoses are not in contact with other components Check if there are no draining obstructions on the coolant unit There is a risk of condensation being accumulated inside the unit Check the air conditioning draining filter if equipped With the roller operating use the sight glass 1 to check if there are bubbles on the drying filter The filter is located on the upper rear o...

Page 106: ...itting of the upper pivot bearing 1 and the grease fitting of the lower pivot bearing 2 operating the grease gun manually with five pump strokes 2 Use the grease according to the lubricant specifications recommended by DYNAPAC 1 2 Fig Pivot bearings 1 Upper pivot bearing grease fitting 2 Lower pivot bearing grease fitting ...

Page 107: ...e applied Temperatures The limit temperatures are valid for series rollers The rollers with additional equipment like noise level diminution equipment may need special attention when they are operated in high temperatures High pressure washing It is important to keep in mind that the high pressure water must not be directed towards the fuel tank caps and the hydraulic system Cover the filling nozz...

Page 108: ...formed around the battery Check if the battery used for the jumper starting and the dead battery have the same tension Turn off the ignition key and all the power consuming equipment Turn off the roller engine supplying power to the jump starting The jump starting cables must have 24V Auxiliary starting When using a booster battery besides the ones installed on the roller always connect the positi...

Page 109: ...inside the engine compartment are located alongside the battery master switch The roller is equipped with a 24V electrical system supplied by an AC alternator Connect the batteries to the correct polarities negative posts to the mass NEVER disconnect the cable between the battery and the alternator when the engine is operating 1 Fig Main control box 1 ECU 2 Fuses 3 Main relay 2 1 Fig Battery compa...

Page 110: ...creen 5A 3 Main ECU PWR 1 10A 4 Main ECU PWR 2 10A option 5 Main ECU PWR 3 20A 6 Main ECU PWR 4 20A 7 Jack 24V 10A 8 Transmission ECU 10A F2 fuse box 1 Air during the operation 5A 2 Asphalt 10A 3 Backup 4 Backup 5 Backup 6 Backup 7 Driving lights 7 5A 8 Driving lights road 20A Fig F1 fuse box Fig F2 fuse box F1 F2 ...

Page 111: ...dscreen wiper washers right 10A 7 Empty 8 Empty Main fuses panel The main fuses panel is behind the battery master switch on the battery compartment 1 General key 2 Pre heating relay 120A 3 F20 fuse pre heating 120A 4 Starting relay 50A 5 F13 fuses engine ECU 30A F10 main 50A and F11 cab 50A 6 F5 fuse cab Radio CD player 10A 7 24V jack Fig Cab fuse box Fig Main fuses panel 2 1 3 4 7 5 6 ...

Page 112: ......

Page 113: ...Dynapac do Brasil Industria e Comercio de Maquinas Ltda Rua Georg Schaeffler 430 Sorocaba SP Brasil Tel 55 15 3412 7500 Fax 55 15 3412 7522 www dynapac com ...

Reviews: