12
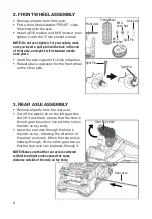
7. TOP RACK ASSEMBLY
• Find the top rack and its cross arm.
• The cross arm is marked with “F” and “R”
on its two ends. Find the corresponding
“F” and “R” markings on the top rack and
fit the cross arm to the corresponding spot
as shown in the diagram.
• Secure the cross arm to the top rack with
two 4x16 mm round head screws .
Cross Arm
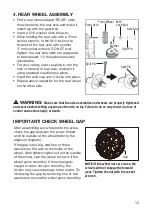
8. RACK FRONT SUPPORTS
ASSEMBLY
• Find one Front Support marked with an
“R1” and remove the M5x30 machine
screw and M5 locknut from it. Attach the
support to the corresponding U shaped
support also marked with an “R1”. Reinsert
the M5x30 machine screw as shown, and
tighten it with M5 locknut securely, as
shown at right.
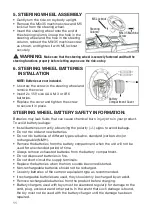
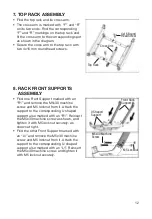
• Find the other Front Support marked with
an “L1” and remove the M5x30 machine
screw and M5 locknut from it. Attach the
support to the corresponding U-shaped
support also marked with an “L1”. Reinsert
the M5x30 machine screw, and tighten it
with M5 locknut securely.
4x16 Round
Head Screw
M5x30 Machine
Screw
M5 Locknut
Front Rack
Support
R1
R1
L1
L1
Top Rack
U Shaped
Support


