background image

CMS

3

4

IMPORTANT SAFETY INSTRUCTIONS

1.

Read these instructions.

2.

Keep these instructions.

3.

Heed all warnings.

4.

Follow all instructions.

5.

Do not use this apparatus near water.

6.

Clean only with a dry cloth.

7.

Do not cover any ventilation openings. Install in accordance with the manufacture’s instructions.

8.

Do not install near heat sources such as radiators, heat registers, stoves, or other apparatus (including amplifiers) that produce heat.

9.

Do not defeat the safety purpose of the polarized or the grounding-type plug. A polarized plug has two blades with one wider than the other. A grounding type plug has two
blades and a third grounding prong. The wide blade or the third prong are provided for your safety. I the provided plug does not fit into your outlet, consult an electrician for
replacement of the obsolete outlet.

10.

Protect the power cord from being walked on or pinched particularly at plugs, convenience receptacles, and the point where they exit from the apparatus.

11.

Only use attachments/accessories specified by the manufacturer.

12.

Use only with the cart, tripod, bracket, or table specified by the manufacturer, or sold with the apparatus. When a cart is used, use caution when moving
the cart/apparatus combination to avoid injury from tip-over.

13.

Unplug this apparatus during lightning storms or when unused for a long period of time.

14.

Refer all servicing to qualified service personnel. Servicing is required when the apparatus has been damaged in any way, such as power-supply cord or
plug is damaged, liquid has been spilled or orbjects have fallen into the apparatus, the apparatus has been exposed to rain or moisture, does not operate
normally, or has been dropped.

15.

Do not expose this equipment to dripping or splashing and ensure that no objects filled with liquids, such as vases, are placed on the equipment.

16.

To completely disconnect this equipment from the AC Mains, disconnect the power supply cord plug from the AC receptacle.

17.

The mains plug of the power supply cord shall remain readily operable.

18.

No naked flame sources, such as lighted candles, should be placed on the apparatus.

19.

The product should be connected to a mains socket outlet with a protective earthing connection.

IMPORTANT SERVICE INSTRUCTIONS

CAUTION: These servicing instructions are for use by qualified personnel only. To reduce the risk of electric shock, do not

perform any servicing other than that contained in the Operating Instructions unless you are qualified to do so. Refer

all servicing to qualified service personnel.

1.

Security regulations as stated in the EN 60065 (VDE 0860 / IEC 65) and the CSA E65 - 94 have to be obeyed when servicing the appliance.

2.

Use of a mains separator transformer is mandatory during maintenance while the appliance is opened, needs to be operated and is connected to the mains.

3.

Switch off the power before retrofitting any extensions, changing the mains voltage or the output voltage.

4.

The minimum distance between parts carrying mains voltage and any accessible metal piece (metal enclosure), respectively between the mains poles has to be 3 mm and
needs to be minded at all times. The minimum distance between parts carrying mains voltage and any switches or breakers that are not connected to the mains
(secondary parts) has to be 6 mm and needs to be minded at all times.

5.

Replacing special components that are marked in the circuit diagram using the security symbol (Note) is only permissible when using original parts.

6.

Altering the circuitry without prior consent or advice is not legitimate.

7.

Any work security regulations that are applicable at the locations where the appliance is being serviced have to be strictly obeyed. This applies also to any regulations
about the work place itself.

8.

All instructions concerning the handling of MOS-circuits have to be observed.

Due to line current harmonics, we recommend that you contact your supply authority before connection.

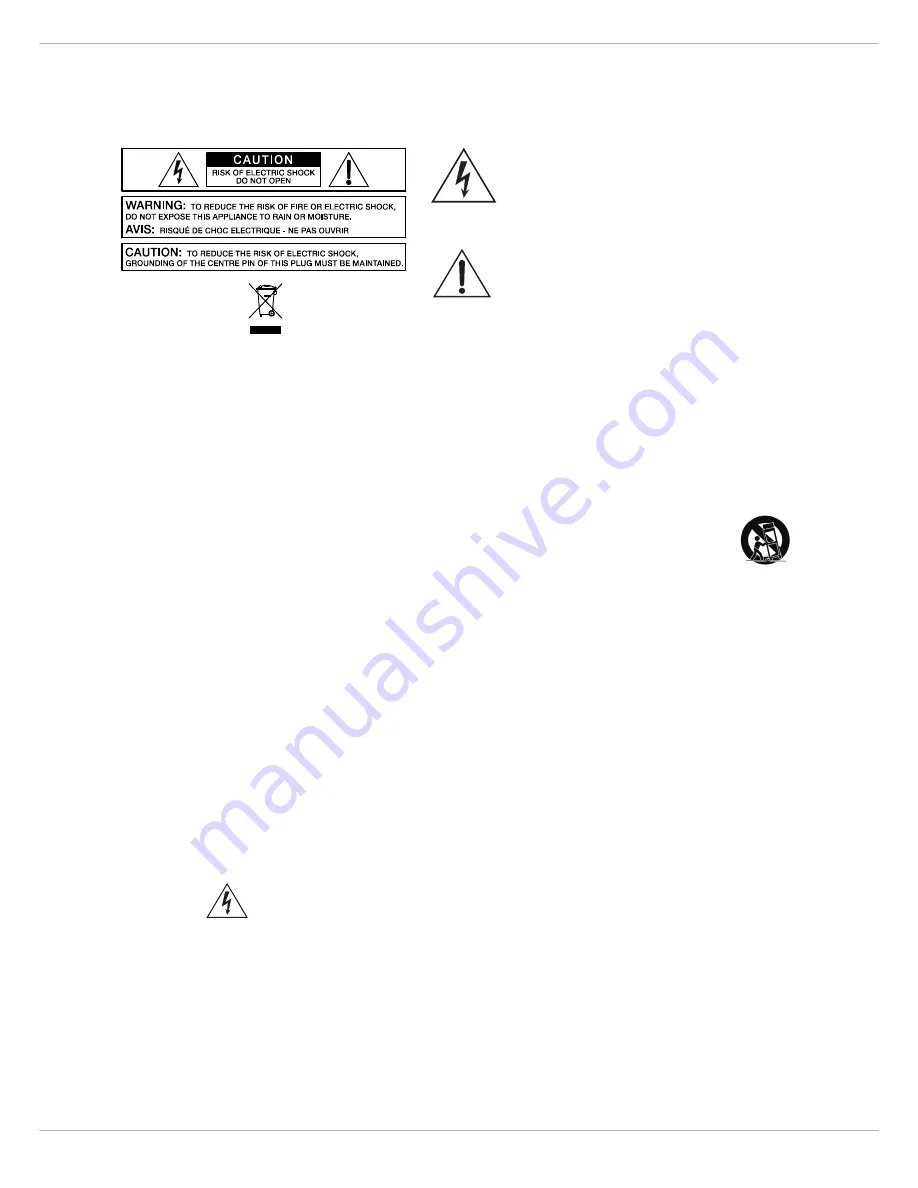
The lightning flash with arrowhead symbol, within an equilateral
triangle is intended to alert the user to the presence of uninsulated
„dangerous voltage“ within the product’s enclosure that may be of
sufficent magnitude to constitute a risk of electric shock to per-
sons.

The exclamation point within an equilateral triangle is intended to
alert the user to the presence of important operating and
maintance (servicing) instructions in the literature accompanying
the appliance.

NOTE:

SAFETY COMPONENT (MUST BE REPLACED BY ORIGINAL PART)

Summary of Contents for CMS 600-3

Page 1: ...CMS3 CMS 600 3 COMPACT MIXING SYSTEM Owner s Manual Bedienungsanleitung ...

Page 2: ...CMS3 2 ...

Page 3: ...with Xa 2 system 35 CMS with CORUS Evolution system 36 SPECIFICATIONS 73 Dimensions 75 Block Diagram 76 INHALT EINFÜHRUNG 39 Lieferumfang Auspacken und Überprüfen 39 Garantie 39 Aufstellen und Anschließen 39 BEDIENELEMENTE UND ANSCHLÜSSE 40 Input Mono 40 Input Stereo 44 FX 1 2 46 AUX 49 MON 49 MASTER mit GEQ 49 DISPLAY mit Funktions Tasten 54 Rückseite 54 DISPLAY FUNKTIONEN 56 Effekt Betriebsart 5...

Page 4: ...cted to a mains socket outlet with a protective earthing connection IMPORTANT SERVICE INSTRUCTIONS CAUTION These servicing instructions are for use by qualified personnel only To reduce the risk of electric shock do not perform any servicing other than that contained in the Operating Instructions unless you are qualified to do so Refer all servicing to qualified service personnel 1 Security regula...

Page 5: ...hows no external damages CAUTION Do not ship the CMS in any other than its original packaging Packing the CMS like it was packed by the manufacturer guarantees optimum protection from transport damage 1 2 Warranty Visit www dynacord com for warranty information 1 3 Installation and Connections Do not cover the ventilation louvers in the bottom plate of the appliance Always place the CMS on an even...

Page 6: ...on the setting of the corre sponding gain control Because of the low impedance and the switchable PHANTOM POWER the XLR input is preferred for MIC applications Because of the higher level and impedance matching the LINE input should be preferred for connecting further mixers effect units keyboards etc 2 LINE Electronically balanced inputs for the connection of electronic instruments such as keyboa...

Page 7: ... as loud as possible directly short distance into the microphone 4 While playing the sound source or singing into the microphone adjust the input level using the gain control so that during the loudest passages the PK LED is just not lit but the SIG present LED lights constantly This is the basic channel setting leaving you with at least 6 dB of headroom i e you have at least a range of 6 dB befor...

Page 8: ... PK LEDs in the FX 1 2 channels The indicator should only light briefly at the occurrence of high program peaks If the indicator is constantly lit you should lower the send levels of those channels where the program peaks occur For further information please read the paragraphs about the FX 1 2 units 7 AUX The AUX control is primarily meant for establishing an independent monitor mix The AUX mix i...

Page 9: ... and you have to turn the gain control a bit to the left The Signal LED lights at levels 30 dB below clipping while the peak LED lights at a level of 6 dB below the occurrence of overdrive Keeping an eye on the indicator during a performance is also a good idea because some very dynamically performing members of a band or changing keyboard setups can easily lead to channel clipping resulting in th...

Page 10: ...l or stereo phone plugs which are in accordance to the diagram below If the external appliance is equipped with a bal anced output stage using balanced cables and plugs is preferable since this type of connection pro vides improved shielding against HF induction and external noise In case you want to connect a monaural sound source to a stereo input channel you just have to plug it into the L MONO...

Page 11: ...ding outputs Whenever stereo sound sources are connected to a stereo input you should leave the BAL control at the center position or make only minor adjustments in either direction In case a monaural sound source is connected the BAL controls function absolutely identical to the PAN controls of the monaural input section 21 MUTE The MUTE button mutes the input signal post fader including all AUX ...

Page 12: ...s 40 These two effects are similarly suitable for live performances and recording applications This is the factory pre set configuration that can be changed any time AUX PRE POST In the default AUX PRE POST mode the FX control of the input channels are used for both effect units FX 1 and FX 2 see illustration 2 8 AUX to FX 2 For the independent usage of the effect units FX 1 and FX 2 the AUX to FX...

Page 13: ...e corresponding FX unit is activated and you can use the footswitch or MIDI device to switch the selected ef fect program on or off 28 PK LED These indicators signal if the internal FX units or the FX 1 2 SENDS signals are on the verge of clipping To achieve an adequate S N ratio please adjust the FX units input level as follows FX input level setting instructions 1 Establish a dry mix without eff...

Page 14: ...CMS3 14 ...

Page 15: ...R This fader controls the summed audio signal at the AUX output When used for monitoring this fader lets you control the volume of the monitor system When using the DIGITAL AUDIO INTERFACE for recording this fader also controls the volume of the sent channel USB 3 See page 26 for details about using the DIGITAL AUDIO INTERFACE 2 5 MON 34 MONITOR This output provides connection for an power amplifi...

Page 16: ...CMS3 16 ...

Page 17: ...rox two seconds after the mixer has been powered on which prevents power on noise when switching the mixer on or off Please also refer to the chapter Setting up a standard PA system 42 MASTER B OUTPUTS L R At the MASTER B OUTPUTS the L R master audio signal is present that can be used for additional monitoring side fill and next door applications or for the connection of a delay line or subwoofer ...

Page 18: ...CMS3 18 ...

Page 19: ...e the levels of the 12 kHz or 6 3 kHz band a bit If the MIDs are nasaling you should attenuate the mid range 500 Hz to 2 kHz by some decibels To provide the kick drum with more punch you have to boost the low frequency range using the 63 Hz or the 125 Hz controls In case the overall sound is undefined with too much bass lowering the levels of these two fre quency bands will solve the problem Howev...

Page 20: ...eir minimum position or engage the STANDBY switch before switch ing the power on This will save you your audience and the equipment from unnecessary stress In case additional external equipment is connected to the CMS e g power amps FX units EQs etc please proceed in the following order when switching your equipment on 1 switch on the FX units 2 switch on the CMS 3 switch on external power amps Wh...

Page 21: ... the display indicates the func tion for the four function keys The following table de scribes some of the functions avialable in menu dialogs Illustration 3 1 Effect mode BRIGHT HALL MONO DELAY PLAY 11 12 MIDI PEAK AUX 5 55 Large Hall 3 230 ms 40 FX1 FX2 1 2 3 4 5 6 7 8 9 10 11 12 13 14 15 Number Description 1 Play 11 12 indicator 2 MIDI indicator 3 PEAK indicator 4 Effect group of effect unit FX...

Page 22: ...pears Turn the MENU ENTER rotary encoder to select the user preset where the edited effect should be stored to Press the MENU ENTER rotary encoder to open the Set FX Name dialog Illustration 3 5 Menu structure of CMS Main Menu Edit FX 1 Edit FX 2 AUX Mode FX Control Setup Device Setup Display Brightness Show Device Name Play 11 12 at STDBY Factory Reset Device Setup Personalize Screensaver TAP But...

Page 23: ... method is recommended when the mixer is also located on the stage and you have to operate it yourself Setting all AUX controls to their center position the master mix is also present on the monitor bus giving you the oppor tunity to control the volume settings of each channel in dividually from the stage The overall volume of the monitor mix is set using the AUX fader in the master sec tion If yo...

Page 24: ...enu Pressing the ESC function returns to effect mode Show Device Name Press the MENU ENTER rotary encoder to edit the set ting Select On if the device name should be indicated in the display If Off is selected the name is not indicat ed Press the MENU ENTER rotary encoder to apply the selected setting Play 11 12 at STDBY Select enable if input 11 12 CD 3 4 should be used for playback of background...

Page 25: ...ight Plate bright plate no audible reflections piano guitar drums vocals 21 30 Echo Reverb bright echo reverb mix specially for Live vocals strings horns 31 33 Chorus light chorus piano guitar bass Rhodes strings 34 36 deep chorus organ piano guitar bass Rhodes strings 37 39 Chorus Echo deep chorus with fading echo organ guitar strings 40 Flanger real late sixties jet flanger drums prcussion bass ...

Page 26: ...Dynacord_USB Audio_Driver dmg Mac found in the CMS_600 3 directory Example When using Windows 32 Bit execute the file Setup exe in direc tory Driver Windows 32Bit CMS_600 3 5 Select the language of the application 6 Start installation of the USB driver for your opera ting system by clicking the corresponding button HINT If you are not sure which Windows Operating System is installed on your PC cli...

Page 27: ...rough input channels USB 1 2 of the CMS You can use the fader to control the volume like it is explained in detail in the In put Stereo section on page 10 DUAL STEREO PLAYBACK DJ APPLICATION The consistent 4 channel design of the DIGITAL AUDIO INTERFACE allows to pre listen the signal of the USB channels 3 4 via headphones using the PFL button while the current song is output e g via USB channels ...

Page 28: ...other HINT Make sure that during recording the signals of the room microphones are not included in the PA mix to prevent feedback Therefore the fad ers of the room channels have to be pulled all the way down The AUX way nevertheless has to be operated in pre fader mode in order to feed the signal to the DIGITAL AUDIO INTER FACE 4 7 MIDI tone generator and multi effect unit As already explained the...

Page 29: ...hnology a special pin assignment of the output jacks offering all advantages of the balanced sig nal transmission but lets you also connect monaural phone plugs without a problem Nevertheless as men tioned above when longer cables are involved using stereo phone plugs and balanced cables are the better al ternative The diagrams below show the pin assignments of plugs and cables that are used with ...

Page 30: ...els in use In case you are also using the stereo input channels LINE 9 10 or 11 12 you can adjust the levels in a similar way 1 Set the TRIM LINE CD controls and the channel fader to their lowest setting 2 Play the corresponding sound source at the highest volume that is to be expected during the perform ance 3 Use the TRIM LINE CD control to adjust the level so that even at loud passages the red ...

Page 31: ...es If you come to the conclusion that some corrections in the overall sound im age are necessary use the 9 band equalizer and match the sound to your liking By doing so you should keep in mind that during the performance the sound is going to be altered because the audience is present which has a major effect on the acoustical condition of the location the degree of first reflections and the absor...

Page 32: ...CMS3 32 6 Setup examples 6 1 CMS with D Lite activeone Illustration 6 1 CMS with D Lite activeone 2 x D 8A 1 x PowerSub 212 as main PA 1 x D 8A used as monitor ...

Page 33: ...CMS3 33 6 2 CMS with D Lite activetwo Illustration 6 2 CMS with D Lite activetwo 2 x D 8A 2 x PowerSub 112 as main PA 1 x D 8A used as monitor ...

Page 34: ...CMS3 34 6 3 CMS with D Lite activefour Illustration 6 3 CMS with D Lite activefour 2 x D 11A 2 x PowerSub 212 as main PA 1 x D 11A used as monitor ...

Page 35: ...CMS3 35 6 4 CMS with Xa 2 system Illustration 6 4 CMS with Xa 2 system 2 x FX 12 4 x FX20 2 x Xa 4000 as main PA 1 x D 8A used as monitor Xa 4000 Xa 4000 ...

Page 36: ...CMS3 36 6 5 CMS with CORUS Evolution system Illustration 6 5 CMS with CORUS Evolution system 2 x C 25 2 2 x Sub 2 18 2 x LX 3000 1 x DSP 260 as main PA 1 x D 11A used as monitor DSP 260 LX 3000 LX 3000 ...

Page 37: ...CMS3 37 ...

Page 38: ...i zu schalten muss der Netzstecker gezogen werden 17 Beim Einbau des Gerätes ist zu beachten dass der Netzstecker leicht zugänglich bleibt 18 Stellen Sie keine offenen Brandquellen wie z B brennende Kerzen auf das Gerät 19 Dieses SCHUTZKLASSE I Gerät muss an eine NETZ Steckdose mit Schutzleiter Anschluss angeschlossen werden WICHTIGE SERVICEHINWEISE ACHTUNG Diese Servicehinweise sind ausschließlic...

Page 39: ...ucht und getestet und sollte in einwandfreiem Zustand bei Ihnen ankommen Falls das CMS Beschädigungen aufweist benachrichtigen Sie bitte unverzüglich das Transportunternehmen Ein Transportschaden kann nur von Ihnen dem Empfänger reklamiert werden Bewahren Sie den Karton und das Verpackungsmaterial zwecks Besichtigung durch das Transportunternehmen auf Die Aufbewahrung des Kartons samt Verpackungs ...

Page 40: ...e jeweilige Bedienungs anleitung des verwendeten Mikrofons Der MIC Eingang ist in der Lage Pegel von 60 dBu bis 11 dBu in Abhängigkeit vom GAIN Regler zu verarbeiten Aufgrund der speziell auf Mikrofone abgestimmten niederohmigen Auslegung und der schaltbaren Phantomspannung sollten weitere Mischpulte Effekt geräte Keybords oder andere elektronische Geräte bevorzugt am LINE Eingang angeschlossen we...

Page 41: ... 1 GAIN Regler zudrehen und Kanalschieberegler schließen 2 Schließen Sie die gewünschte Quelle Mikro Instrument an der MIC oder LINE Buchse an 3 Spielen Sie das Signal mit der maximal zu erwartenden Lautstärke ein bzw singen oder sprechen Sie mit voller Lautstärke wobei Sie so nahe wie möglich am Mikrofon stehen sollten 4 Gleichen Sie dabei mit dem Regler den Pegel so ab dass auch bei sehr lauten ...

Page 42: ...g im Mittenbereich hervorragende Ergebnisse erzielen 6 FX REGLER Mit dem FX Regler können Sie das jeweilige Eingangssignal den eingebauten Digital Effektgeräten FX 1 und FX 2 stufenlos zumischen Das Signal wird nach dem Kanalschieberegler abgegriffen und ist somit von dessen Einstellung abhängig was mit POST FADER bezeichnet wird Sie können damit spezielle Effekte für die jeweilige Instrumentierun...

Page 43: ...isen Seite 41 beschrieben sollte die SIG LED Signal rhythmisch dem eingespielten Signal folgen Ist dies nicht der Fall dann muss am GAIN Regler nachgeregelt werden Leuchtet hingegen die PK LED teilweise oder ständig auf ist der Eingangskanal in akuter Übersteuerungsgefahr Es muss in jedem Fall am GAIN Regler die Verstärkung zurückgenommen werden Die SIG LED leuchtet bereits ca 30 dB und die PK LED...

Page 44: ...mmetrisch gespeist werden Verwendung von Klinken Steckern Verwenden Sie Mono bzw Stereoklinkenstecker 6 3 mm für die Eingänge 9 10 bzw 11 12 wie sie in der folgenden Abbildung gezeigt sind Wenn das anzuschließende Gerät symmetrische Ausgangs stufen besitzt ist in jedem Fall die symmetrische Signalführung mit Stereoklinkenkabel zu bevorzugen Die Verbindung ist dann unempfindlicher auf etwaige exter...

Page 45: ...d rechten Kanals mit gleicher Verstärkung an den Ausgängen zur Verfügung stehen Bei Verwendung mit Stereo Quellen sollten Sie daher den BAL Regler nur wenn nötig geringfügig aus der Mittelposition verdrehen Haben Sie eine Mono Quelle angeschlossen funktioniert der BAL Regler genauso wie der PAN Regler im Monokanal 21 MUTE SCHALTER Der MUTE Schalter schaltet das Eingangssignal ab dem Kanalschiebere...

Page 46: ...rk starten die Effektteile beim Einschalten des Gerätes immer mit der voreingestellten Programmnummer 05 BRIGHT HALL Large Hall 3 für FX 1 und 55 MONO DELAY 230 ms 40 für FX 2 Diese Effekte sind auf der Bühne beim Recording und auch beim gleichzeitigen Betrieb beider Effektteile sehr gut zu ver wenden Die Startprogramme können allerdings beliebig verändert werden siehe Seite 58 AUX PRE POST In der...

Page 47: ...ert die grüne ON LED leuchtet Beachten Sie auch dass eine Bedienung der ON Funktion über einen externen Fußschalter oder MIDI möglich ist Die LED zeigt auch dann immer an ob der Effekt eingeschaltet ist oder nicht Wenn Sie einen Fußschalter oder die Fernsteuerung über MIDI be nutzen wollen muss immer der FX ON Schalter gedrückt sein Das entsprechende Effektteil ist dann aktiviert und Sie können es...

Page 48: ...CMS3 48 ...

Page 49: ... Ausgang und ist somit beim Monitoring der Lautstär keregler für die Monitoranlage Bei Verwendung des DIGITAL AUDIO INTERFACE zur Aufnahme regelt dieser Schiebe regler zugleich die Lautstärke des über den Kanal 3 ausgegebenen Audiosignals Weitere Hinweise zur Verwendung des DIGITAL AUDIO INTERFACE finden Sie auf Seite 61 2 5 MON 34 MONITOR BUCHSE An der MONITOR Buchse steht die Abmischung die Sie ...

Page 50: ...CMS3 50 ...

Page 51: ...terfader L R angeordnet sind Es stehen sowohl elektronisch symmetrische XLR als auch unsymmetrische Klinken Buchsen zur Verfügung Die MASTER Ausgänge sind mit Ausgangs relais ausgestattet durch die Knackgeräusche beim Ein bzw Ausschalten des Gerätes unterdrückt werden Bitte beachten Sie dass das Mastersignal erst ca 2 Sekunden nach dem Einschalten des CMS auf die Ausgänge geschaltet wird Lesen Sie...

Page 52: ...CMS3 52 ...

Page 53: ...ecken mehr Durchsetzungskraft verleihen so heben Sie im Bereich von 6 3 kHz bzw 12 kHz etwas an Ist der Sound sehr nasal und mittenbetont so senken Sie im Mittenfrequenzbereich 500 Hz bis 2 kHz leicht ab Wollen Sie jedoch einen bassreichen Sound und vielleicht die Bassdrum besser hervor heben dann bewegen Sie den 63 Hz bzw 125 Hz Regler etwas nach oben Erscheint der Sound hingegen zu basslastig od...

Page 54: ... der Musik angepasst werden Die gelbe LED blinkt entsprechend der aktuellen Delay Zeit Bitte beachten Sie zur Funktion der TAP Taste auch den Parameter TAP Button Ctrl siehe Abschnitt FX Control Setup auf Seite 58 2 8 Rückseite 55 NETZBUCHSE Die Spannungsversorgung des CMS erfolgt ausschließlich mit dem mitgelieferten IEC Netzkabel über eine verriegelnde Netzbuchse Schließen Sie das CMS nur an ein...

Page 55: ...ung oder sogar Rückkopplungen Für angeschlossene Leistungsverstärker und andere elektronische Geräte wie z B Effektgeräte verfahren Sie bitte bei der Inbetriebnahme der Anlage wie folgt 1 Effektteile einschalten 2 CMS einschalten 3 Leistungsverstärker einschalten Beim Ausschalten der Anlage gehen Sie genau umgekehrt vor 57 MIDI IN OUT BUCHSEN Diese Buchsen erlauben den Anschluss von MIDI Geräten N...

Page 56: ...rte Wert dann übernommen Die unterste Zeile im Display zeigt stets die Funktion für die vier Funktionstasten an die bei Betätigung der Taste ausgeführt wird Folgende Tabelle erläutert einige der in den verschiedenen Dialogen zur Verfügung stehenden Funktionen Abbildung 3 1 Anzeige in der Effekt Betriebsart BRIGHT HALL MONO DELAY PLAY 11 12 MIDI PEAK AUX 5 55 Large Hall 3 230 ms 40 FX1 FX2 1 2 3 4 ...

Page 57: ...rük ken Sie die SAVE Funktionstaste folgender FX User Presets Dialog erscheint Wählen Sie im FX User Presets Dialog den gewünschten Speicherplatz durch Drehen des MENU ENTER Drehencoders Drücken des MENU ENTER Drehencoders öffnet den Set FX Name Dialog Abbildung 3 5 Menüstruktur des CMS Main Menu Edit FX 1 Edit FX 2 AUX Mode FX Control Setup Device Setup Display Brightness Show Device Name Play 11...

Page 58: ...rung von Effektgeräten oder für spezielle Monitorabmischungen benutzt Müssen Sie beispielsweise ohne Tontechniker am Mischpult ar beiten oder von der Bühne aus mischen kann die POST Fader Abmischung sinnvoller sein Indem Sie alle AUX Regler in Mittelstellung bringen wird praktisch die Hauptabmischung auf den Monitormix übernommen und die Lautstärkeverhältnisse der einzelnen Kanäle zuei nander könn...

Page 59: ...ENTER Drehencoder nach links oder rechts um das mit dem Cursor markierte Zeichen zu ändern Drücken des MENU ENTER Drehencoders über nimmt das gewählte Zeichen und bewegt den Cursor um eine Stelle nach rechts Mit den Funktionstasten bzw kann der Cursor nach links bzw rechts bewegt wer den Wählen Sie das Zeichen oder drücken Sie die Funktionstaste OK um die Eingabe zu beenden Drücken der BACK Funkti...

Page 60: ...Tabelle 3 15 Werkseinstellungen Parameter Wert AUX Routing PRE Footswitch Ctrl FX 1 2 TAP Button Ctrl FX 1 2 FX 1 Start Preset 5 FX 2 Start Preset 55 FX 1 MIDI Channel Off FX 2 MIDI Channel Off MIDI PrgCh Count 1 128 Display Brightness 100 Screensaver Off Device Name CMS Show Device Name On Play 11 12 at STDBY Disable Tabelle 3 16 CMS Effekt Presets Nr Effektgruppe Beschreibung Bevorzugte Anwendun...

Page 61: ...is Driver 4 Starten Sie die Installation durch Doppelklick auf die Datei Setup exe Windows bzw Dynacord_USB Audio_Driver dmg Mac im Unter zeichnis CMS_600 3 Beispiel Bei Verwendung von Windows 32 Bit starten Sie die Datei Setup exe im Verzeichnis Driver Windows 32Bit CMS_600 3 HINWEIS Falls Sie nicht sicher sind welches Windows Betriebssystem Sie verwenden klicken Sie bitte auf Start und wechseln ...

Page 62: ...ten Effektteile die Sie z B über einen MIDI Fußschalter fernbedienen an den PC übermittelt werden Eine Fehlinterpretation der Daten lässt sich durch eine geeignete Auswahl der MIDI Kanäle vermeiden beachten Sie hierzu Abschnitt FX Control Setup auf Seite 58 und die Dokumentation der von Ihnen verwendeten Software Abbildung 4 1 Konfiguration von Cubase LE Abbildung 4 2 DIGITAL AUDIO INTERFACE Anzei...

Page 63: ...ird automa tisch auch der ASIO Treiber mitinstalliert Zur Zuweisung der Ausspielwege auf die Wiedergabekanäle des CMS beachten Sie die Dokumentation der von Ihnen ver wendeten Software 4 6 Anwendungsbeispiel Aufnahme Bei der folgenden Anwendung wird Ihr PC Mac zur Aufnahme verwendet das CMS fungiert hierbei als hoch wertiger Analog Digital Wandler eine weitere Soundkar te wird also nicht benötigt ...

Page 64: ...die vor wenigen Jahren nur bei aufwändigen Studio Synthesizern zu finden wa ren Schließen Sie das Master Keyboard an die MIDI IN Buchse an und wählen Sie in der Software das MIDI In terface als Eingang für den Klangerzeuger Die computer generierten Sounds werden über einen der beiden USB Stereokanalzüge an das CMS zurückübertragen Mit den Fadern können Sie bequem die Lautstärke einstellen so als o...

Page 65: ...sführung in Verbindung mit der Gleichtaktunterdrückung der Eingangsstufe wirkungsvoll eleminiert Im CMS sind alle XLR und Klinken Eingänge symmetrisch und mit hoher Gleichtaktunterdrückung ausgeführt Die Ausgänge wie AUX MASTER MONITOR im Mischerteil des CMS sind generell in GND SENSING Technik ausgelegt Dies ist eine spezielle Beschaltung der Ausgangsbuchsen die im wesentlichen die Vorteile der s...

Page 66: ...Stellen Sie wenn nötig den HI MID und LOW Regler ausgehend von der Mittelstellung nach Ihrem persönlichen Geschmack ein 3 Wiederholen Sie die Punkte 1 7 für alle belegten Eingangskanäle Wenn Sie auch die Stereo Eingangskanäle LINE 9 10 bzw 11 12 belegt haben pegeln Sie diese wie folgt ein 1 TRIM LINE CD zudrehen und Kanalschieberegler schließen 2 Spielen Sie mit dem jeweiligen Instrument mit der m...

Page 67: ...m Monitor generell weniger Effektsignal nötig ist als auf der Haupt PA LETZTE KORREKTUREN Spielen Sie nun im komplett Setup und hören Sie die Haupt PA aus verschiedenen Entfernungen ab Falls Sie den Einduck gewinnen dass noch Klangkorrekturen nötig sind gleichen Sie den Sound mit dem 9 Band STEREO MASTER GRAPHIC EQUALIZER optimal an Bedenken Sie aber dass sich das Klangbild und hier vorallem die R...

Page 68: ...CMS3 68 6 Aufbaubeispiele 6 1 CMS mit D Lite activeone Abbildung 6 1 CMS mit D Lite activeone 2 x D 8A 1 x PowerSub 212 als Haupt PA zusätzlich 1 x D 8A für den Monitorweg ...

Page 69: ...CMS3 69 6 2 CMS mit D Lite activetwo Abbildung 6 2 CMS mit D Lite activetwo 2 x D 8A 2 x PowerSub 112 als Haupt PA zusätzlich 1 x D 8A für den Monitorweg ...

Page 70: ...CMS3 70 6 3 CMS mit D Lite activefour Abbildung 6 3 CMS mit D Lite activefour 2 x D 11A 2 x PowerSub 212 als Haupt PA zusätzlich 1 x D 11A für den Monitorweg ...

Page 71: ...CMS3 71 6 4 CMS mit Xa 2 System Abbildung 6 4 CMS mit Xa 2 System 2 x FX 12 4 x FX20 2 x Xa 4000 als Haupt PA zusätzlich 1 x D 8A für den Monitorweg Xa 4000 Xa 4000 ...

Page 72: ...72 6 5 CMS mit CORUS Evolution System Abbildung 6 5 CMS mit CORUS Evolution System 2 x C 25 2 2 x Sub 2 18 2 x LX 3000 1 x DSP 260 als Haupt PA zusätzlich 1 x D 11A für den Monitorweg DSP 260 LX 3000 LX 3000 ...

Page 73: ...Level mixing desk MIC inputs 12 dBu Mono Line inputs 31 dBu Stereo Line inputs 30 dBu All other inputs 22 dBu All other outputs 22 dBu Input Impedances MIC 2 kOhms CD In 10 kOhms All other inputs 15 kOhms Output Impedances Phones 47 Ohms All other outputs 75 Ohms unbalanced 150 Ohms balanced Equivalent Input Noise MIC input A weighted 150 ohms 130 dBu Noise Channel inputs to Master A L R outputs A...

Page 74: ...ervoltage Phantom Power switchable 48 V DC Power Requirements SMPS with auto range mains input 100 V to 240 V AC 50 Hz to 60 Hz Power Consumption at 1 8 maximum output power 4 Ohms 35 W Safety Class I Ambient Temperature Limits 5 C to 40 C 40 F to 105 F Dimensions W x H x D mm 416 9 x 10⁹ 6 x 347 8 Rack mount 7 5 HE 483 0 x 99 1 x 332 6 Weight Net Weight 5 8 kg Shipping Weight 7 8 kg Warranty 36 m...

Page 75: ...CMS3 75 7 1 Dimensions ...

Page 76: ...CMS3 76 7 2 Block Diagram ...

Page 77: ...countries Apple Macintosh Mac OS and Mac OS X are trademarks of Apple Inc registered in the United States and other countries Cubase is a registered trademark of Steinberg Media Technologies GmbH ASIO is a trademark of Steinberg Media Technologies GmbH Other company names product names and logos in this document are the trademarks or registered trademarks of their respective owners ...

Page 78: ...CMS3 78 Notes ...

Page 79: ...CMS3 79 ...

Page 80: ...2 844 4051 Fax 1 952 884 0043 49 9421 706 0 Fax 49 9421 706 265 Asia Pacific only For customer orders contact Customer Service at www dynacord com 65 6571 2534 Fax 65 6571 2699 For technical assistance contact Technical Support at 49 9421 706 0 Bosch Communications Systems 05 2012 PartNumberF01U250630 Vs03 Specifications subject to change without notice ...

Reviews: