


Using the Label Editor
8
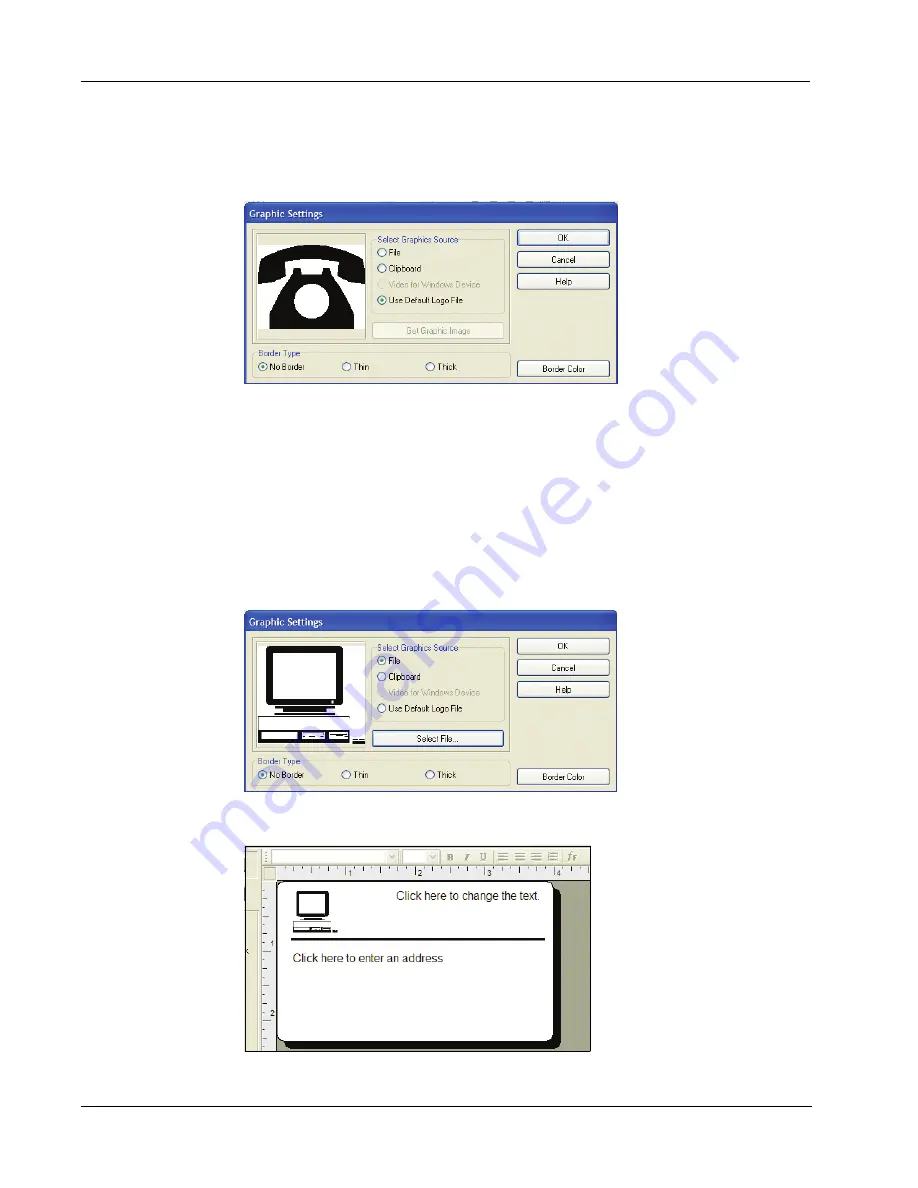
To change the graphic
1
Double-click the graphic that appears on the label.
The
Graphic Settings
dialog box appears.
2
Select
File
under
Select Graphics Source
.
The
Insert Image
button changes to read
Select File
.
3
Click
Select File
.
The
File open dialog box appears listing the contents of the default Clipart folder.
4
Select the
Miscellaneous
folder and click
Open
. The contents of the Miscellaneous folder
appear.
5
Select
Comput1.bmp
from the Miscellaneous folder.
A preview showing the contents of the Comput1.bmp graphic file appears in the dialog box.
6
Click
Open
.
The Comput1.bmp graphic appears in the
Graphic Settings
dialog box.
7
Click
OK
.
The computer graphic is placed on the label replacing the telephone graphic.
Summary of Contents for LabelWriter 450 Duo Label Printer
Page 1: ...DYMO Label Software User Guide Version 7 6 ...
Page 8: ...Introduction 4 ...
Page 16: ...Using the Label Editor 12 ...
Page 32: ...Using the LabelWriter Printer with Other Applications 28 ...
Page 46: ...Using the Tape Editor 42 ...
Page 50: ...Caring for Your LabelWriter Printer 46 ...
Page 54: ...Technical Specifications 50 ...
Page 63: ...59 W WMF 34 Word Add in 25 WordPerfect 26 ...
Page 64: ...60 ...


