9
Configuring the print server software
THERMAL TICKET PRINT SERVER
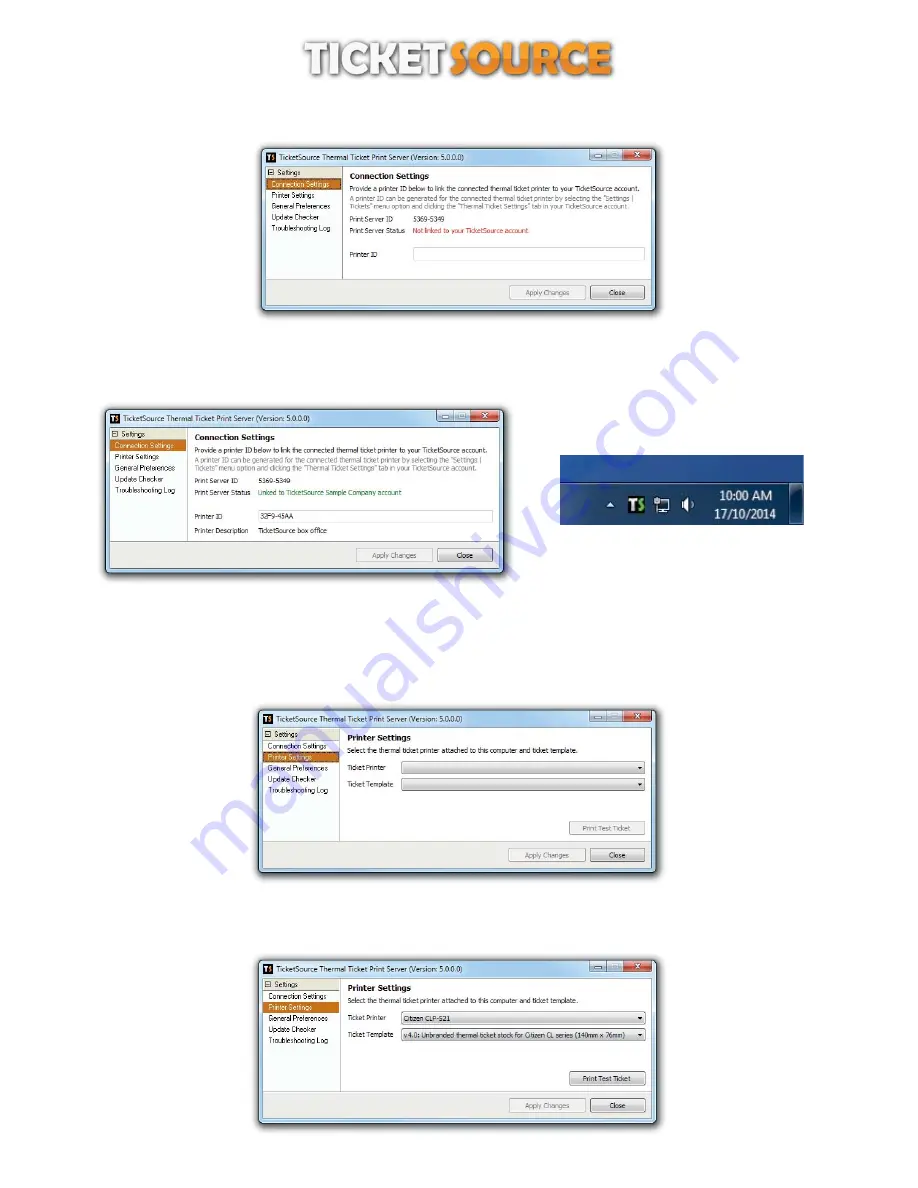
Figure 8: Connection Settings
enter the Printer ID that you noted down earlier,
click “Apply Changes”,
the TicketSource thermal ticket printer server will establish a link to your TicketSource account
.
(figures 9 and 10)
Figure 9: Connection Settings - link established
Figure 10: System tray icon - link established
click the “Printer Settings” option to specify your printing preferences
,
(figure 11)
choose your thermal ticket printer from the list of printers installed on your computer,
select the ticket template that matches your thermal ticket stock from the list of available templates,
click “Apply Changes”.
Figure 11: Printer Settings
you should now be able to click “Print Test Ticket” to print a test ticket to your connected printer
.
(figure 12)
Figure 12: Printer Settings - configured


