Encoder Configuration
The camera’s built-in encoder should be “bench configured” before the camera is installed in
the field. Each camera comes with a default IP address, which is typically listed on a sticker
affixed to it (some early models of the camera do not have this sticker. In that case, the
default IP address is
192.168.0.1
).
1.
Install the DVTel ActiveX extensions on your computer. The application can be found
in the
firmware
folder of the installation CD under the name
DVTELACX.exe
.
2.
Launch Internet Explorer and open
Internet Options
from the
Tools
menu. Switch to
the
Security
tab and click
Local intranet
and then the
Custom Level
button. Change
all the ActiveX setting to either
Prompt
or
Enable
.
3.
and download and install the latest version of the
Java Virtual Machine.
4.
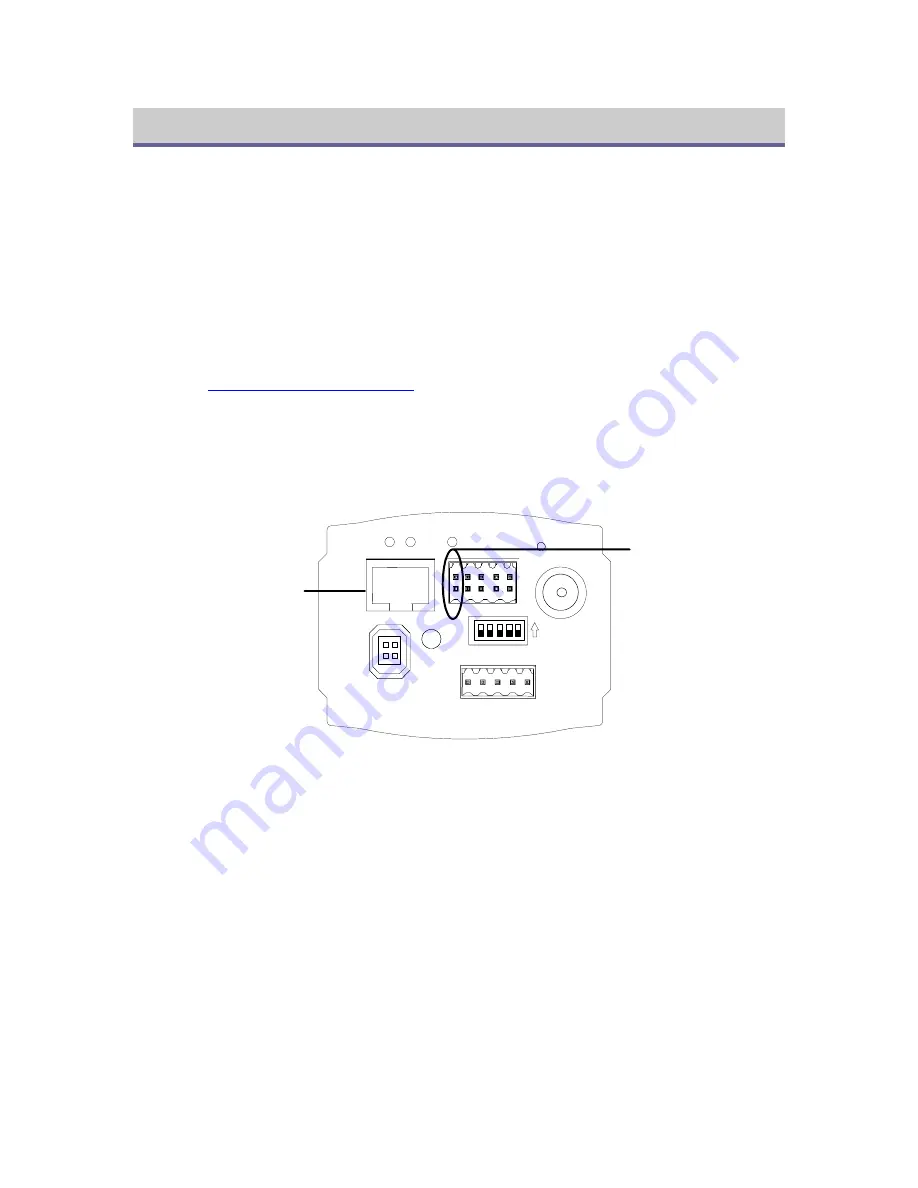
Using a small screwdriver, connect a 12-24 VDC power supply’s positive and negative
leads to the corresponding pins of the 10-block terminal block. Plug the terminal block
into the back of the camera. You can also power the camera using
non-standard
12-24
VDC Power over Ethernet. Do not use standard 48 VDC PoE (IEEE 802.3af).
LINK
ETHERNET
DC LENS
ACT
Rx+Tx+Rx-Tx-GND
RS232 / 485
LEVEL
ON
OFF 1.FLON
2.BLC
3.ALC/ELC
4.AGC
5.Hi-GAIN
STATUS
R
GND
IN2
-
+ R IN1 Lo Li
VIDEO
RESET
12-24 VDC
Power
Connection
Network and
Optional PoE
Connection
Figure 2 - IP Camera Rear Panel
5.
Connect the camera to your network with a CAT5 cable.
6.
Configure your computer’s network settings so that it can connect to devices with IP
addresses of the form 192.168.0.X. See your network administrator for information on
how to do this.
7.
Enter the encoder’s IP address in Internet Explorer Address field and press Enter.
5


