8
RMO200
Getting Started
6 Getting Started
6.1 Connecting a Test Object to RMO200
Before you connect a test object to RMO200, make sure that:
• the test object is disconnected or separated from its circuit in accordance with
the national safety regulations,
• the test object is properly grounded to protective earth (PE),
• RMO200 itself is properly grounded. To do so, connect the grounding screw on
the back of RMO200’s to PE using a grounding cable.
6.2 Setting the Measurement Parameters
Single Test
Turn on RMO200 with the power switch on the back of the test set. The display
shows the
Sing
menu.
In the
Sing
menu, define a test current for the test. To do so set the value of your
choice by means of the
UP/DOWN
buttons.
The memory position (here
m:30
) denotes a position the test data is stored during
the test. It can be recalled later by selecting that position’s number.
Once a test is finished, the memory position is automatically switched over to the
next position.
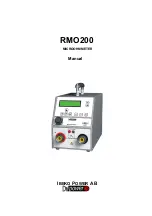
Figure 6-1:
Connecting a test
object to RMO200
Figure 6-2:
The
Sing
menu
Test current
Memory position
Time
Menu name
Date
With RMO200 turned off,
connect RMO200 to the test
object (R
X
) in such a way that the
measuring cables from the
"Voltage Sense" sockets are
attached as close as possible to
R
X
, and in between the current
feeding cables. That way,
resistance of both cables and
clamps is almost completely
excluded from the resistance
measurement.
To take care about polarity
while connecting measuring
cables. Measuring results will
be incorrect as a consequence
of error.

