18
Set Up
Platter and belt installation
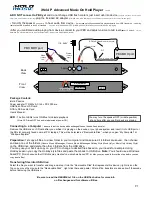
The record player is delivered with the drive belt already fitted around the turntable flange.
The belt is provided with a red tape so that it can be pulled over the drive motor pulley. (pic. 1)
1.
Place the turntable on the turntable spindle. Rotate the turntable until the cut-out
is positioned over the motor pulley (at about the 8 o'clock position).
2.
Using the red tape, pull the drive belt over the motor drive pulley and position
it in the centre of the pulley. Then remove the red tape.
3.
Now place the turntable mat on the turntable.
Tonearm
The tonearm is secured at the tonearm rest with a coated wire and the safety clip.
Remove and discard the coated wire and open the safety clip to play the record.
Fitting the headshell
Fit the removable headshell onto the tonearm as described below: (pic. 2)
1.
Place the headshell (1) into the socket (2) at the end of the tonearm (3).
2.
Hold the headshell, while turning the socket (2) in the direction of the arrow.
Counterweight fitting
Fit the supplied counterweight (2) onto the tonearm (1) by screwing it on from behind.
Keep the dial facing forward. The counterweight is used to set the correct tracking force
for the pick-up. (pic. 3)
Balancing the tonearm
Damage to the stylus
Ensure that the stylus does not come in contact with
the platter mat, or any other part of the turntable.
1. Place the turntable on an even horizontal surface.
2. Remove the stylus guard (page 20).
3. Lower the tonearm lift via the tonearm lift lever.
4. Position the tonearm in between the platter and the tonearm rest. (not resting on the stylus)
5. Turn the anti-
skating dial (3) to „0”
(pic. 3).
6. Turn the counterweight (2) backwards or forwards until the tonearm reaches a horizontal balance.
7. Place the balanced tonearm back onto the tonearm rest and secure it with the clip.
8. (Pic 4
) Hold the counterweight (1) in position while turning the tracking force dial (2) to „0“ (12 o’clock position).
Tracking force
The tracking force needs to be adjusted according to the installed pick-up. (pic. 4)
1. Adjust the entire counterweight (1) including the scale to the required weight (2).
2. The tracking force weight can be read from the scale.
Note:
The recommended force / weight for the supplied pick up is between 1,6 g and 2,0 g.
If in doubt, please consult the pick-up manufacturer for recommended values.
Anti-Skating-adjustment
The skating force pulls the tonearm towards the centre of the platter. This increases the
pressure on the inside wall of the groove. The ANTI-Skating force compensates
this movement and ensures the ideal tracking of the stereo information on the vinyl.
• Set the Anti
-skating dial (1) to the same value setting as the tracking force. (pic. 5)
Pic. 2
Pic. 3
Pic. 4
Pic. 5
Tape Motorpully
Belt
Pic. 1
1
2
1
2
3
1
1
2
3


