background image

INSTALLATION MANUAL

RK SERIES - DVR and NVR

Page:

 44

mouse.

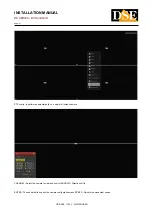
DRAG CAMERAS - If you want, you can drag a camera with the mouse to change its position in the monitor.

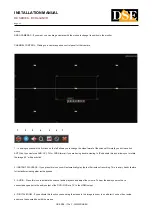
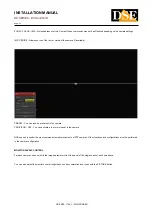
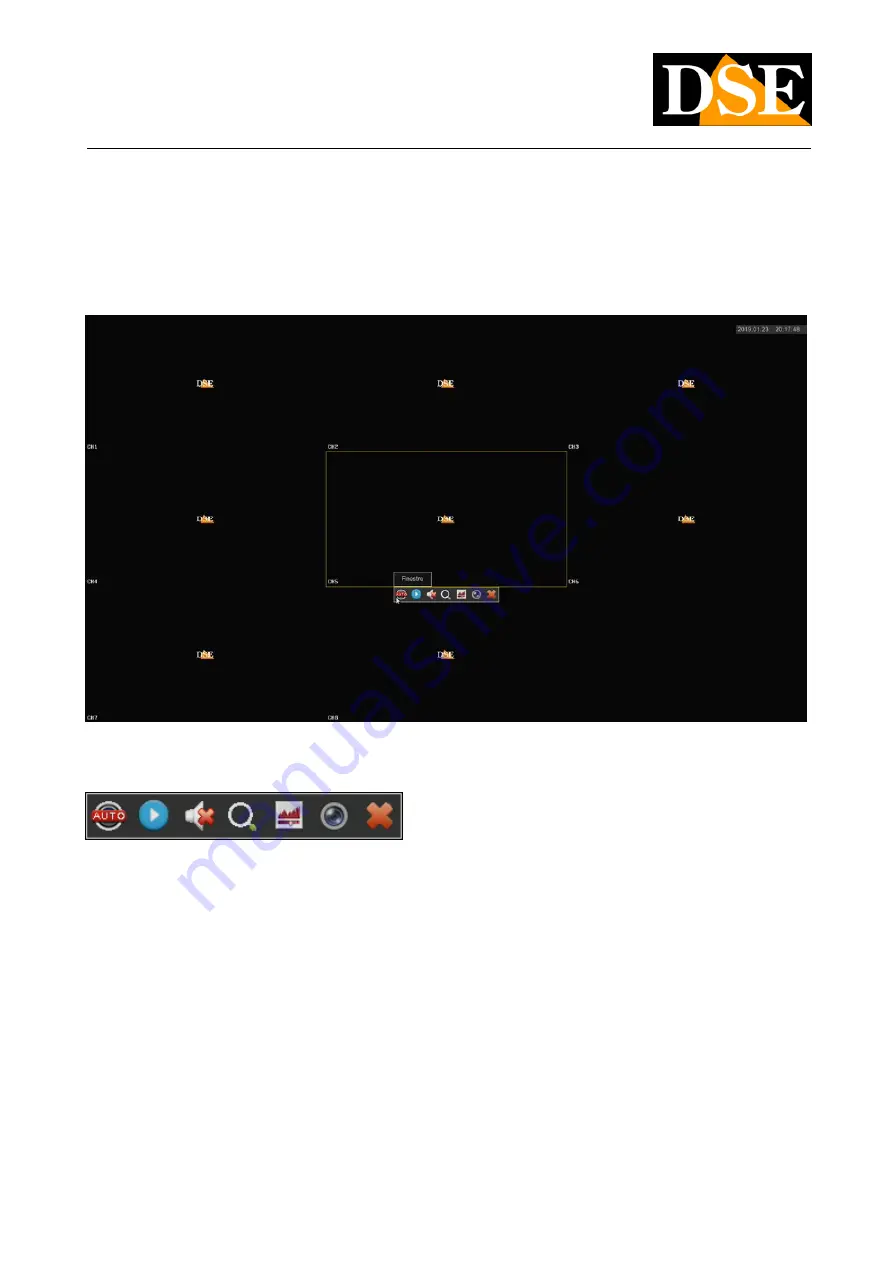
CHANNEL CONTROL - Clicking on a camera opens a control panel for that camera.

1

2

3

4

5

6

7

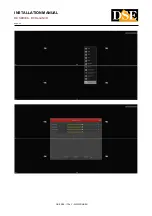
1 - In analogue channels the first icon on the left allows you to change the video format of the channel. Normally you will leave it on 

AUTO, but you can force AHD, CVI, TVI or CVBS format if you are having trouble viewing. In IP channels this icon allows you to rotate 

the image 90 ° with each click.

2 - INSTANT PLAYBACK - If you press this icon you will automatically play the last 5 minutes of recording. This is a very handy feature 

for instantly reviewing what just happened.

3 - AUDIO - Press this icon to activate the channel audio playback and adjust the volume. To hear the audio you must have 

connected a speaker to the audio output of the DVR / NVR or a TV to the HDMI output.

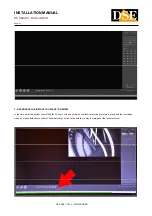
4 - DIGITAL ZOOM - If you activate this function you can drag the mouse in the image to zoom in on a detail. You can then resize 

and move the zoomed box with the mouse.

DSE SRL - ITALY - WWW.DSE.EU

Summary of Contents for RK Series

Page 1: ...INSTALLATION MANUAL RK SERIES DVR and NVR Page 1 RK SERIES DVR and NVR Installation manual How to install the system How to connect to the network DSE SRL ITALY WWW DSE EU ...

Page 2: ...NVR models are for connecting IP cameras The DVR models have BNC inputs to connect AHD CVI TVI CVBS analog cameras but can also manage IP cameras if you disable some analog inputs This manual explains how to install cameras and video recorder how to make basic adjustments and how to connect from a computer on the internal network DSE SRL ITALY WWW DSE EU ...

Page 3: ...as to be connected If you connect analog cameras you have to supply them with power and then connect the video signal with a coaxial cable or a twisted pair with balun If you connect IP cameras to the network you need to configure their IP address For these operations you must follow the camera manual DSE SRL ITALY WWW DSE EU ...

Page 4: ... to 8 Hard Disks inside the video recorder You can easily understand the direction in which the disk should be mounted by looking at the holes on the bottom of the DVR NVR Remove the cover by unscrewing the side screws e rear Connect the hard disk with the two cables of power and data you find inside If there are multiple ports choose any pair Secure the hard drive with the 4 screws provided that ...

Page 5: ...E button on the remote control These DVRs come from the factory with a low output resolution that you can increase up to 4K to match the monitor s maximum resolution Remember that the HDMI cable cannot be longer than a few meters To connect a remote HDMI monitor from the NVR you need to use an HDMI transmission device VGA You can connect a computer monitor not of the latest generation to this outp...

Page 6: ... it in the camera manual You will then need to configure the transmission protocol in the PTZ configuration of the DVR Motorized IP cameras do not require this connection because they are controlled via the network cable DC 12V Connect the included 12VDC power supply here Be careful not to confuse the power supply of the DVR NVR which has at least 2A of power with other smaller ones that you have ...

Page 7: ...the SOURCE button on the remote control These DVRs come from the factory with a low output resolution that you can increase up to 4K to match the monitor s maximum resolution Remember that the HDMI cable cannot be longer than a few meters To connect a remote monitor from the NVR you need to use an HDMI transmission device USB You can connect the mouse included with the DVR to the USB ports and USB...

Page 8: ...INSTALLATION MANUAL RK SERIES DVR and NVR Page 8 DC 12V Connect the included 12VDC power supply here DSE SRL ITALY WWW DSE EU ...

Page 9: ...from a few years ago DVRs NVRs are factory programmed to provide low resolution 1280x1024 to be compatible with all monitors Once you have connected the monitor and started the DVR NVR you should increase the resolution of the video output up to the maximum supported by your monitor usually FullHD 1920x1080 or 4K If starting the DVR NVR you only see the DSE logo and then nothing more it is because...

Page 10: ...N MANUAL RK SERIES DVR and NVR Page 10 Remember that the HDMI cable cannot be longer than a few meters To connect a remote monitor from the NVR you need to use an HDMI transmission device DSE SRL ITALY WWW DSE EU ...

Page 11: ...bes the options available in the wizard A more detailed description can be found in the configuration manual All windows of the setup wizard are also accessible later in the setup menu 1 START THE GUIDED PROCEDURE When turned on the guided procedure starts After using it you can choose to remove the tick to stop using this procedure in future start ups 2 LOG IN TO THE SYSTEM Enter the factory pass...

Page 12: ...at it would be advisable to customize the password It is an important operation to protect your privacy but it is better to do it later in the configuration menu when you have become familiar with the system If you decide to change the login password to your NVR DVR first you must be DSE SRL ITALY WWW DSE EU ...

Page 13: ...to easily recover your password by email if you forget it 3 SET THE GENERAL OPTIONS In the first section of the guided procedure the general system options are set LANGUAGE Choose the menu language RECORD MODE Choose OVERWRITE to overwrite the oldest file once the HDD space runs out DAYS PRESERVED Set if you want a capacity limit of the video archive for privacy reasons VIDEO STANDARD Leave the PA...

Page 14: ...t the time and date management You can set a manual date and time or you can choose to synchronize your DVR NVR with an NTP server via the Internet by setting the Italian time zone GMT 1 In the last section you can set the automatic switching between summer and winter time DSE SRL ITALY WWW DSE EU ...

Page 15: ...tain the parameters automatically from the network router 5 ADD THE CAMERAS Analog cameras connect to the BNC ports and are immediately available If you want to connect IP cameras to your DVR NVR you must first configure them appropriately in the external network or connect them to the LAN ports of the NVR NVR with poe ports In this section of the procedure you can add the IP cameras you have netw...

Page 16: ...tinuous recording and yellow where you want to record in motion detection i e only in the presence of movements We recommend that you keep the factory continuous recording for now and then eventually set up motion alarm detection and motion recording later following the advanced setup manual DSE SRL ITALY WWW DSE EU ...

Page 17: ...INSTALLATION MANUAL RK SERIES DVR and NVR Page 17 FINISHED At the end of the wizard your CCTV system is already working DSE SRL ITALY WWW DSE EU ...

Page 18: ...etwork To do this use a network cable and connect the NET NETWORK port to a free port on your router or switch Verify that the port LEDs turn on solid green and flashing yellow this means the hardware connection is correct If your NVR has POE LAN ports for cameras do not use them to connect the external network as it will not work The external network towards your Internet router must be connected...

Page 19: ...on t have to worry about entering any parameters However before connecting remotely with PCs and mobile phones it is good to check the network situation To do this follow these instructions 1 ACCESS THE NVR MENU Right click and choose MENU To access you will need to login Enter the factory password USER admin PASSWORD 12345 2 OPEN THE NETWORK WINDOW TO CHECK THE IP ADDRESS Click CONFIGURATION and ...

Page 20: ...ess the NVR from within your network without going through the Internet If your network is not connected to a router or to another device acting as a DHCP server you cannot use the DHCP option and you must set a manual address This situation is better explained in the configuration manual 3 GO TO THE P2P WINDOW TO CHECK THE CONNECTION TO THE SERVER After checking the IP address of your NVR open th...

Page 21: ...he server is ONLINE This means that the NVR is communicating well via the Internet with our P2P cloud server which will allow you to access via the Internet without configurations or static IP If the status is not ONLINE but OFFLINE double check the previous steps because it means that your DVR NVR cannot access the Internet DSE SRL ITALY WWW DSE EU ...

Page 22: ... HD SDI digital cameras although they use the same BNC connector as analog cameras are not compatible When you connect a new camera the DVR displays the format and resolution of the camera s video signal for a few seconds Many analog cameras allow you to change the video format and its resolution by pressing the button on the camera If you want you can force the DVR to accept only one video format...

Page 23: ...y operated with the button on the camera These DVRs allow you to control the internal OSD menu of the camera with the mouse of the DVR thanks to the UTC protocol that passes along the video cable The camera must support the UTC protocol to be able to use this function The UTC remote control also allows you to adjust the zoom of the lens cameras DSE SRL ITALY WWW DSE EU ...

Page 24: ...e to check that the UTC protocol is enabled in the PTZ settings of the channel by clicking MENU CAMERA PTZ CONFIGURATION CHANNEL Select the camera input you want to control PROTOCOL Choose UTC A If that doesn t work you can try the UTC B version that DSE SRL ITALY WWW DSE EU ...

Page 25: ...n and click PTZ To open the OSD menu you have to press the central ENTER button in the middle of the arrows PTZ CONTROL OF ANALOG CAMERAS The analogue motorized cameras are controlled by commands sent through the rear RS485 port First you need to set the communication parameters that allow the DVR to communicate with the camera Click MENU CAMERA PTZ CONFIGURATION DSE SRL ITALY WWW DSE EU ...

Page 26: ...ory address 1 but you can change it by acting on the camera BAUD RATE DATA BIT STOP BIT CHECK PARITY These are the communication parameters that the DVR will use to communicate with your camera The most important is the Baud Rate that you can choose in the camera The most common speeds are 2400 4800 9600 bps Check the manual of your PTZ camera to know the parameters to be entered In general the ad...

Page 27: ...the motorized cameras you have to bring the camera to full screen and click PTZ You can rotate the camera with the arrows and control the lens with the Zoom Focus Iris buttons The commands in this window are explained in detail in the configuration manual DSE SRL ITALY WWW DSE EU ...

Page 28: ...VR you can only manage IP cameras that you must have previously installed on the network each with its own address Even DVRs with BNC ports can manage IP cameras if you disable some analog inputs in the channel configuration You have to click MENU CONFIGURATION CHANNEL CONFIGURATION DSE SRL ITALY WWW DSE EU ...

Page 29: ...number of IP channels will be automatically enabled and you can add network IP cameras Obviously if you disable an analog channel the relative BNC can no longer be used It seems like an obvious clarification but it needs to be remembered because if you connect a BNC camera to that input in the future and you don t see it working you may think that the DVR is broken and needlessly require repair DS...

Page 30: ...you have disabled some analogue channels as seen in the previous chapter Before adding an IP camera you must have it configured on the network using the appropriate configuration software as explained in the camera manual To add an IP camera to your DVR NVR you have to right click and choose ADD CAMERA or from the programming menu click MENU CAMERA ADD CAMERA DSE SRL ITALY WWW DSE EU ...

Page 31: ...r a few moments you will find in the list all the DSE cameras and also the ONVIF cameras of other brands that the DVR NVR has detected on the LAN to which it is connected Select the camera and click ADD to insert it into the VCR If your camera does not appear in the list check that it has been configured on it DSE SRL ITALY WWW DSE EU ...

Page 32: ...ed there is something wrong because the automatic camera setup was not successful At the bottom of the row to the right of the table you will find an error message giving you an indication of the cause of the problem You must then click on the EDIT button and change the connection parameters Start by entering the correct access password of the camera then check the onvif port your camera uses in t...

Page 33: ...INSTALLATION MANUAL RK SERIES DVR and NVR Page 33 DSE SRL ITALY WWW DSE EU ...

Page 34: ...an take the new IP camera out of the box and connect it directly to a LAN port of the NVR without doing any preliminary configuration The NVR will automatically assign the address to the camera and correctly configure the network settings Wait about a minute and you will see the camera image appear on the monitor in the box corresponding to the POE port where you have inserted it ONVIF CAMERAS If ...

Page 35: ...ge 35 Then connect the camera to a POE port of the NVR click add camera and press ADD MANUAL Enter the camera parameters as in the following example Note that the channel mode must be changed from plug and play to manual DSE SRL ITALY WWW DSE EU ...

Page 36: ...his address it will work the same even if you have not used an internal IP address of the NVR network 192 168 11 It can be handy if you have already assigned your camera a fixed IP address for your external network so you don t have to change it ONVIF CAMERAS IN DHCP Although it is technically possible it is not advisable to connect to the POE ports of the NVR cameras in DHCP mode automatic addres...

Page 37: ... of our RK series cameras to the NVR wifi recognition is totally plug play You can take the new IP camera out of the box and connect it directly by following these instructions To connect an RK wifi camera to your NVR follow the steps below 1 Power the new camera and connect it with a network cable to a rear network port of the NVR If your NVR only has one WAN network port connect the new camera t...

Page 38: ...INSTALLATION MANUAL RK SERIES DVR and NVR Page 38 3 Press the ADD button to start the camera search DSE SRL ITALY WWW DSE EU ...

Page 39: ...es for RK cameras and will find in addition to any wifi cameras already installed also the new one you connected with the cable This new camera will probably have a completely different address than the ones already installed but don t worry the NVR will configure the camera automatically DSE SRL ITALY WWW DSE EU ...

Page 40: ...n do so by following the instructions of your camera to connect the camera to a wifi network Generally these instructions tell you how to connect the camera to your home wifi network but you can do the same by connecting to the NVR s wifi network instead Before you can proceed however you must perform some preliminary configurations in the NVR to make the wifi network that it generates visible to ...

Page 41: ...to enter the camera configuration from the computer and act in the wifi configuration The WiFi page of the NVR provides you with the connection data The ESSID is the name of the wifi network of the NVR and the login password is revealed by pressing SHOW Look at the following example You can connect to the NVR any onvif wifi IP camera and also different wifi devices such as WiFi signal repeaters to...

Page 42: ...INSTALLATION MANUAL RK SERIES DVR and NVR Page 42 DSE SRL ITALY WWW DSE EU ...

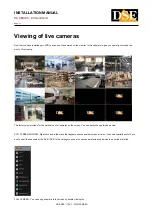
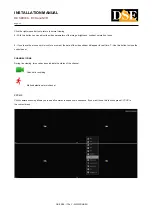
Page 43: ...ides for the multivision of all cameras on the screen You can easily change this basic view EDIT SCREEN DIVISION Right click and in the menu that appears choose another screen division It can be especially useful if you don t use all the channels of the NVR DVR In the settings you can also choose a preferred subdivision to be called at startup FULL SCREEN You can bring a camera to full screen by d...

Page 44: ...ouble viewing In IP channels this icon allows you to rotate the image 90 with each click 2 INSTANT PLAYBACK If you press this icon you will automatically play the last 5 minutes of recording This is a very handy feature for instantly reviewing what just happened 3 AUDIO Press this icon to activate the channel audio playback and adjust the volume To hear the audio you must have connected a speaker ...

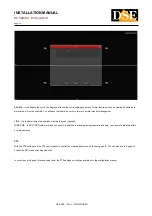
Page 45: ...on this icon for a moment the data of the video stream will appear in real time 7 Use this button to close the control panel CHANNEL ICONS During live viewing two overlay icons indicate the status of the channel Channel in recording Motion detection alarm channel CYCLIC Cyclic camera scanning allows you to see all cameras in sequence in sequence If you want to use this function press CYCLIC in the...

Page 46: ... dwell time of each window during the scan seconds WINDOWS In DVR NVR with more than 4 channels in addition to scanning a single camera at a time you can cycle windows with 4 or more cameras PTZ With the PTZ button open the PTZ control panel to control the motorized cameras both analog and IP You can also use this panel to control the UTC menu of analog cameras In order to use this panel it is nec...

Page 47: ... control is performed automatically on a single full screen camera CHANNEL Select the camera to view and control ARROWS Direction shifts ENTER The central button opens the camera configuration menu SPEED Adjusts the movement speed DSE SRL ITALY WWW DSE EU ...

Page 48: ...camera CRUISE ON OFF You can activate a tour or cruise set in the camera NVRs can only control the most common automatic movements of PTZ cameras Other functions and configurations must be performed in the camera configuration MONITOR LEVELS CONTROL For each camera you can modify the image parameters from the panel of the single channel as shown above You can also adjust the monitor s overall brig...

Page 49: ...INSTALLATION MANUAL RK SERIES DVR and NVR Page 49 DSE SRL ITALY WWW DSE EU ...

Page 50: ...INSTALLATION MANUAL RK SERIES DVR and NVR Page 50 DSE SRL ITALY WWW DSE EU ...

Page 51: ... 1 OPEN THE PLAYBACK WINDOW Right click and choose PLAY in the context menu 2 CHOOSE THE DAY AND THE CAMERA YOU WANT TO REVIEW Choose the day you are interested in at the top right Days containing recordings are marked with a colored box Click on one of these Under the calendar select the channels you want to play DSE SRL ITALY WWW DSE EU ...

Page 52: ... TO REVIEW In the time bar at the bottom you will find the 24 hours of the day with the continuous recording colored in green and the recordings made by motion detection in yellow Click wherever you want in the timeline to play the images at that exact moment DSE SRL ITALY WWW DSE EU ...

Page 53: ...RK SERIES DVR and NVR Page 53 With the buttons 24H 6H 2H 1H 30M you can vary the scale of the timeline With the control buttons at the bottom left you can accelerate playback stop or pause playback DSE SRL ITALY WWW DSE EU ...

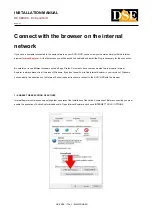
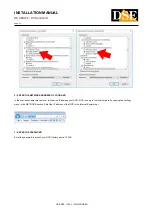
Page 54: ...irefox Chrome etc because they wouldn t work properly Internet Explorer is always present in all versions of Windows If you don t know how to find Internet Explorer in your version of Windows you can easily find directions on the Internet Follow these instructions to connect to the DVR NVR with the browser 1 ENABLE THE EXECUTION OF ACTIVEX Internet Explorer contains security settings that can prev...

Page 55: ...us chapter we saw how to know the IP address your DVR NVR is using in the local network by opening the settings menu in the NETWORK section Enter the IP address of the DVR in the Internet Explorer bar 3 ENTER THE PASSWORD Enter the password to access your NVR factory admin 12345 DSE SRL ITALY WWW DSE EU ...

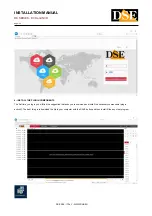
Page 56: ...TS The first time you log in you will find the suggestion that asks you to download and install the necessary components plugin activeX The best thing is to download the file to your computer with the SAVE button and then install it like any other program DSE SRL ITALY WWW DSE EU ...

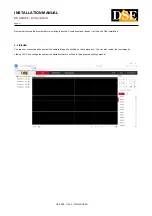
Page 57: ...component and reopen it at the end of the installation 5 FINISHED You are now connected and can view live camera images by clicking on the camera icon You can also review the recordings by clicking PLAY and change the system configuration that we will see in the advanced settings manual DSE SRL ITALY WWW DSE EU ...

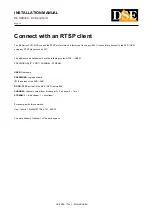
Page 58: ...e address to be called must have the following syntax RTSP USER PASSWORD IP PORT CHANNEL STREAM USER Username PASSWORD Login password IP IP address of the DVR NVR DOOR RTSP port set in the DVR NVR factory 554 CHANNEL channel number from 0 channel 1 0 channel 2 1 etc STREAM 0 main stream 1 substream For example with this command rtsp admin 12345 192 168 2 191 554 00 The main stream of channel 1 of ...

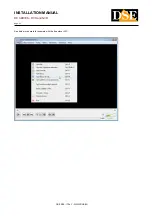
Page 59: ...INSTALLATION MANUAL RK SERIES DVR and NVR Page 59 See below as operate for example with the free player VLC DSE SRL ITALY WWW DSE EU ...

Page 60: ...INSTALLATION MANUAL RK SERIES DVR and NVR Page 60 For the stream to play the following option must be enabled DSE SRL ITALY WWW DSE EU ...

Page 61: ...INSTALLATION MANUAL RK SERIES DVR and NVR Page 61 DSE SRL ITALY WWW DSE EU ...

Page 62: ...even via the internet You can connect to the video recorder easily with your mobile or tablet You can do it on the internal wifi network or even via the Internet thanks to our P2P cloud server Consult the manual for remote access with our IoVedo RK app DSE SRL ITALY WWW DSE EU ...

Page 63: ...h your Windows PC You can do this on the internal wifi network or even via the Internet Download our iVMS software and charge your device to control it from a computer Use the internal IP address if you want to connect to the local network or use the serial if you want to connect via the internet with our P2P cloud DSE SRL ITALY WWW DSE EU ...

Reviews: