12
DR
®
PRO-XL CHIPPER SHREDDER
Checking/Setting the Knife to Wear Plate Gap
Check and (if necessary) adjust the Wear Plate as described in the “Check and Adjusting the Knife to Wear Plate Gap” section on
page 23.
Adding Engine Oil
Engine Oil
SAE 30 Oil - 37 oz. (1.09 L): above 50 degrees F; 10w-30:
30-90 degrees F; 5w-30: 30 degrees F or below
Fuel
Unleaded gasoline, 7 US quarts (6.53 L)
Note:
Use only the recommended high detergent Engine Oil. Do not use special
additives. Other types of Oil could cause problems operating your machine. Please
refer to your Engine Owner’s Manual for more detailed oil information.
1.
Place the machine on a level surface.
2.
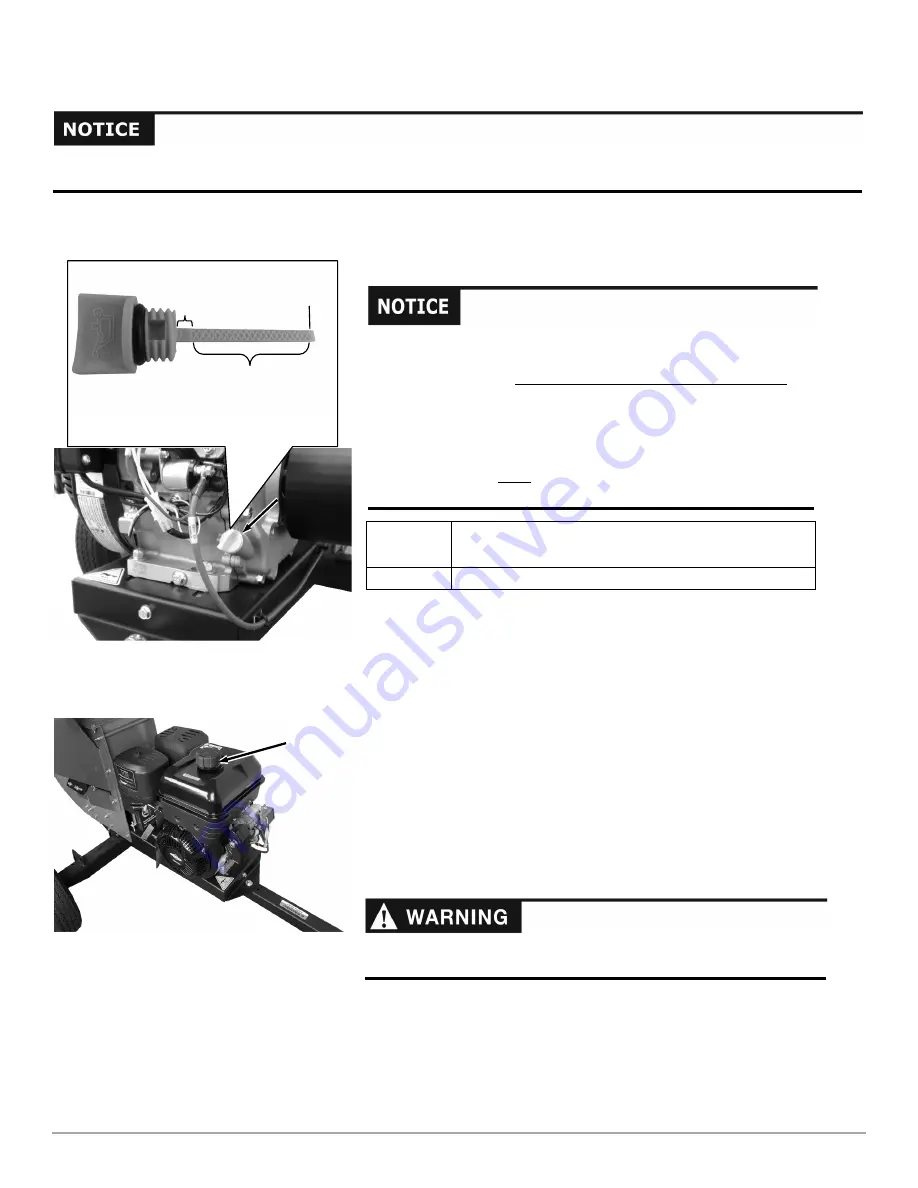
Remove the Engine Oil Fill/Dipstick and initially add 1/2 of the SAE 30 high
detergent Oil recommended by the Engine Manufacturer and wait one
minute for the Oil to settle (
Figure 8
).
3.
Screw the Dipstick in and then remove it to check the Oil level (clean the
Dipstick with a rag after checking) and continue adding a few ounces of Oil
at a time, rechecking the Dipstick until the Oil reaches the FULL mark. Be
careful not to overfill.
4.
Replace the Dipstick and screw all the way in when full.
Adding Gasoline
1.
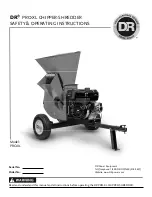
Remove the Fuel Fill Cap and fill the Fuel Tank with fresh, unleaded gas (with a minimum of 85 Octane) to approximately 1"
to 1-1/2" below the top of the Fill Neck to allow for Fuel expansion (
Figure 9
). Be careful not to overfill.
2.
Reinstall the Fuel Tank Cap before starting the Engine. See your Engine Owner’s Manual for more detailed information.
Note:
When Refueling the Fuel Tank, turn the Engine OFF, and let the Engine cool at least five minutes before removing the Fuel Tank
Cap.
You must add Oil before starting the Engine. This machine is
shipped without Oil. Traces of Oil may be in the reservoir from
factory testing, but you must add Oil before starting the Engine.
Fill the reservoir slowly, checking the level frequently to avoid
overfilling.
To get an accurate reading when checking the Oil level:
- The Engine must be level.
- The Dipstick must be screwed all the way in to ensure an
accurate Oil level reading.
Add Fuel outdoors or in a well-ventilated area, away from sparks, open
flames, pilot lights, heat, and other ignition sources.
Figure 9
Fuel Fill
Cap
Figure 8
Oil
Fill/Dipstick
Operating
Range
Too Low
(add oil)
Too Full
(drain oil)
The Wear Plate is installed at the factory at an approximate location for shipping purposes. You must check/adjust the Knife to
Wear Plate gap before using the Chipper Shredder. Ensuring the gap is correct will ensure optimum chipping performance.


