


03
15
Common Operations
05
26
DVD/VCD/MP4
Selecting MENU
Selecting Menu:
During DVD status,
press
MENU
to return to the root
menu, all of the chapters will appear
on monitor. You can press or
button to select your desired chapter.
4
27
23
Selecting Title:
During DVD status,
press
TITLE
to return the title menu,
all of the titles will appear on monitor.
You also can press or button to
select your desired chapter.
3
1
2
Under DVD menu, touch the screen to select
items.
Note:
*
27
23
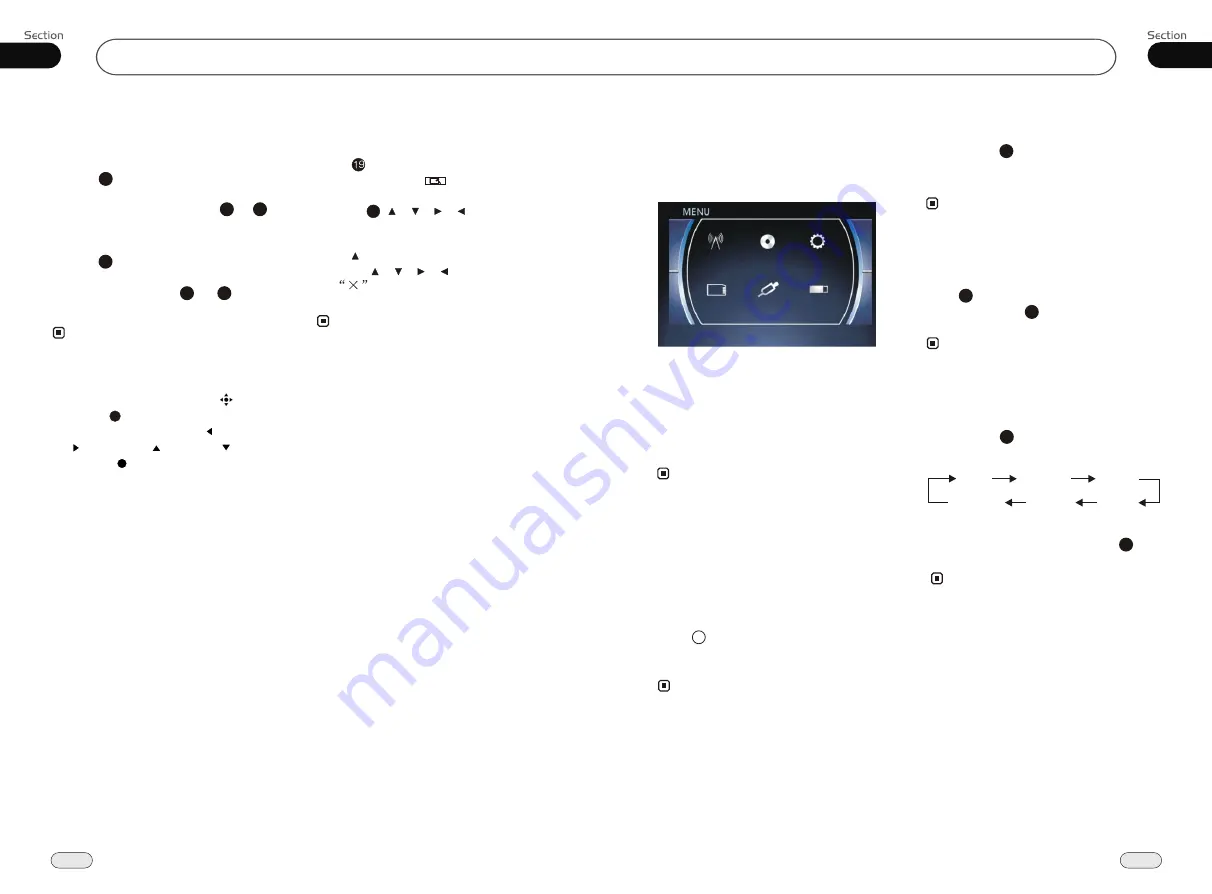
DVD SETUP MENU
27
Press SETUP on remote control or MENU
on the main unit or in the monitor, main
menu and sub-menu will appear on TFT,
pressing [ ][ ][ ][ ] on the remote
control to select your desired items, then
press ENTER.
* The selections are the preferred options that
will be chosen if they are available on a disc.
If the disc that is inserted does not have the
preferred option then the discs own prefer-
ence will be used.
* Regarding
SETUP MENU
, please refer to
the following pages for more details.
* Some functions varies depending on the types
of models or formats of the disc.
Notes:
Press to the pervious one, press SETUP
or press [ ][ ][ ][ ] to move the cursor
on
, then press ENTER to exit the
menu setup.
* To touch the screen to select menu, touch it
again to select the item.
If the touch menu options invalid or the disc
does not support touch-TITLE, that is the
same as bottons on the remote control will
display on the screen. Press to left, press
to right, press to up, press to down
and press to ENTER.
*
27
Setting the Sound Characteristics
* Press +/- or SEL button on the main unit also
performs the same function.
Reset the Unit
You may need to reset the unit if operating
for the first time or after replacing the car
battery.
Note:
*
When ome errors occur on the
also press
RESET
it will
s
display, you can
button to resume to normal,
and
erase the clock settings and some of
your stored functions.
* This function can only be operated by the
main unit.
Release the front panel at first, and then
press
RES
button in the panel w
object, (such as a ball
the unit to initial status.
ith
a pointed
point pen)
to set
8
Briefly press
SEL
button to select the
mode in the following order:
desired
14
After selecting the desired mode, you
adjust the current level by pressing
.
can
VOL
buttons
Note:
Press
VOL+
button to increase
sou-
nd level and press
VOL-
button to decr-
ease
sound level.
the
the
Volume Control
* Press +/- on the main unit or VOL+/- in the
monitor also performs the same function.
14
14
Note:
Turning the Unit On/Off
Briefly press
PWR
button to turn on the
unit, press it again, the unit is still in
waiting status. Press and hold to turn off.
the
1
* Pressing PWR button on the main unit also
performs the same function.
Note:
14
To Select Source by Menu
Press it to select your desired item, and press
SET to enter into the main menu.
If you want to use navigation, press NAVI; if it
did not enter into that function, the unit dose
not support it.
In any mode, press BACK to return to the
previous mode.
* If the font display in cyan, that means this
function is null.
Note:
TREBL
BALAN
BASS
VOL
FADE
SUBWF
In any mode(except for DVD, SD, USB
mode), pressing SRC, then BACK in the
monitor will show the following display:
RADIO
DVD
SET
USB
AUX
SD


