background image

3

Please read these instructions carefully and follow all instructions, guide-
lines, and warnings included in this product manual in order to ensure that 
you install, use, and maintain the product properly at all times. These instruc-
tions MUST stay with this product.

By using the product, you hereby confirm that you have read all instructions, 
guidelines, and warnings carefully and that you understand and agree to 
abide by the terms and conditions as set forth herein. You agree to use this 
product only for the intended purpose and application and in accordance 
with the instructions, guidelines, and warnings as set forth in this product 
manual as well as in accordance with all applicable laws and regulations. A 
failure to read and follow the instructions and warnings set forth herein may 
result in an injury to yourself and others, damage to your product or damage 
to other property in the vicinity. This product manual, including the instruc-
tions, guidelines, and warnings, and related documentation, may be subject 
to changes and updates. For up-to-date product information, please visit 
documents.dometic.com, dometic.com.

Contents

Explanation of symbols  . . . . . . . . . . . . . . . . . . . . .3

Safety instructions  . . . . . . . . . . . . . . . . . . . . . . . . .3

Scope of delivery . . . . . . . . . . . . . . . . . . . . . . . . . .4

Intended use  . . . . . . . . . . . . . . . . . . . . . . . . . . . . .5

Technical description  . . . . . . . . . . . . . . . . . . . . . .5

Installation  . . . . . . . . . . . . . . . . . . . . . . . . . . . . . . .6

Operation. . . . . . . . . . . . . . . . . . . . . . . . . . . . . . . 10

Maintenance  . . . . . . . . . . . . . . . . . . . . . . . . . . . . 12

Warranty . . . . . . . . . . . . . . . . . . . . . . . . . . . . . . . . 15

Disposal  . . . . . . . . . . . . . . . . . . . . . . . . . . . . . . . . 15

Technical data  . . . . . . . . . . . . . . . . . . . . . . . . . . . 15

Explanation of symbols

!

!

A

I

Safety instructions

General safety

!

WARNING! Risk of injury
and damage hazard

• Do not make any alterations or conversions to 

the device.

!

CAUTION! Risk of injury
and damage hazard

• The dust reduction system must be installed 

securely.

• Do not insert any foreign objects into the device.

A

NOTICE! Damage hazard

• Never drive through automatic car washes when 

the dust reduction system is mounted.

• Please ask your vehicle manufacturer if a techni-

cal inspection is required after fitting the dust 
reduction system and whether the height 
entered in your vehicle documents needs to be 
altered.

WARNING! 
Safety instruction:

 Indicates a hazard-

ous situation that, if not avoided, could 
result in death or serious injury.

CAUTION! 
Safety instruction:

 Indicates a hazard-

ous situation that, if not avoided, could 
result in minor or moderate injury.

NOTICE! 

Indicates a situation that, if not avoided, 
can result in property damage.

NOTE 

Supplementary information for operating 
the product.

Summary of Contents for DRS2

Page 1: ...DRS2 Dust Reduction System Installation and Operating Manual EN CLIMATE CONTROL DRS ...

Page 2: ...his manual is protected by copyright and design law The underlying technical design and the products contained herein may be protected by design patent or be patent pending The trademarks mentioned in this manual belong to Dometic Sweden AB All rights are reserved ...

Page 3: ...ate product information please visit documents dometic com dometic com Contents Explanation of symbols 3 Safety instructions 3 Scope of delivery 4 Intended use 5 Technical description 5 Installation 6 Operation 10 Maintenance 12 Warranty 15 Disposal 15 Technical data 15 Explanation of symbols A I Safety instructions General safety WARNING Risk of injury and damage hazard Do not make any alteration...

Page 4: ...Top roof flange 4 1 Bottom ceiling flange with ceiling cover blocking plate and insect filter 4 Reinforcing battens 4 10G x 80 mm self tapping screws 4 10G x 60 mm self tapping screws 4 10G x 34 mm self tapping screws 16 10 mm long spacer 4 5 mm long spacer 1 Filter 1 Self adhesive roof seal 1 2 3 4 1 ...

Page 5: ...ect assembly or connection including excess voltage Incorrect maintenance or use of spare parts other than original spare parts provided by the manufacturer Alterations to the product without express per mission from the manufacturer Use for purposes other than those described in this manual Dometic reserves the right to change product appearance and product specifications Technical description Th...

Page 6: ...Possible to mount on a roof with a less than 30 slope CAUTION Risk of injury Improper installation of the product can result in irreparable damage to the device and put the safety of the user at risk NOTICE Damage hazard Observe the structural engineering of the vehicle and seal off all openings made when installing the product Check whether the roof of the vehicle is able to support the weight of...

Page 7: ... DRS2 There are two ways of installing the system Making a new opening chapter Making a new opening on page 8 In this case the opening must be reinforced by an appropriate frame Using the existing roof hatch openings in the vehicle chapter Installing in an existing opening on page 8 3 300 mm 4 ...

Page 8: ...e insulation foam accord ing to the width of your reinforcing battens 9 Fit the reinforcing battens Installing in an existing opening 1 Use a clean dry cloth to wipe around the underside perimeter of the top roof flange to remove any dust or residues 2 Remove the backing paper of the self adhesive foam seal and fit onto the bottom surface of the top roof flange There is a slight recess on the oute...

Page 9: ...mm and or 5 mm spacers so that the total length of the stacked spacers is 5 mm shorter than the gap This is to ensure the bottom roof flange and top roof flange deform sufficiently to clamp on the roof Fitment of bottom ceiling flange 1 Choose the suitable screws according to the table and fit them through the holes in the bot tom ceiling flange 2 Slide the spacer over the protruding part of the s...

Page 10: ... product operates automatically from vehicle speeds of 25 km h The product is suitable for use in the rain Prior to travel ensure that the blocker plate is removed fig b page 11 Otherwise the product will not function to reduce dust entry Ventilation while stationary Observe the following notes Cross flow ventilation is still maintained with the blocker plate fitted Do not block any openings aroun...

Page 11: ...b shown fig b page 11 1 To fit the blocker plate open the interior ceil ing cover by pulling on the edge marked PULL HERE TO OPEN 2 Remove blocker plate from the ceiling cover which is held by magnetic strips 3 Insert the blocker plate upwards 4 Close the interior ceiling cover by rotating the cover upwards and pushing gently until the magnets engage to hold the cover closed 2 1 a 2 1 4 3 b ...

Page 12: ...filter holder and check the condition and color for dust accumulation Changing the filter 1 Depending on the discoloration tap the filter lightly to remove excess dust It can continue to be used for some more time 2 If there are signs of damage filter media becomes furry or separates replace filter available 3 When replacing ensure that the filter is slid back into the filter holder with the arrow...

Page 13: ...frame Check the frame regularly for build up of debris If debris is present the frame will be discolored and must be cleaned and dried 1 Remove the frame by pushing the two tabs outwards and pulling down gently fig f page 13 2 Rinse the frame in water to clean any dust and dry it 3 To re insert the frame angle the top of the frame upwards and insert into the space so that the cross brace of the fr...

Page 14: ... clean it if any are present 1 Remove the insect screen from the ceiling cover by carefully pulling it off fig g page 14 2 Rinse the insect screen in water to clean any dust and dry it 3 Put the insect screen back onto the inside of the ceiling cover by carefully pressing it into the retaining grove g ...

Page 15: ...r damage You are also enti tled to have the goods repaired or replaced if the goods fail to be of acceptable quality and the fail ure does not amount to a major failure New Zealand only This warranty policy is subject to the conditions andguaranteeswhicharemandatoryasimpliedby the Consumer Guarantees Act 1993 NZ Local support Please find local support at the following link address dometic com deal...

Page 16: ...16 482 282 400 444 248 95 96 282 473 h ...

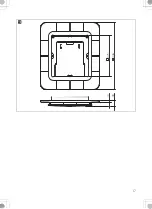
Page 17: ...17 275 436 12 28 i ...

Page 18: ......

Page 19: ......

Page 20: ...4445103850 4450031364 54 661 MAW01B 07 12 2022 ...

Reviews: