5) R e m o t e C o n t rai Unit (RCU)
These buttons are used far switching between menus and options.
This button is used to switch on the RCU, to select a required menu, to SENO or to SET a para meter or a program.
This button is used to EXIT tram a menu or move back a step.
This button is also used to turn off the RCU. Press EXIT a number of times unti I RCU turns off.
lf a parameter was modified, then just before final EXIT you may be required to send your new set of parameters.
Menu
ENTER/SENO/SET
EXIT/BACK
Battery cover
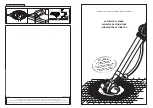
5.1) Oescription and use of menus
5.1.1) C/eaning programs
•
REGULAR-
Floor and walls cleaning program.
•
ULTRAclean
- Slower movement and increase suction far special thorough cleaning.
Note:
ULTRAclean
mode can only be selected tram
REGULAR
mode.
•
WATERline
- Far special attention to walls and water line.
Note:
Far efficient
WATERline
cleaning program, position the handle diagonally exactly as shown in
[Fig B].
lf you choose
WATERline or ULTRAclean
modes, these parameters will not rema in in the OOLPHIN WAVE 1 OD
memory far the next cycle. lnstead, the OOLPHIN WAVE 1 DO automatically switches to
REGULAR
mode.
•
LAPpool
- Suitable far this specific type of pool - narrow and long.
Note:
lf you choose a
LAPpool
cleaning mode, set the pool length alter setting this mode.
5.1.2) Parameters
•
CYCLE-TIME
- Choose the most suitable cycle time.
•
POOL-LENGTH
- Program the pool length.
•
CLIMB-EVERY
- This option controls the trequency of wall climbing e.g.: at which trequency the OOLPHIN
WAVE 100 should climb on the walls.
5.2) Battery Replacement
lf the massage "Low Battery'' appears on the RCU screen:
• Open the battery cover.
• Remove all used batteries tram the RCU.
• Piace two 1.5 V AAA batteries into the RCU as shown in the drawing inside the battery housing.
• Close the battery cover.
lf you are not using your RCU for more than 6 months - remove batteri es.
5.3) Remote Contro/ Flow Chart
-
see next page.
4
Summary of Contents for WAVE 100
Page 1: ...Operating lnstructions 1 9 Consignes d utilisation 10 18 lnstrucciones de uso 19 27...
Page 2: ...English 1 9...
Page 3: ...1 9 1...
Page 10: ...OOLPHIN WAVE 100 Caddy assembly Step 1 r Step2 Step3 8...
Page 12: ...Fran ais 10 18...
Page 13: ...1 0 18 10...
Page 20: ...Fig Montage du Caddy du DOLPHIN WAVE 100 tape 1 tape2 tape3 tape5 17...
Page 22: ...Espaiiol 19 27...
Page 23: ...1 9 2 7 19...
Page 30: ...Montaje del Caddy del OOLPHIN WAVE 100 r Paso2 Paso3 26...
Page 32: ......


