Scheduled access for shared users
1. Choose ‘Scheduled’ as the
access level when adding a
shared user (see page 21)
2. The ‘Timezone’ selected
on the ‘Invite New User’
screen (see page 20) will be
used as the timezone for all
dates/times selected on this
screen
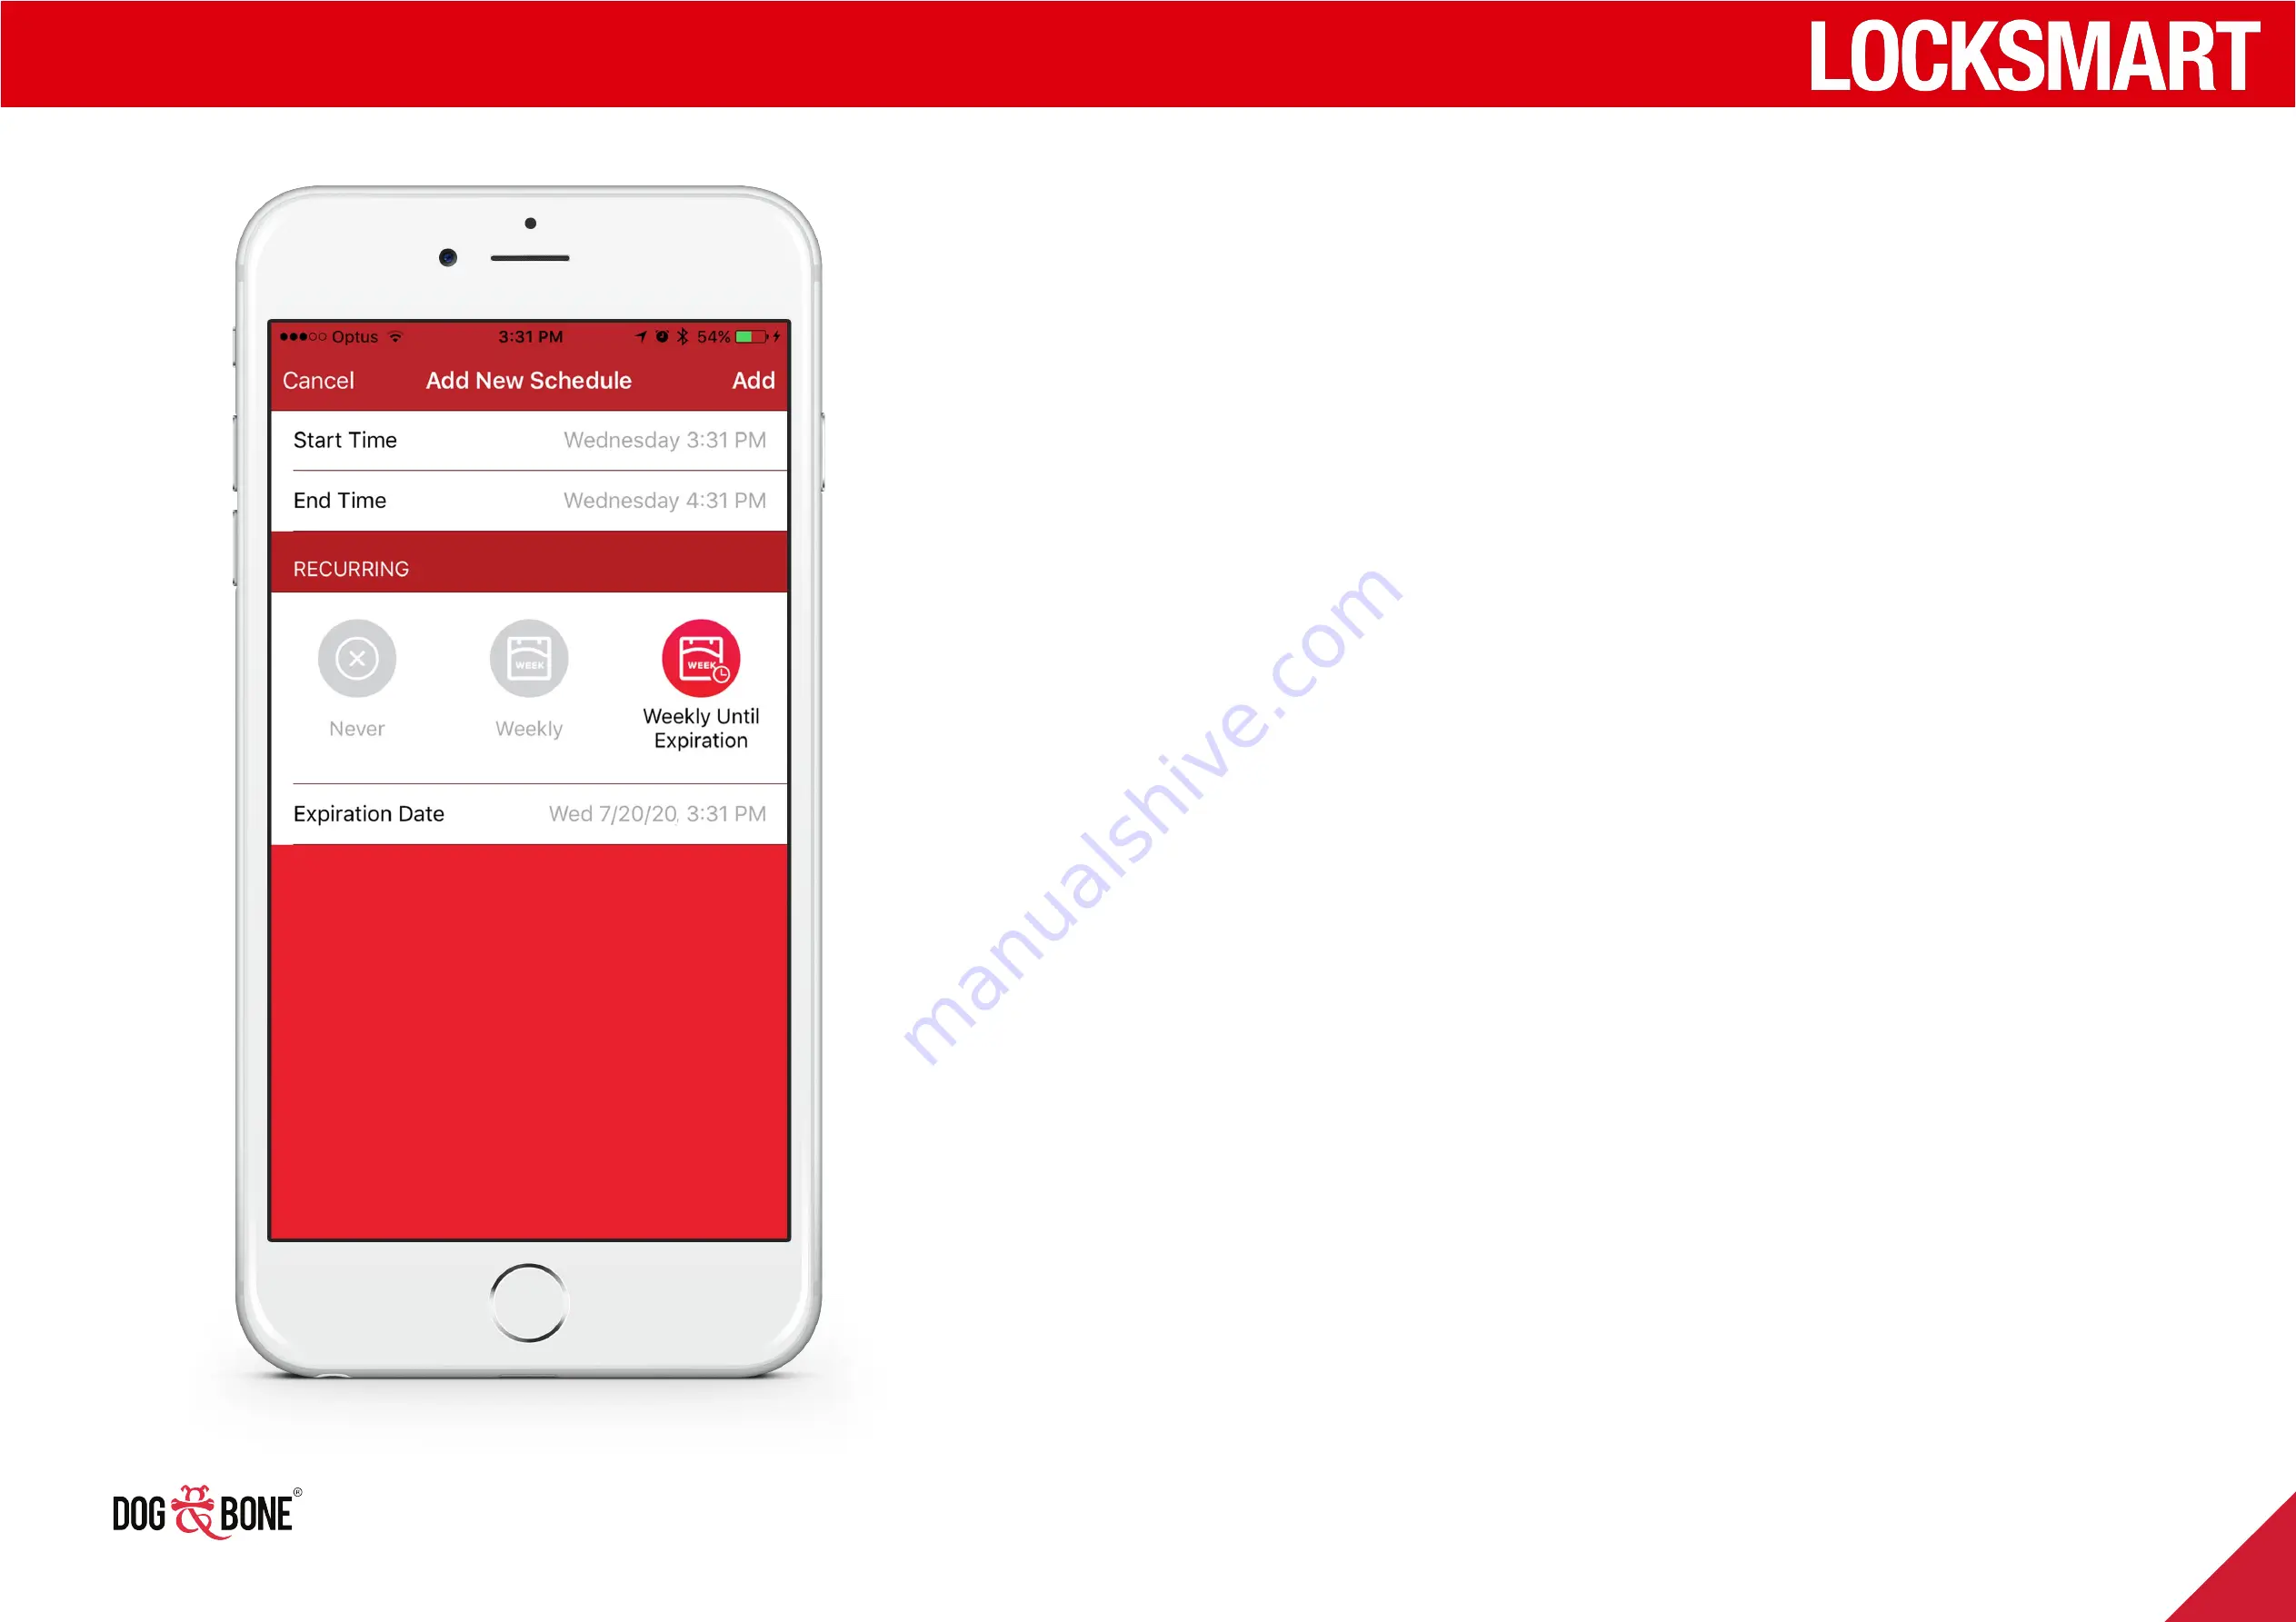
3. Choose the ‘Start Time’
and ‘End Time’ for when
a shared user may unlock
your lock
4. Choose the schedule
recurrence option of ‘Never’,
‘Weekly’ or ‘Weekly Until
Expiration’
-
Never
: Create a fixed
schedule from the
chosen start date until
the end date
-
Weekly
: Choose a
range of access time
during the week, which
will be repeated every
week
-
Weekly Until
Expiration
: Same as
‘Weekly’, but will stop
on the set date
5. Press the ‘Add’ button to
add this schedule to the
shared user, and you will
be taken back to the ‘Invite
New User’ page to complete
the invitation process
6. You can create multiple
schedules for the user
by pressing ‘Add New
Schedule’ again and
repeating the above steps
Finding and sharing
21

