20
10.2 Controls
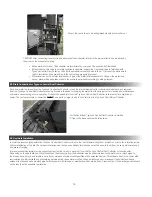
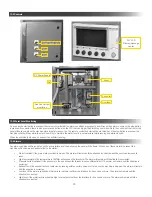
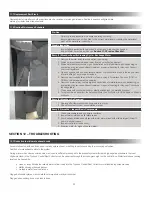
Alarm Annunciator
PLC LCD
Display/message
center
Fuses
Controller
Overload
Aux Fan Current
monitoring
Pic
DC Power Supply
Stop
Start
As soon as the start button is pressed, the main motor will start if no alarm conditions are present and will run until an alarm occurs or the stop button
is pressed. If connected, there is also a remote control input on the PLC that can trigger the Start/Stop command. Note, the controls at the front of the
panel will have priority on the machine state for safety reason. (ex. The remote control has started the machine but, if the stop button is pressed, the
machine will stop). Meanwhile, the machine will try to maintain the water level to a set water level while running and while stopped.
When the machine is stopped, an exhaust fan will start running.
Any alarm condition will be indicated on the user interface and the buzzer on the panel will be heard. When one of these alarms is present, the
machine will lock-down and will not allow to be started:
•
Motor Overload: if the main motor overload is tripped. The alarm will remain until the situation is corrected and the over load is manually
reset.
•
High temperature: if the temperature in the filter units exceed the threshold. The alarm will remain until the situation is corrected.
•
Pressure switch (optional): if the pressure in the unit exceed the threshold set on differential unit. The alarm will remain until the situation is
corrected.
•
Exhaust fan: if the exhaust fan is not detected as running within a certain amount of time once the machine is stopped. The alarm will remain
until the situation is corrected.
•
Low level: if the water level reaches the low level set point set from the interface for 5 seconds or more. The alarm will remain until the
situation is corrected.
•
High level: if the water level reaches the high level set point set from the interface for 5 seconds or more. The alarm will remain until the
situation is corrected.
10.3 Water Level Monitoring
10.4 Alarms
Summary of Contents for Typhoon TY-10000
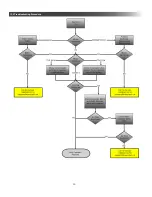
Page 26: ...26 12 4 Troubleshooting Procedure...
Page 29: ...29 NOTES...


