


Diver6 User Manual
Section 5: Page 46 of 87
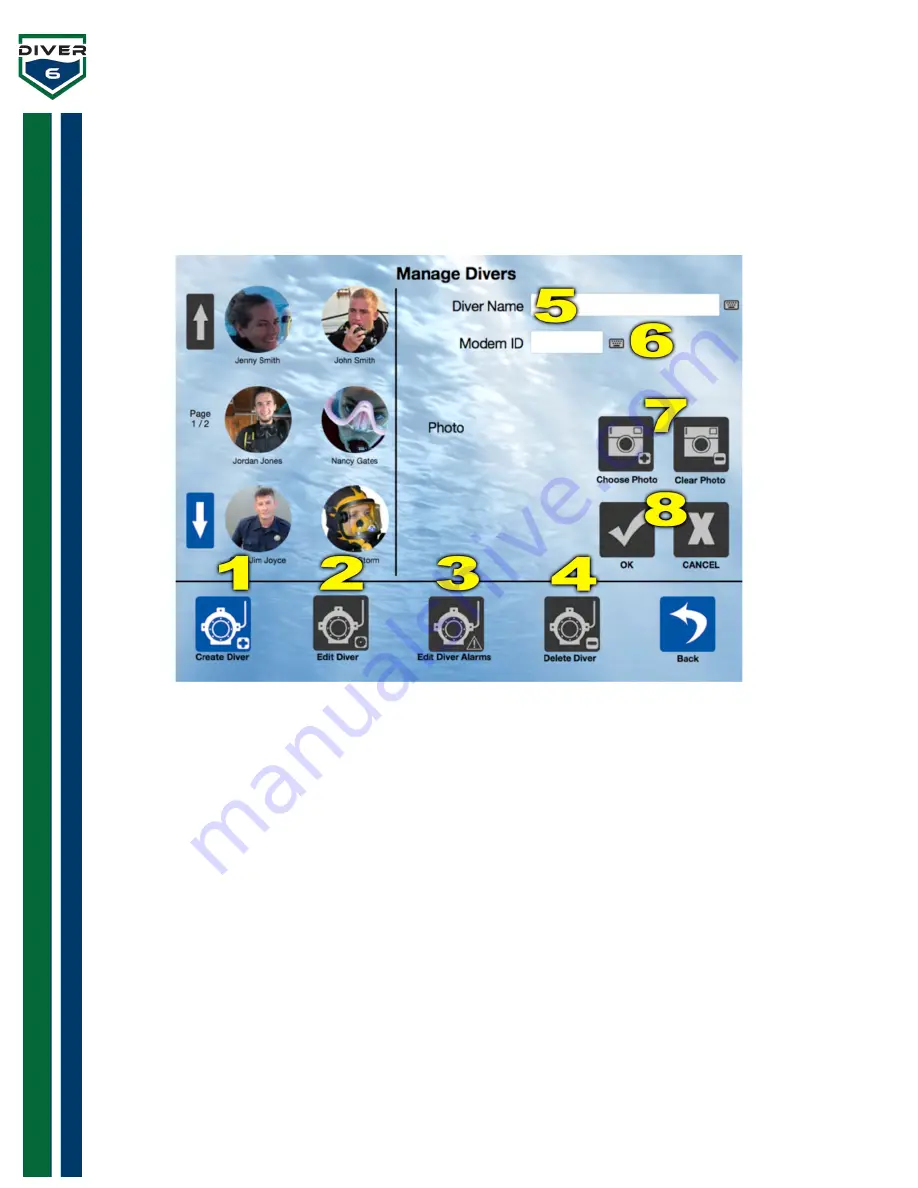
Manage Divers
Clicking the
Manage Divers
button will allow the Dive Master to create, edit, and delete divers as well as
editing alarm conditions associated with a diver. Existing divers (up to six at a time) will be shown on the
left side of the screen. Page up and page down buttons will become active with more than six dive divers
are available (Figure 33).
Figure 33: Manage Diver Screen
1.
Create Diver
- Allows the user to create a new diver. The user will then be able to insert a new
username, password, password hint, and photo.
2.
Edit Diver
- Allows the user to edit an existing diver. The password for that diver account will be
requested before any editing is allowed.
3.
Edit Diver Alarms
– The Dive Master can edit specific alarms for the selected diver.
4.
Delete Diver -
Allows the user to delete an existing diver. A confirmation box will be presented
to confirm this action.
Note:
No password is required for this operation.
5.
Diver Name
- The name given to a diver.
6.
Modem ID
– The ID of the diver modem. (Displayed on the LED on the bottom of the modem).
7.
Choose / Clear Photo
- The Choose Photo button accesses any onboard/attached camera to take
or choose photos (See
Choose Photo
for Details). The Clear Photo button clears the current image.
The photo area also provides drag and drop support allowing JPEG and PNG files to be dropped
on this location.
8.
OK / Cancel
- The
OK
button will save the changes and the
CANCEL
button will revert to the
original data.


