DEVOS -- Enterprise Video System
Page 47
DEVOS
How To Create or Modify an Channel
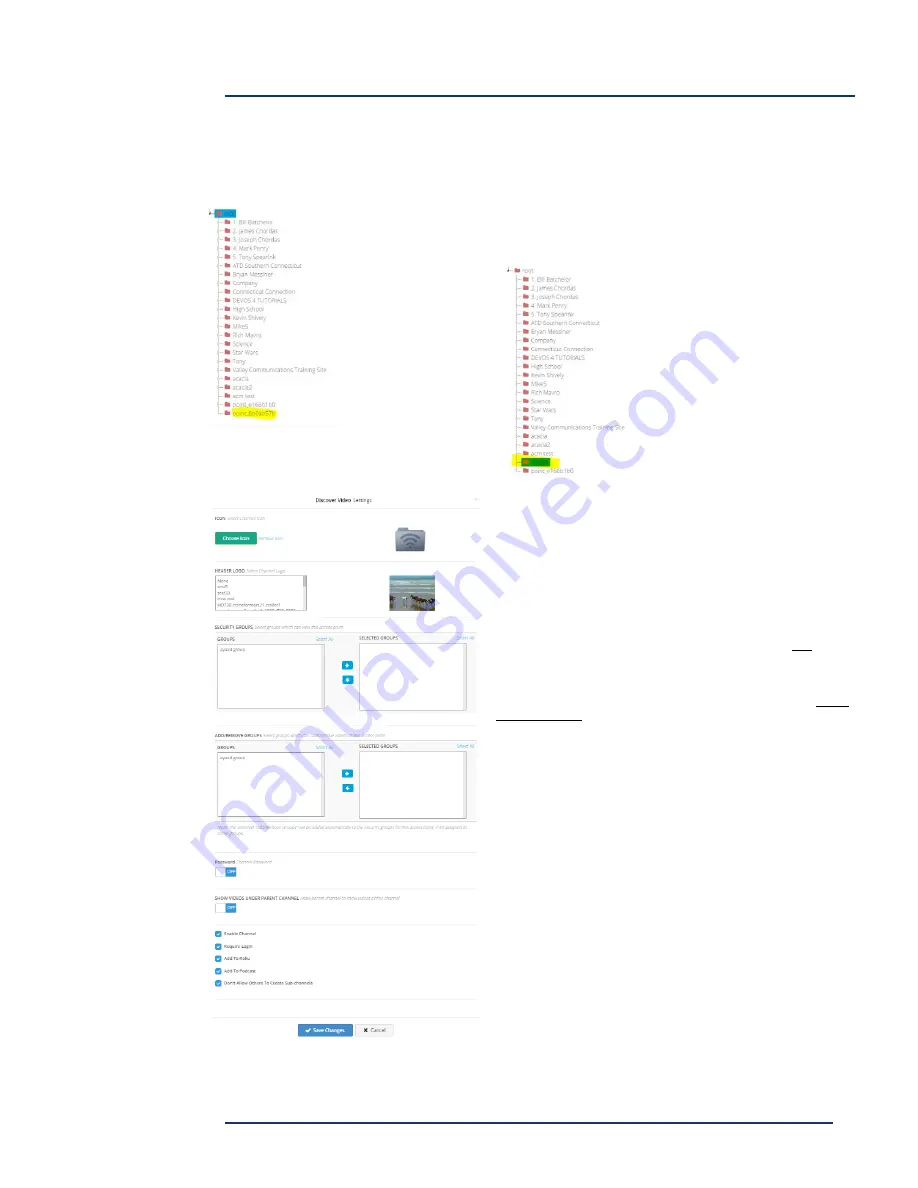
Right-Click on Root, or on an existing channel. Select Create. Open the folder (if needed)
and notice there is a new channel created with a code (see yellow highlight).
Next, right click on this newly created channel and select "Rename".
In our example here, we will rename it to "Widget".
Right-Click on Widget and select Settings.
Title -- Enter a title for the channel. This will display on the channel page
Icon -- Optional. Upload a .ico ("favorite") icon for this channel
Header -- Enter header text for this channel
Header Logo -- Select an image from your image library for this channel
Security Groups -- Select one or more security groups that may view this
channel. Select none if you do not wish to limit access (anyone may access
your channel).
Add/Remove Groups -- Select one or more security groups that may publish
or remove content in your channel. Selecting none means only you can
add/remove content for the channel.
Password -- Optional. Turn Password on and enter password if desired.
Viewers must know this password to access the channel (you would provide
it via email or other means).
Show Videos Under Parent Channel -- If this is a sub-channel, enabling this
will show all sub-channel videos in the parent channel.
Private -- if checked, then the channel will not appear in a system landing
page. Use "Open" to obtain the channel URL
Enable Channel -- If checked, channel will appear in the channel list,
otherwise it will not. Disabled Channels are not available to anyone, including
the owner.
Require Login -- If checked, viewers must log in to the system to view.
Add To Roku -- If checked, this channel will appear as a channel in your
private Roku channel.
Add To Podcast -- If checked, the channel is available as a video podcast.
Don't Allow Others To Create Subfolders -- If checked, then no one can add a sub-channel to your channel.


