SETTING UP YOUR DIRECTV SYSTEM
P
AGE
2-5
Finishing Up
You can mix and match the different hookups described above to suit your entertainment system’s
available connections. For example, you could connect the VCR using audio/video, while the TV is
connected with the RF signal. Always try to achieve the highest quality and greatest flexibility
available.
Once all connections have been completed, plug in the TV, VCR and digital satellite receiver to the
wall outlet, appropriate extension cord, or surge protector. See
Important Safety Instructions
described
in the front of this manual.
Note: If you have connected a VCR into your entertainment system in a way that routes the cables
from your DIRECTV System to your VCR before the signal reaches the TV, you could experience a
distorted picture if you attempt to record a copy-protected program. These programs are identified
by a “Can’t Tape” symbol in the banner area of the screen. If this occurs, simply stop the recording
process and your picture will automatically correct itself.
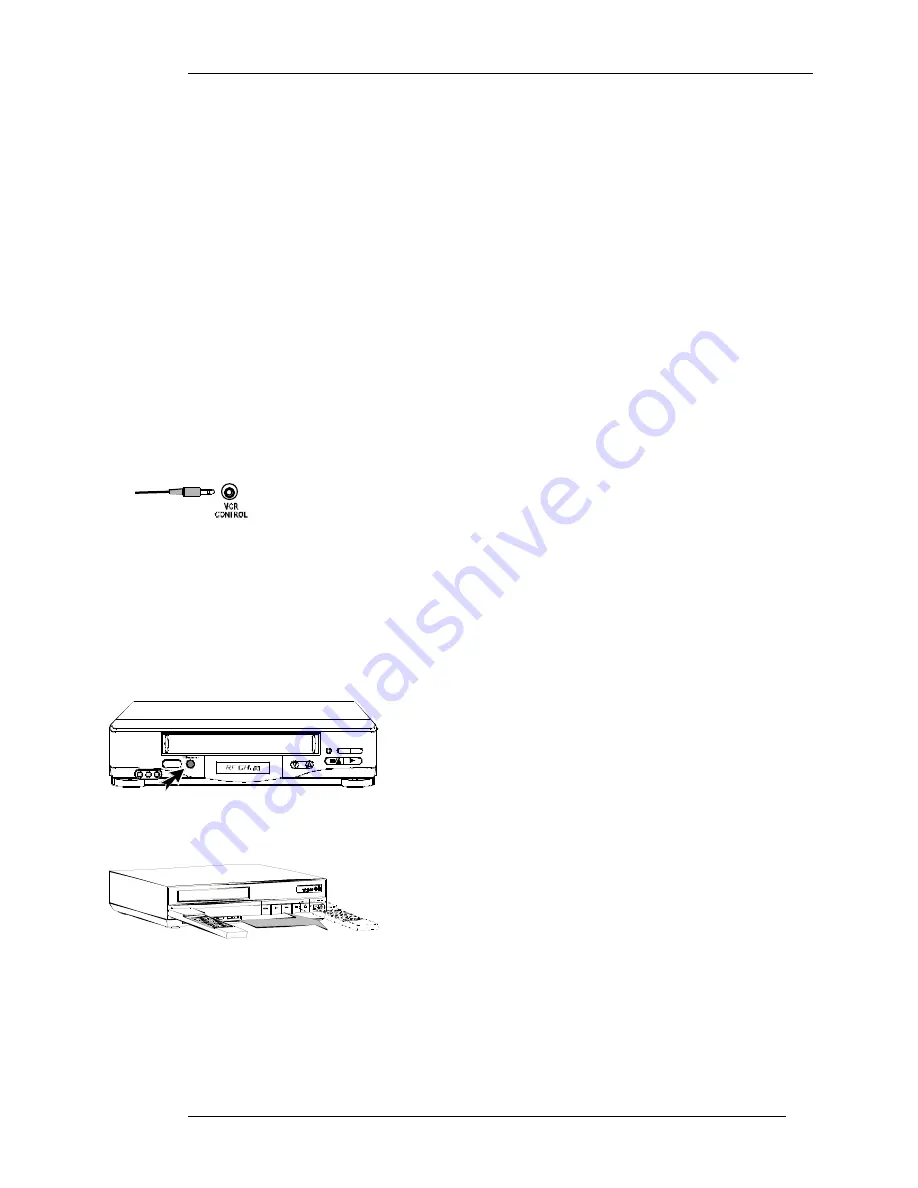
Connecting the VCR Control Cable
(Models HIRD-B3 and HIRD-B4 only)
With the proper connections you can have your digital satellite receiver control your VCR for
unattended recording. First, you will need to plug the VCR Control cable into the
back of your digital satellite receiver. Then proceed to the next section to determine
where the other end of this cable should be attached.
If you have the model HIRD-B4 receiver and a D-VHS video recorder, you will
likely choose to connect the D-VHS cable instead. Refer to your D-VHS owner’s
manual and the chapter “Using D-VHS Features on the HIRD-B4 Receiver” in this manual.
When the D-VHS cable is connected, the IR-based VCR Control jack and cable are overridden and
will not function.
Finding the VCR’s Remote Control Sensor
So that your digital satellite receiver can control your VCR the emitter end of the VCR control cable
must be attached where the VCR’s remote control sensor is located.
On some VCRs this is labeled. You may also find a diagram in your
VCR’s manual indicating the sensor position. It is commonly
identifiable by a small dark plastic window. For reference, see the
sensor on your digital satellite receiver located in the center.
If the sensor is not labeled or documented, you will need to scan the front of your VCR with your
VCR’s remote control. Use the following procedure to accomplish
this:
•
Hold the VCR’s remote control about ½-inch from the front left
side of your VCR.
•
Slowly move the remote control to the right repeatedly pressing
the remote control’s power key on and off.
•
Once your VCR responds to your pressing the remote control power, note the position.
This should be the location of your VCR’s sensor.
Once the sensor position has been determined, attach the emitter to the area with a piece of tape. This
is temporary until the system can be tested. Refer to the “VCR Setup” section in the chapter “Your
Receiver’s Menu System” to program and test the VCR Control feature.
The VCR Control cable and jack
Look for indications of the remote control sensor
Scanning for the remote control sensor
Summary of Contents for HIRD-B2
Page 1: ...Models HIRD B2 HIRD B3 HIRD B4 HIRD C2 O W N E R S M A N U A L Model HIRD B4 shown ...
Page 6: ......
Page 14: ...HUGHES BRAND DIRECTV SYSTEM OWNER S MANUAL PAGE 1 6 ...
Page 22: ...HUGHES BRAND DIRECTV SYSTEM OWNER S MANUAL PAGE 2 8 ...
Page 46: ...HUGHES BRAND DIRECTV SYSTEM OWNER S MANUAL PAGE 4 22 ...
Page 50: ...HUGHES BRAND DIRECTV SYSTEM OWNER S MANUAL PAGE 5 4 ...
Page 78: ...HUGHES BRAND DIRECTV SYSTEM OWNER S MANUAL PAGE 7 18 ...
Page 88: ...HUGHES BRAND DIRECTV SYSTEM OWNER S MANUAL PAGE 9 6 ...
Page 92: ...Part 1026005 0001 Revision B ...


