background image

22

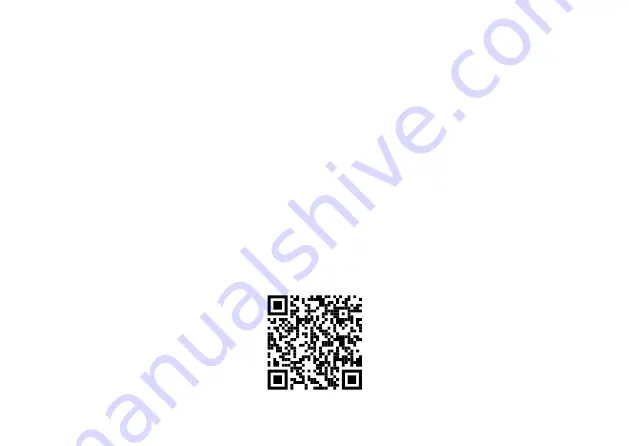
1.  On your smart device, download the NCP-VIEW app from the Google Play store if you 

are using an Android device, or the iOS App Store if you are using an iPhone. You can 

also scan the QR code below.

2.  Power up the NCP-DVR3CH and turn on the Wi-Fi from the settings.
3.  Once the app is downloaded and installed on your smartphone and the Dash Camera 

is powered up, open your smartphone's Wi-Fi settings and connect to the wireless 

connection named NCPDVR3CH_XXXX. (XXXX is the unique number for every Dash 

Camera).

4.  When prompted, enter the password 12345678

Wi-Fi Name:

 NCP-DVR3CH

Password:

 12345678

5.  Once the connection has been made, open the NCP-VIEW app. You will now be able to 

access the live recording screen for stored videos, and Dash Camera settings.

6.  Scan the QR code below to download the NCP-VIEW app from the Google Play or iOS 

App Store.

Summary of Contents for Nanocam+ NCP-DVR3CH

Page 1: ...USER MANUAL 3 Channel Front Rear and In Cabin FHD Dash Camera with GPS WiFi and DMS Your Safety Our Priority NCP DVR3CH...

Page 2: ...CONTENTS 6 6 0 PRODUCT OVERVIEW 7 6 1 BUTTON FUNCTIONS 8 7 0 BEFORE INSTALLING YOUR DASH CAMERA 8 7 1 INSERTING THE MICRO SD CARD 8 7 2 FITTING THE GPS MOUNT TO THE DASH CAMERA 9 8 0 INSTALLATION INS...

Page 3: ...SCREEN INTERFACE WHEN IN PLAYBACK 17 9 5 SETTINGS MENU 17 9 6 SYSTEM SETTINGS 18 10 0 DOWNLOADING AND INSTALLING THE NCP VIEW APP 21 11 0 NCP VIEW APP OPERATION 23 11 1 APP VIDEO PLAYBACK 24 11 2 DOW...

Page 4: ...ccording to the actual conditions on the road The system is for non commercial use only and within the limits permitted by the relevant laws Avoid using the Dash Camera in the vicinity of any devices...

Page 5: ...or above with 32GB 128GB storage capacity this is not included and will need to be purchased separately Please format your Micro SD card before use NOTE Formatting the Micro SD card will delete all i...

Page 6: ...at the Dash Camera be installed near the rear view mirror or at the top centre of the windscreen for best results making sure the internal camera is not obscured by the mirror 2 Make sure the lens is...

Page 7: ...ist and aid the driver and not to replace the manual function of the person operating the vehicle Please read through these instructions before attempting to install this product For the latest manual...

Page 8: ...creen 4 Infra Red LED 5 In Cabin Camera 6 Power Button 7 Menu Lock Button 8 Previous Camera Switch Button 9 Next DMS button 10 Take Picture Confirm Button 11 Light Sensor 12 3M Mount Slot 13 Speaker V...

Page 9: ...o switch the camera modes In menu playback Toggle the menu up or previous Next DMS button In video mode Short press to turn on off DMS function Long press to start DMS calibration In menu playback Tog...

Page 10: ...ease insert the mounting lock into the 3M mounting lock at the back of camera and slide the Dash Camera from left to right to lock 4 Dash Camera Power Connection Please insert this cable into your Das...

Page 11: ...llation 2 Remove the protective film from the NCP DVR3CH mounting bracket and position the Dash Camera in the middle of the electrostatic film optional Press down on the base of the bracket by hand fo...

Page 12: ...ront Dash Camera using the cable provided Either run the cable through the roof lining or under the carpet underlay as shown on page 12 The rear Camera can rotate 360 depending on the position and typ...

Page 13: ...12 8 3 REAR CAMERA WIRING DIAGRAM NOTE The rear Camera must be mounted inside the car as it is not waterproof Rear Camera 8M Rear Camera Cable...

Page 14: ...essing the Previous Camera Switch Button The Camera Display can switch between cameras and show the following Full front Dash Camera view Full rear Camera view Full in cabin Dash Camera view Half fron...

Page 15: ...will delete all previously saved information on the inserted card and prepare the card for best use with the car Dash Camera To format follow the steps below 5 Press the Take Picture Record button 6 P...

Page 16: ...carefully How to set the date and time 1 Press the Take Picture Record button 2 Press the Menu lock button 3 Scroll down the menu using the forward and backward key until you reach Date and Time 4 Pr...

Page 17: ...is recording 2 Recording time Shows the duration of the recording 3 DMS enabled 4 Wi Fi If your Dash Camera is not connected to Wi Fi it will have a strike through the icon 5 GPS enabled 6 G Sensor e...

Page 18: ...ssed by pressing the Previous and Next button 4 Long press the previous button to lock video 5 Long press the next button to delete video 6 Press the Menu button again to exit the Playback menu 9 5 SE...

Page 19: ...off or adjust the sensitivity of the built in G Sensor Off Low Medium High Low A higher sensitivity means more videos will be stored in the emergency folders Even a hard door closure will be saved as...

Page 20: ...keypad volume on off On Off On Power on sound Provides sound when the DVR is powered on On Off Off Factory settings Restore factory settings About Dash Camera Provides the model name and firmware vers...

Page 21: ...Requires a 3 wire wire hardwire kit When time lapse mode is turned on and the car detects the engine is off the recording will be done in time lapse mode This is to save memory space when the car is p...

Page 22: ...he App store You will also need to connect your smartphone to the NCP DVR3CH s Wi Fi signal using your smartphone s Wi Fi settings For Android devices Please search NCP VIEW in the Google Play Store f...

Page 23: ...phone and the Dash Camera is powered up open your smartphone s Wi Fi settings and connect to the wireless connection named NCPDVR3CH_XXXX XXXX is the unique number for every Dash Camera 4 When prompte...

Page 24: ...23 11 0 NCP VIEW APP OPERATION To use the NCP VIEW app your smart device will need to be connected to the Dash Camera wireless connection For instructions on connecting please see Section 10...

Page 25: ...he video videos and press the download button 4 The download will start and will save to your smartphone which can also be accessed through the NCP VIEW app in the folder named Local 11 3 SHARING VIDE...

Page 26: ...vehicle against impact The dash camera will automatically lock the recording in the event of a collision Turn off or adjust the sensitivity of the built in G Sensor Parkmode On Off Records 60 seconds...

Page 27: ...ghts under the Australian Consumer Law Directed Electronics Australia Pty Ltd Directed Electronics warrants that this product is free from defects in material and workmanship for a period of 12 months...

Page 28: ...retailer will contact you when the product is ready for collection All costs involved in claiming this warranty including the cost of the retailer sending the product to Directed Electronics will be...

Page 29: ...racy or reliability of any information obtained through Nanocam Plus including third party content that any defects in the Nanocam Plus products or services be corrected or that the Nanocam Plus produ...

Page 30: ...not permit the exclusion of implied warranties the last sentence of this section may not apply to you Nanocam Plus hereby further expressly disclaims all liability for any claims for service failures...

Page 31: ...y liability for negligence is limited to direct losses usually and typically foreseeable in such case Should the claim for damages be based on wilful or grossly negligent breach of contractual duty or...

Page 32: ...d com au www directed co nz All Images Information and Content are Copyright 2022 Directed Electronics Australia Pty Ltd All Rights Reserved www nanocamplus com au www nanocamplus co nz Your Safety Ou...

Reviews: