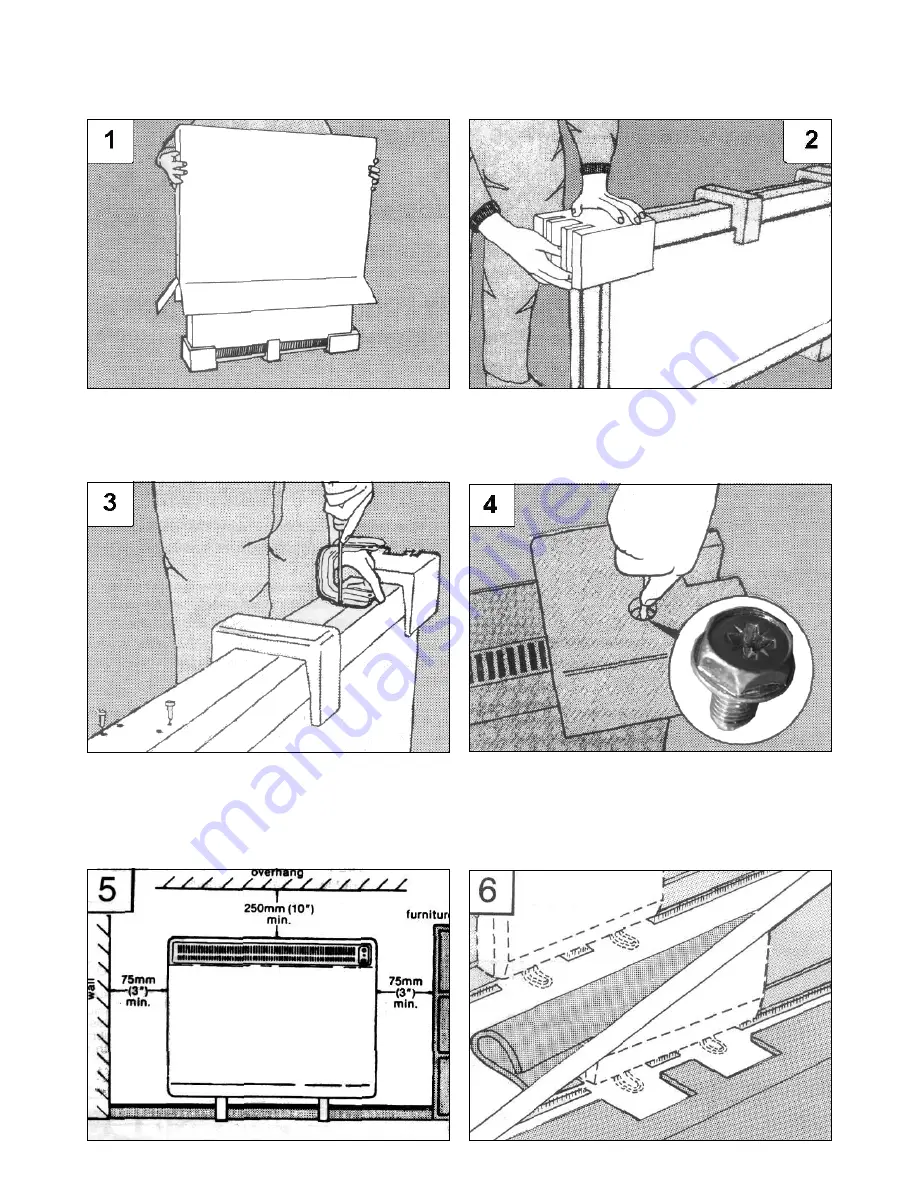
1
. Invert carton and lift carton off heater. Take care to ensure that staples
in carton ! aps do not scratch surface of heater. Do not remove internal
packaging pieces at this stage.
Assembly of heater
2
. Remove feet and accessories bag from corner " ttings (accessories bag
is located within one of the feet.)
3
. Secure feet to base of the heater using two Taptite screws (provided)
for each foot. (On modules CXL12N/CXLS12N it would be necessary to
remove base corner packaging pieces to locate feet in position). Apply
end pressure whilst turning screws so that they form their own thread in
the plunged holes in the base.
4
. Loosen hexagon head front panel securing screws, by 1-2 turns using
screwdriver through aperture in each end packaging piece.
Stand heater on its feet and remove all packaging pieces.
5. Position heater against wall in intended " nal position, taking
note of the minimum " xing dimensions given below. If " tted, the
Dimplex storage heater shelf should be " xed in accordance with
the instructions enclosed with the shelf.
Special instructions for ! tting the heater to the wall.
6. Fitting on the top of carpet.
If the heater is to stand on top of the carpet the following
course of action MUST be taken. Ensure that any carpet gripper (e.g. “Gripperod”) is
removed from the ! nal positions of the storage heater feet. Ensure that the carpet AND
underlay completely cover the area under the feet so that they stand on a level surface.
If the underlay is particularly thick it is advisable to cut it away completely from under the
feet and for a suf! ciently wide area around the feet for them to rest ! rmly through the
carpet onto the " oor.


