background image


Stereo Setup and Test


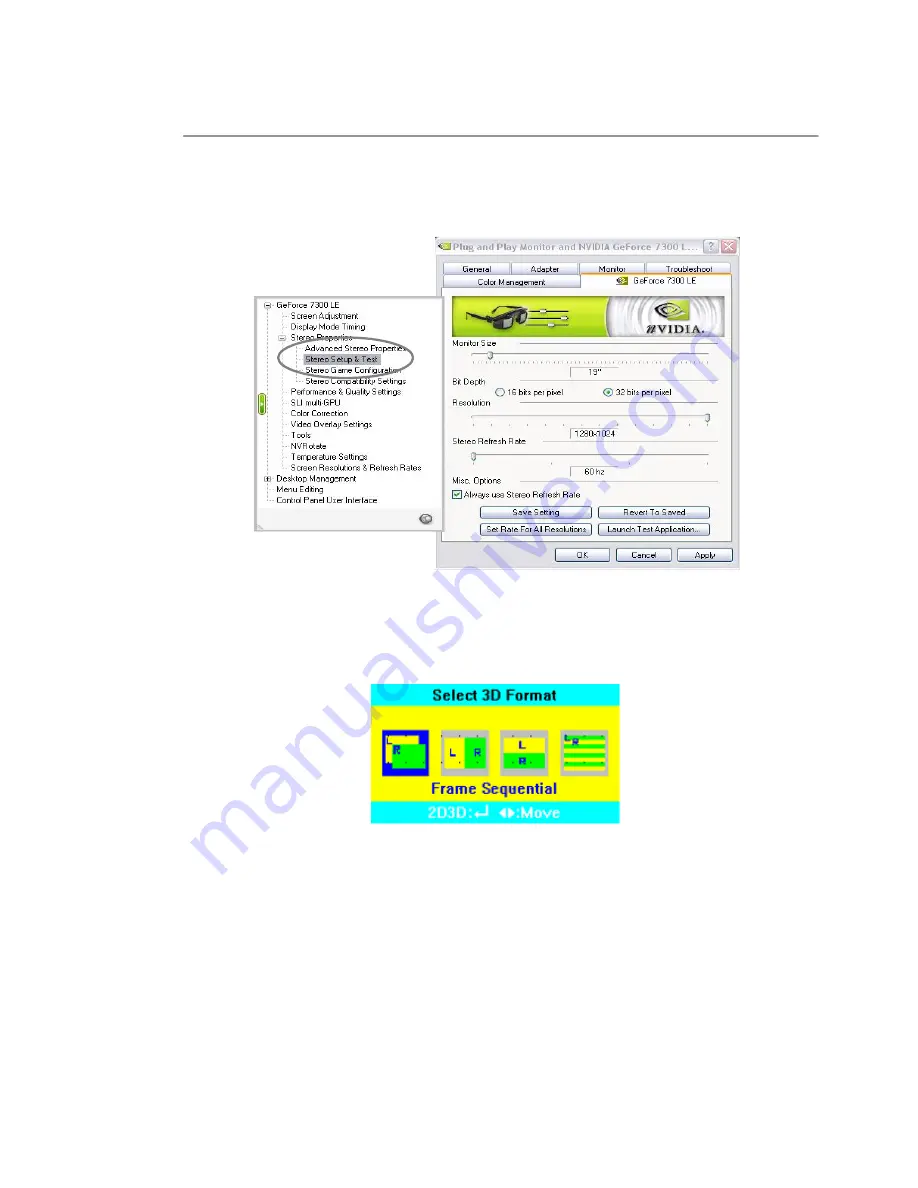
"Stereo parameters" can be set at "Stereo Setup & Test". 1280x1024 resolution and 60Hz 

frequency are recommended. 


Most 3D games are in "Frame Sequential" format. Click the [MENU] button to see if the 3D 
image format is selected as "Frame Sequential". 


If another format is selected, use the [

] or [

] button to select the correct format and use the  

[2D/3D] button to confirm and leave the menu. 


Chapter 5 

26

Summary of Contents for C190S

Page 1: ...Stereoscopic 2D 3D Switchable LCD Display User s Manual C190S...

Page 2: ...n 12 Comparison of 2D and 3D Mode 13 CHAPTER 3 2D Mode Adjustments in 2D Mode 14 Change of Input Channel 14 Automatic Screen Control 14 Navigating the MENU 14 Brightness 15 Contrast 15 Color 16 Image...

Page 3: ...ed Stereo Properties 25 Stereo Setup and Test 26 CHAPTER 6 Miscellaneous Troubleshooting 27 Product Specifications 29 Customer Service 30 Recycling 30 Appendix Explanations of 3D Image Formats 31 Fram...

Page 4: ...in front of the display and move your head very slowly left and right until you have a perfect 3D result Please run the Intro Demo Disc first On the disc you will find 3D content that can show you the...

Page 5: ...of one button 3D Formats Our displays support 4 different 3D formats The stereo image format can be changed simply by the push of a button Supported formats Interlaced Stereo Frame Sequential Sub Fiel...

Page 6: ...ower adapter that came with your display Using adapters with different specifications will cause monitor damage and might cause fire or electric shock Do not touch the power plug with wet hands This m...

Page 7: ...ause electric shock fire and injury When foreign objects are inside of the product please take out the power cord and call our service center When installing the monitor make sure to keep it away from...

Page 8: ...your eyesight we recommend taking a break frequently at least 5 minutes for every hour of monitor use Do not scratch the surface of the monitor with sharp objects such as nails pencils or pens This mi...

Page 9: ...Included Parts After opening the box please check whether the following items are included Each item might look different from the image shown Chapter 2 6...

Page 10: ...1 4 5 6 1 switch between 2D and 3D mode 2 2D mode Auto function 3D mode Reverse function 3 enter OSD menu move between sub menus 4 decrease selected value in OSD menu 5 increase selected value in OSD...

Page 11: ...for wall mounting 2 Air vent Input terminal for C190S and G170S models 2 1 2 2 1 3 1 DVI input terminal DVI cable connection 2 RGB input terminal 15 pin D SUB cable connection 3 Power input provided...

Page 12: ...Installation Power Cord 2 1 1 Connect the 220V plug to the DC 12V adapter 2 Connect the 12V plug of the DV 12V adapter to the power input terminal Set up 9...

Page 13: ...the 15 pin D SUB cable 2 Connect the RGB input terminal to the RGB output terminal Turn off the power of the monitor and other devices before connecting After connecting please tighten the two screws...

Page 14: ...DVI input terminal to the DVI output terminal Turn off the power of the monitor and other devices before connecting After connecting please tighten the two screws at both ends of the cable Make sure...

Page 15: ...r red and there is no image on the display please check whether the screen setup of the PC is set at a resolution in the range of 640x480 1280x1024 and at a frequency in the range of 60Hz 75Hz In case...

Page 16: ...the 2D 3D button at the OSD control on the front of the monitor The display now works in 3D and the LED signal lamp is red 5 To view 3D content the source has to be in a 3D format Notice A general 2D...

Page 17: ...selecting either the thumbs up or thumbs down icon displayed on the screen Move between icons with the left and right buttons save by pressing the 2D 3D button which functions as an Enter button here...

Page 18: ...onfirm your changes and leave the OSD menu Without pressing the 2D 3D button the new setting is automatically confirmed after a few seconds and the OSD menu disappears Brightness control OSD screen Co...

Page 19: ...colors and select color temperature settings Color control OSD screen Image Type Mode The visual output of the monitor can be adjusted in the third tab of the menu Choose between Normal Cinema Vivid...

Page 20: ...have the option to return to factory settings for all values in case you are not satisfied with your chosen changes Additionally you have the option to switch input channels RGB DVI If you want to cha...

Page 21: ...1 3D content can be formatted in various ways according to the production and display method Therefore various 3D image formats exist Four major types of formats are currently used each with its own...

Page 22: ...caused by a decreased frame rate However the horizontal resolution gets cut into half Sub Field Format Image format that displays L image and R image by dividing into half the vertical resolution of t...

Page 23: ...d for a 3D image format the content producers may use varying orders If you are experiencing difficulty in observing a correct 3D effect even though you are using 3D content and have chosen the correc...

Page 24: ...the OSD menu please adjust the contrast by pressing the or button Safe and exit by pressing the 2D 3D button or wait a few seconds to automatically exit the menu Subfield Adjustments When watching co...

Page 25: ...according to the manual of the graphic card manufacturer and install the stereo driver supplied from the graphic card manufacturer Please make sure that the graphic card driver and the stereo driver...

Page 26: ...dow of the NVIDIA control panel Stereo Properties When the stereo driver is properly installed you can see Stereo Properties on the left side of the box Click Stereo Properties and the Stereo Enable M...

Page 27: ...sequential format of the 3D mode a smaller square will appear on the left side of this square as a stereoscopic image in front of the big square If you are able to see the smaller square properly grap...

Page 28: ...ion can be enabled by selecting a Hot key In the Stereo Enable Mode menu choose Enabled by Hot Key Then click Advanced Stereo Properties in the left bar and choose your hot Keys for Hot Key setup Sepa...

Page 29: ...z frequency are recommended Most 3D games are in Frame Sequential format Click the MENU button to see if the 3D image format is selected as Frame Sequential If another format is selected use the or bu...

Page 30: ...though the LED signal lamp is green Check Are brightness and contrast settings at a normal level Act Adjust brightness and contrast 4 Problem The position or color of the image is strange Check Is th...

Page 31: ...ct 8 Problem Have other problems occurred Act If a problem cannot be solved by pressing the AUTO button in 2D mode only please use the factory reset function OSD MENU Setup Factory Reset This will ret...

Page 32: ...z 75Hz DVI input is 60Hz Horizontal frequency 30 81KHz Vertical frequency 55 76Hz Input terminal 15 Pin D Sub DVI D VESA standard Power 35W DC12V Maximum 2 9A Low consumption power below 1W VESA DPMS...

Page 33: ...ymbol This is an indication that this product must not be disposed together with other waste Please contact your dealer or the local government office in charge in order to find out about the details...

Page 34: ...me rate is cut in half you might experience some kind of blinking phenomenon even though normally this is not noticeable to the human eye Side Field Format A 3D image format that is displaying two ima...

Page 35: ...below each other This format has the demerit that the vertical resolution decreases Photo without gap Photo with gap Interlaced Stereo Format This 3D image format displays at the same time left and ri...

Reviews: