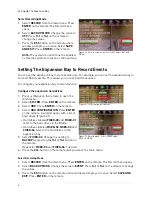
10
Setting Up The Expansion Bay
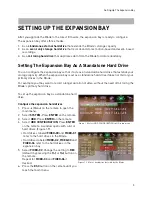
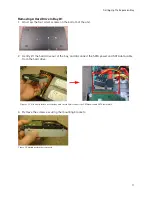
2. With the hard drive upside down, screw the metal bracket on both sides of the hard drive with
the included hard drive screws.
3. With the hard drive upside down, connect the SATA power and SATA data cables. The cables
only connect one way. Do not force in the cables.
4. Gently lower the hard drive into the bay. With your hand clasping the hard drive, flip the unit
over. Tighten the four bracket screws to secure mounting bracket in place.
Figure 3.0 Install the two mounting brackets on the side of the hard drive.
NOTE:
The screws that mount
the hard drive to the bracket
are larger. The screws that
mount the bracket onto the
base of the unit are smaller.
Bracket screw
Hard Drive screw
Figure 3.1 Connect the SATA power cable and SATA data cable. Make sure connections are in all the way.
Figure 3.2 With the hard drive in place, flip the unit over with your hand clasping the hard drive so that it does not fall out.
Tighten the four screws underneath the unit to secure hard drive.
Summary of Contents for VBAY3HD
Page 8: ...viii...

