background image

1)        Split Screen

Screen division panel pops up for various screen split display mode.

Full screen mode : 

Channel Bar pops up

4 Split

9 Split

16 Split

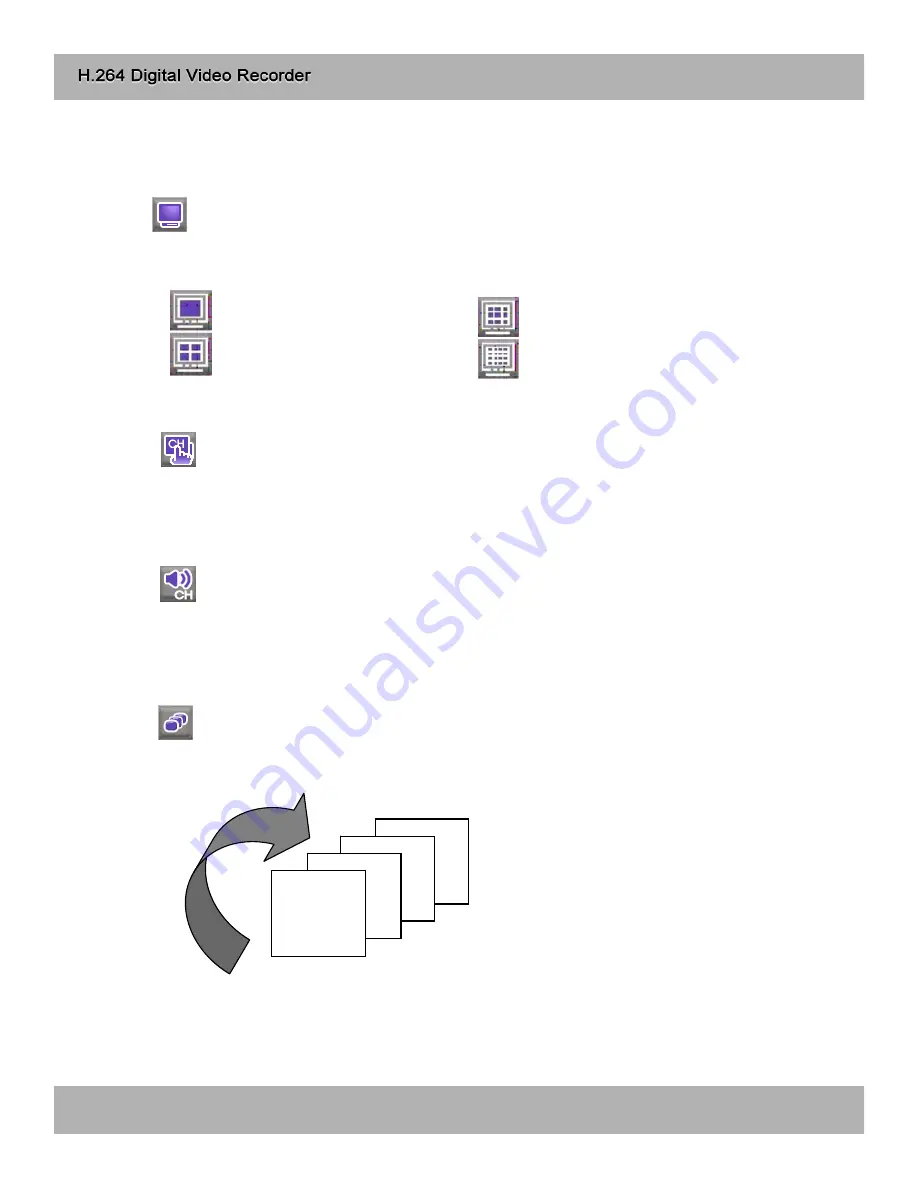
4)        SEQ (Sequence)

Displays full screen mode image in sequence.

CH04

CH03

CH02

CH01

4-3. Menu

2)        Display Channel Selection

3)        Audio Channel Selection

Display Channel Selection Panel pops up, and selected channel displays in full screen mode.

(Channels are also selectable in ZOOM, PTZ, FREEZE mode.)

Audio Channel Selection Panel pops up, and audio of selected channels turns on.

(1ch output for 4CH DVR, 2ch output for 8CH DVR, 4ch output for 16CH DVR)

19

Summary of Contents for H.264 Digital video recorder -4/8/16 channel models

Page 1: ...Ver 1 400 ...

Page 2: ...ord but you will not be able to search recorded data 2 This unit is compatible with large sized HDD 3 When setting RECORDING SETUP after installation set not only RECORD CONFIGURATION but also SCHEDULE SETUP Setting Schedule setup is necessary as this unit records according to Record type Schedule setup Default setting value for Schedule setup is Continuous mode 4 Stop recording before powering of...

Page 3: ...HDD Hard Disk Drive 11 3 Camera 13 4 Audio 13 5 Monitor 14 6 Power Cable 14 7 SPOT Video Printer 14 8 Others 15 CHAP 4 Display Configuration 17 4 1 Display 18 4 2 Channel 18 4 3 Menu 19 4 4 Record Playback Toolbar 23 4 5 Panic Recording 23 4 6 Search 24 4 7 PTZ control 25 4 8 CD DVD Backup 25 4 9 USB Backup 26 CHAP 5 Operation 27 5 1 System Login 27 5 2 Factory Default 27 5 3 Access Authority 28 5...

Page 4: ... 39 6 7 Backup Update 39 6 8 Network 41 6 9 Language 43 CHAP 7 Network Setup 44 7 1 DVR Network 44 7 2 DDNS 46 7 3 Web Application 47 CHAP 8 Remote Viewer Program 48 8 1 IRS Operation 48 8 2 Backup Operation 51 8 3 Transmitter Operation 53 8 4 Player Operation 59 CHAP 9 Specification Dimension 62 CHAP 10 Remote Controller 64 4 ...

Page 5: ...pply 5 User s Manual User s Manual 6 Software CD Remote Viewer SOFTWARE 7 Rubber Pad Prevent DVR from slipping by attaching on the bottom of the unit 8 HDD Absorber Absorbing the mechanical shock of HDD against the case bottom 9 Batteries Batteries for Remote Control 10 Rack Mount Bracket Bolts Rack Mount Bracket 6 Bolts for fixing Rack Mount Bracket to DVR 4 Bolts for fixing DVR with Rack Mount B...

Page 6: ...de at highest quality 120ips Highest 1 1x BOOKMARK Check the bookmark while playback for bookmark search PLAY Playback recorded data on HDD AUDIO Select audio channel Turn volume up down K LOCK Locking the key To unlock keep pressing the button for a few seconds and input password Same password for Setup Menu SEARCH Search recorded data on HDD STOP Stop Playback 4 LIVE View Control Key PTZ Shift L...

Page 7: ...are upgrade and USB backup 7 Camera Selection PTZ Control 1 16 Button Select camera channel in full screen mode NEAR FOCUS NEAR PRESET Increase PRESET NO FAR FOCUS FAR PRESET Decrease PRESET NO WIDE ZOOM IN PTZMENU PTZ MENU POPUP TELE ZOOM OUT F1 USER 1 SET PRESET SET F2 USER 2 CLEAR PRESET CLEAR F3 USER 3 GOTO PRESET GOTO F4 USER 4 AUTO AUTO SCAN F5 USER 5 8 CD DVD ROM For Firmware upgrade and CD...

Page 8: ...2 2 Rear Rear Panel for 4ch DVR Rear Panel for 8ch DVR Rear Panel for 16ch DVR 1 2 3 4 6 8 9 5 7 10 11 12 1 2 3 4 6 8 9 5 7 10 11 12 1 2 3 4 6 8 9 5 7 10 11 12 8 ...

Page 9: ...mera Loop out 7 Monitor Output Connection with NTSC PAL Composite Monitor 8 SPOT Output Connection from Analog backup output to external devices 9 DC Power DC 12V 6 67A Adaptor 10 PS2 Mouse Connection to PS2 Mouse 11 Audio Microphone input and Audio output 12 POWER SWITCH Power ON OFF Switch To avoid accidental deletion of HDD data please make sure to press MENU button and enter into setup menu be...

Page 10: ...3 1 Configuration 3 Installation Typical Digital Video Recorder Installation 10 ...

Page 11: ... using IDE cable and HDD power cable 2 When you use just 1 HDD install the HDD onto HDD1 location 3 When you use 2 HDDs install the first HDD onto HDD1 location and then install the second HDD onto HDD2 location in order 4 Stick the HDD absorber included in package on the bottom of case and then install the HDD on top of them by using the bolts included in package 5 Screws must be inserted from ou...

Page 12: ...ASTER 1 HDD2 MASTER2 HDD1 HDD2 4ch HDD Cable Connection HDD Fix MAIN BOARD x x x x x x x x x x x x CD RW MASTER MAIN BOARD HDD1 MASTER 1 HDD2 MASTER2 HDD1 HDD2 8ch HDD Cable Connection HDD Fix MAIN BOARD x x x x x x x x x x x x CD RW MASTER MAIN BOARD HDD1 MASTER 1 HDD2 MASTER2 HDD1 HDD2 16ch 12 ...

Page 13: ... 1 is assigned for camera channel 1 4 audio channel 2 for camera channel 5 8 audio channel 3 for camera channel 9 12 and audio channel 4 for camera channel 13 16 4 Audio input should be connected according to assigned camera channels for audio recording Microphone Input 1 1 Microphone Input is available It does not record microphone input 2 Microphone is to support TWO WAY Audio for communication ...

Page 14: ... of 2HDDs and CD Recorder Before turning on be sure all necessary devices such as Power adaptor cameras and Monitor are connected properly to DVR Notice To avoid accidental deletion of HDD data please make sure to press MENU button before powering off the unit This takes the unit out of recording mode for safe shutdown 7 SPOT Connection with the spot monitor as needed 14 ...

Page 15: ...8 Others SPEAKER VGA MONITOR PC SENSOR SIREN PTZ CAMERA PAN TILT CAMERA PC MIC 4CH SPEAKER VGA MONITOR PC SENSOR SIREN PTZ CAMERA PAN TILT CAMERA PC MIC 8CH 15 ...

Page 16: ...23 26 at Terminal Block GND Ground Pin No 3 No 7 No 12 No 17 No 22 at Terminal Block ETHERNET Connection to LAN WAN and Internet VGA Connection to VGA Monitor CRT TFT LCD Monitor is available if optional VGA board is fixed on the main board Resolution is set to 800x600 60 Hz User can change resolution in MONITOR SETUP VGA SETUP VGA RESOLUTION SPEAKER VGA MONITOR PC SENSOR SIREN PTZ CAMERA PAN TILT...

Page 17: ... and available remaining days 2 Channel Display ALARM CAM LOSS MOTION status for each channel 3 Menu Click with mouse SPLIT CHANNEL AUDIO FRZ SEQ ZOOM PIP PTZ SETUP EM REC PLAY SEARCH 4 Live Live screen of each channel Camera Title Status 4 Display Configuration 3 2 1 4 17 ...

Page 18: ...ted 5 HDD Space In case of ALARM CAMLOSS MOTION relevant channel number lights orange 1 Channel Information It is set to CAMLOSS notice mode and orange light on 6 and 11 indicate that no cameras are connected on channel 6 and 11 Ex HDD recorded space is marked red on the time bar Available remaining days time at current record mode is shown 4 2 Channel 3 Record Icon Display current recording mode ...

Page 19: ...ge in sequence CH04 CH03 CH02 CH01 4 3 Menu 2 Display Channel Selection 3 Audio Channel Selection Display Channel Selection Panel pops up and selected channel displays in full screen mode Channels are also selectable in ZOOM PTZ FREEZE mode Audio Channel Selection Panel pops up and audio of selected channels turns on 1ch output for 4CH DVR 2ch output for 8CH DVR 4ch output for 16CH DVR 19 ...

Page 20: ... CLEAR PRESET CLEAR WIDE ZOOM IN GOTO PRESET GOTO TELE ZOOM OUT AUTO AUTO SCAN NEAR FOCUS NEAR Arrow PAN TILT FAR FOCUS FAR No PRESET No 5 FRZ Freeze Freeze live display and show the Images on the screen with icon Control PAN TILT with mouse drag and click Control ZOOM IN ZOOM OUT with mouse scroll in the middle of screen 20 ...

Page 21: ...splays in sequence according to preset interval Full screen can be shifted to next channel by clicking the full screen or by clicking the channel number CAM01 CAM02 10 Search 9 Setup Click SETUP button to go to setup menu See Chapter 6 for details Its function is to search recorded data easily and playback Search by Time Date Percentage of HDD Event Bookmark list search available See Chapter 4 6 f...

Page 22: ...and support flexible playback operation play forward reverse previous next fast forward reverse pause See Chapter 4 4 for detailed instruction In case of emergency click the Panic Record icon to activate the panic recording appears and it starts recording at continuous mode at highest quality See Chapter 4 5 for details 22 ...

Page 23: ... Playback Playback in Reverse Direction 4 5 Panic Recording Default setting is Schedule recording continuous recording mode In case of emergency click Emergency Record button and it starts recording at highest quality Record LED lights on DVR Schedule Mode Records according to the recording settings in the RECORD SETUP SCHEDULE SETUP menu To return to Schedule Recording mode click STOP button 2 Wh...

Page 24: ...re in the percent search bar It starts playback from the selected Date Time or from the point marked on the percent search bar Search by event list made in case of Motion Alarm or Video Loss Select any event shown on the list first and click PLAY button to play it And then it starts playback from the beginning of the selected event 3 Search by BOOKMARK List Search by bookmark list While in playbac...

Page 25: ...ACKUP SIZE and it will show end time End time and date will be calculated automatically as per start time and the selected backup data size To backup in several CDs set size in SPLIT TO FILE 3 Click BACKUP START to start backup 4 When burning process is completed CD RW will open automatically and start time will be set automatically to the end time of burned data for continuous backup process End ...

Page 26: ...ime and date select BACKUP SIZE and it will show end time End time and date will be calculated automatically as per start time and the selected backup data size 3 Click BACKUP START to start backup 4 When backup process is completed start time will be set automatically to the end time of backup data for continuous backup process End time will be calculated automatically as per selected backup data...

Page 27: ...ord and click the OK button To exit click the CANCEL button Check if all channels are being displayed properly before the first operation and log into the Main Menu and set Time Date and run factory default and clear HDD Starting recording without factory default and clear HDD may cause a malfunction 5 1 System Login 5 2 Factory Default 5 Operation 27 ...

Page 28: ... CLEAR BACKUP PLAY 5 4 Key Lock Press K LOCK button for several second and then the message appears to confirm If you click OK it will lock all the key function of DVR appears on the screen while DVR is under Key Lock mode To unlock press K LOCK button for several second and then input the password same as system password 28 ...

Page 29: ... 3 1 4 1 8 1 16 1 32 Lower speed playback available 4 x2 x4 x8 x16 x32 Higher speed playback available 5 Pause Click Playback icon and then the recorded data on HDD will begin playback at X1 speed Playback control panel Navigation button on the front You may also control the playback by pressing buttons on the front While in playback mode if you want to remember a certain point of the recorded dat...

Page 30: ...fault DISPLAY Display Interval DID Resolution HDD MANAGEMENT Clear HDD HDD Information Display CAMERA Title Camera Color Camera Activate Alarm Motion PTZ Operation speed PTZ EVENT Pop Up RECORD Recording Quality And Method Schedule Holiday BACKUP UPDATE CD DVD Backup USB Backup Firmware Update NETWORK IP CONNECTION WEB GUARD DDNS LANGUAGE Language Selection 30 ...

Page 31: ...kbox of contents for buzzer ON KEY BEEP when button on mouse of key panel is clicked or pressed VIDEO LOSS when video signal is lost ALARM ACTIVE when alarm is activated MOTION DETECT motion is detected Click OK to save setting Click DEFAULT to return to initial setting Set Password for each user grade Select user grade and set USER PASSWORD Set different passwords for different user grades Click ...

Page 32: ...Click DEFAULT to return to initial setting Set settings for RS 232C port BAUDRATE 2400 115200 LENGTH 5 8 STOP BIT 1 2 PARITY NONE ODD OVEN FLOW CONTROL NONE SOFTWARE HARDWARE Click OK to save setting Click DEFAULT to return to initial setting Set Remote Controller for DVR DVR can be controlled remotely with remote controller Setup for its remote control range available Click OK to save setting Cli...

Page 33: ...ttings as initial setting before delivery Check checkbox of contents to reset Click OK to run factory default Click CANCEL to return to initial setting 7 Audio Set audio output volume AUDIO VOLUME Set output volume for each channel Click OK to save setting Click DEFAULT to return to initial setting 33 ...

Page 34: ...EFAULT to return to initial setting Set interval for shifting channel Sequence Camera channel shifting interval PIP SCREEN PIP channel shifting interval SPOT MONITOR Spot Monitor shifting interval TIMEOUT Menu display dwell time EVENT UPDATE TIME Event update interval Click OK to save setting Click DEFAULT to return to initial setting Set VGA OUT VGA Connection ON OFF RESOLUTION Set Resolution FRE...

Page 35: ...formation Menu for Clear HDD Displays start and end time of data on HDD After pressing START button account and password of DVR input window pop ups Then after input number check HDD becomes Clear Status And start saving recording data of HDD OVERWRITE When HDD is full overwrites from the beginning of HDD Click OK or CANCEL to EXIT 35 ...

Page 36: ... title of each camera Left click any place one the screen Then the virtual keyboard panel pops up Enter title and click ENTER Click OK to save setting Click DEFAULT to cancel Set camera activation STATUS Camera type NTSC PAL LOSS COVERT Check the checkbox of camera channel not to display REC Check checkbox of camera channel to Record Click OK to save setting Click DEFAULT to return to initial sett...

Page 37: ...nsitivity Low Very High DWELL TIME Time duration of motion detection Click right button of mouse motion cell area can set Click OK to save setting Click DEFAULT to return to initial setting Cell Setup Click left button of mouse to set Motion Mask Zone by selecting or clearing blocks Block Setup Click selected cell and drag it to desired position And then SELECT CLEAR buttons appear SELECT Activate...

Page 38: ...setting Click DEFAULT to return to initial setting 6 PTZ Set PTZ Camera control speed CHANNEL Selection connected PTZ PROTOCOL Selection Camera Model ID ID Value for PTZ Camera BAUDRATE PTZ SIGNAL Transmit rate PAN Horizontal movement Speed TILT Vertical movement Speed ZOOM Zoom In Out Speed FOCUS Focus Near Far Speed Click OK to save setting Click DEFAULT to return to initial setting 38 ...

Page 39: ...e recording by Day and Hour MOTION ALARM MOTION ALARM or CONTINUOUS recording mode selectable In case of emergency click Panic button and it will start recording at CONTINUOUS MODE at highest resolution Unless otherwise specified it records according to this Schedule Record Setup Click OK to save setting Click DEFAULT to return to initial setting Set national holidays or holidays on calendar to re...

Page 40: ...able to USB size Click START to start backup Backup via CD DVD RW Start End time of total recorded data on HDD shows on top Input date time of data to backup and click SELECT button to check total backup data size If total backup data size is bigger than CD DVD storage End time will be determined automatically Click START to start backup Insert an USB memory stick which has the firmware to be upgr...

Page 41: ...lue TIME OUT Limitation of Time Out maximum value Recommendation Increased Time Out in slow network environment decreased Time Out in fast network environment RETRY COUNT The number of times of retrial PORT Set IP Port 50000 recommended Click OK to save setting Click DEFAULT to return to initial setting 1 Ethernet 2 Connection Used for changing port of DVR Select the usage of WEB GUARD or not WEB ...

Page 42: ...ction DDNS SERVER DDNS Server address DVR NAME DVR name to be registered to server Click OK to save setting Click DEFAULT to return to initial setting See Chapter 6 2 for details 4 DDNS 6 EMAIL Please fill the information of SMTP SERVER USER NAME USER PW PORTMAIL SERVER CHECK SERVER Check the status of mail server TITLE Input the title of mail which will be sent FROM TO Input the sender and receiv...

Page 43: ...1 Language Select language Click OK to save setting 6 9 Language 43 ...

Page 44: ...____________________________________________________ ex 255 255 255 0 Default Gateway _____________________________________________________ ex 192 168 1 1 Refer to following scenarios 1 3 and identify which scenario your current network falls within and follow instructions for configuring and accessing your DVR via TCP IP 1 Static IP User input IP address assigned from ISP company in IP CONFIG SET...

Page 45: ...d turn on again This process is to reset client s MAC from ISP company Wait for 30 sec after turning on 4 When modem functions good turn off DVR and turn on again 5 Enter into MENU NETWORK SETUP IP CONFIG 6 Select DYNAMIC IP and click refresh button 7 Exit MENU 8 Verify if MAC address starts with 00 0A A2 9 Set IP port in CONNECTION SETUP 50000 recommended 10 Access DVR with Transmitter Program If...

Page 46: ...ORK DDNS 2 Click the check box of DDNS and Input the domain which you want to Register to DDNS 3 Click OK to request the registration NOTE When entering a domain name already registered on DDNS server an error massage displays 46 ...

Page 47: ...hich support IRS Remote Software function Notice When you firstly use web application please click yes for ActiveX control installation DVR SETUP Change DVR setting remotely over network BACKUP Backup Recorded Images from DVR to PC PLAYER Playback backup data on PC TRANSMITER Control DVR remotely as if controlling the local unit DVR 47 ...

Page 48: ...hange DVR setting remotely over network 3 BACKUP Backup Recorded Images from DVR to PC 4 PLAYER Playback backup data on PC 5 TRANSMITTE R Control DVR remotely as if controlling the local unit DVR 8 1 IRS Operation 1 IRS Integrated Remote Station Display 8 Remote Viewer Program 1 2 3 4 5 48 ...

Page 49: ...TION Input IP address and port number manually Input the location of DVR 2 ID PASS Input ID and Password of DVR 3 UPDATE DELETE Update the new setup Delete the selected setup 4 SAVE OK Save and select the sight information from the list 1 2 3 4 49 ...

Page 50: ... number manually 2 DDNS PORT Input IP address and port number of DVR 3 ID PASS Input ID and password of DVR 4 CONNECT Click to connect to DVR User can change some settings of DVR remotely over network Active Camera Alarm Buzzer Interval Password Record Configuration Record Schedule 50 ...

Page 51: ...te Backup input IP Address Port and click Connect Test Button 2 After Connect Test is done you can see Success Connect Test message Then click Lock button and click Set Backup Time Button 8 2 Backup Operation 51 ...

Page 52: ...3 Now you set Start Time End Time Save File Path File Size and click Apply 4 After finishing time setting click Start Backup to start Backup Then you can see the Backup on the Path that you chose 52 ...

Page 53: ...Change or set DVR system menu 4 Search Search recorded data from HDD of DVR Date Time Search Event List 5 Main Key Panel Pop up panel to control CH REC PLAY STOP 6 Two Way Audio Enable Two Way Audio between DVR and Transmitter TRANSMITTER Program that enables connection to DVR via TCP IP to see live screen and to control DVR 13 14 1 4 2 3 5 6 7 8 9 11 10 12 53 ...

Page 54: ...TZ Camera 9 ZOOM Zoom In Out operation of PTZ Camera 10 FOCUS Focus Near Far operation of PTZ Camera 11 PTZ PTZ ON Pan Tilt control of PTZ Camera OFF Function as arrow keys 12 EXIT EXIT the transmitter 13 User Input IP PORT ID PASSWORD of remote DVR 14 Date Time Display Date Time of DVR 2 Transmitter Search 1 2 3 4 5 6 7 8 Search Percent Date 54 ...

Page 55: ...9 10 Search Event List Search Bookmark List 55 ...

Page 56: ...ded data on DVR 5 Search by Time Date Search by Time and Date as entered 6 Search by percentage of HDD Search by Percentage of total recorded data on HDD 7 OK Start playback 8 CANCEL Close Search window 9 Event List Index Show Event Lists received from DVR Double click a list to start playback or click OK 10 Bookmark List Index Show Bookmark Lists received from DVR Double click a list to start pla...

Page 57: ...equence Full screen image displays in sequence 8 PIP Picture In Picture 9 Un FRZ Continue playback from FREEZE 10 Zoom Zoom In image 11 Pause Stop playback for a short period of time 12 Up Down button for volume channel page 13 Exit Exit Main Key Panel 1 13 2 3 4 5 6 7 8 9 10 11 12 Button Function Move to the beginning of recording Increase reverse playback speed Decrease reverse playback speed Re...

Page 58: ...etup Page SETUP STREAM Choose pre setting for some specific network condition 128K 256K 512K Or choose CUSTOMISE for setting as you want Twoway Audio Choose the audio input from DVR for when Twoway Audio activated 58 ...

Page 59: ...specification HIGH SPEED PC supports all channel Playback simultaneously LOW SPEED PC supports up to 4channel playback simultaneously 8 4 Player Operation NOTE Recommended PC specification for HIGH SPEED PC is as below Processor Type Pentium Core2 DUO or better Memory 1GB minimum 59 ...

Page 60: ...nel panel 5 DIVISION Select 1ch 4ch 9ch 16ch Division display 6 Audio Check checkbox Audio On and choose channel to sound on 7 DISPLAY Playback backup data 8 TIME Indicate Start time End time Play time of backup data 9 CONTROL Play panel for Fast normal Reverse Forward Move to beginning end Pause 10 Speed Delay Control playback speed of backup data 11 EXIT Exit Player 1 2 3 4 5 6 7 8 9 10 11 60 ...

Page 61: ... screen mode 3 Bright Adjust brightness of still image in full screen mode 4 Sharp Adjust sharpness of still image in full screen mode 5 Image Save Save still image in image file in full screen mode 6 Image Print Print still image in full screen mode 7 AVI Save Option Select channel frame rate size to convert into avi file 8 Start Start saving data in avi file format 9 Stop Stop saving data in avi...

Page 62: ...odec Audio G 726 or mp2 General Feature Signal Format NTSC or PAL Auto Detect Video In 4CH 8CH 16CH Out Main Spot VGA Loop Out 4CH 8CH 16CH Video Compression Rate 3 Steps Selectable Audio In 1CH 2CH 4CH Out 1CH Alarm In 4EA 8EA 16EA Out 1 NO NC Storage 2EA S ATA HDD Recording Speed NTSC PAL 704x480 704x576 704x240 704x288 352x240 352x288 120 100 ips 240 200 ips 480 400 ips 352x120 352x144 Resoluti...

Page 63: ...able Network Remote S W Monitoring Search Playback Back up Integrated Romote Station Internet Explorer support Available No need to register DDNS Support Yes CMS Central Management Software Yes Simultaneous remote user access 4 persons or more Network Speed Value Selectable Remote Setup Available Data Export Own File Format Back Up Archiving CD RW Option DVD RW Yes USB Port USB 2 0 Others Operatio...

Page 64: ...lect CH Input number indicates 2 digits 0 0 10 0 1 11 No functions Playback from beginning Reverse playback Playback Move to end and stop Decrease playback speed Pause Stop Increase playback speed Sequence Freeze Picture In Picture Zoom I I II SEQ FRZ PIP ZOOM 1 9 0 Search Menu Audio On Off Screen Division Change Mode No functions No functions SEARCH AUDIO MODE ESC FUNC 64 ...

Page 65: ...65 ...

Page 66: ...66 ...

Page 67: ...67 ...

Page 68: ...Real time playback USB backup H 264 Hardware Codec ...

Reviews: