


1-19
DiGiCo S21
1-19
1.5.5 Macros .....................................................................................
Touching the Main Menu >
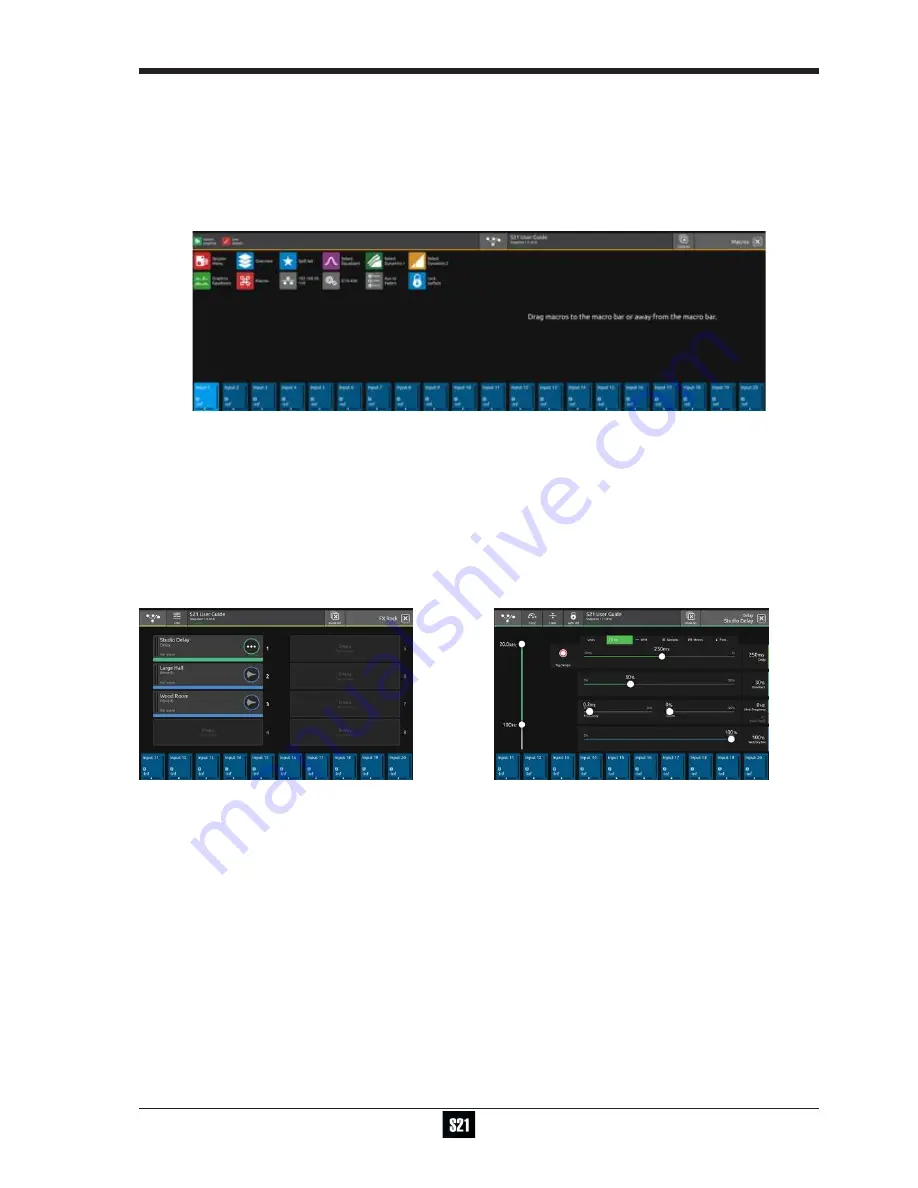
Macros
button displays a list of factory provided Macros that can be assigned to the Macro bar at the top of
the left hand screen.
The Macro bar is visible in all console views.
To assign a Macro to the bar, touch and hold on the required Macro on the left screen and drag it into the Macro bar at the top.
To remove a Macro from the bar, touch and hold on the required Macro and drag it back into the main screen area.
Macros can also be reordered within the Macro bar by touching, holding and drag/drop.
The Macro bar can display up to 10 Macros at one time and if more Macros are added, up to 4 groups of 10 Macros can be displayed by
swiping horizontally in the Macro bar itself.
1.5.6 FX Rack ...................................................................................
Note: A maximum of 6 Studio Delay units can be used in combination with any type of Reverb
Touching the Main Menu >
FX Rack
button displays the FX slots and the FX units that are assigned to them.
If a slot is empty, touch that slot and select the required FX unit from the scrollable FX picker list, this will then be added to the slot and
opened to display its expanded view.
FX parameters can be adjusted on-screen by touching/dragging the controls or by using the Master rotaries to the right of the screen.
Close this view to return to the FX overview and touch on any existing effect to reopen the expanded view.
To change the FX unit type in a slot, touch and hold on the existing unit in the slot and FX picker will be displayed
To route signal to an FX unit:
Open the Channel Setup view for the required Input Channel or Aux Master by touching the top of the channel strip
Touch the Direct Outputs block on the right of the screen which opens the output routing view
Select
Effects
from the
Internal Port Group
in the top left of the screen
Select a socket(s) for the required FX inputs
To route signal from an FX unit:
Open the Channel Setup view for the required Input Channel which will be the FX return by touching the top of the channel strip
Touch the input block in the
Source
column which opens the input routing view
Select
Effects
from the
Internal Port Group
in the top left of the screen
Select a socket(s) for the required FX returns
A similar routing procedure to the above should be used when inserting FX in a Channel Insert point.
The Channel Insert routing (A or B) is also found in the Channel Setup View.
The buttons in the top bar of the expanded FX view also provide the following functions:
Copy
FX from one FX slot to another - touch the copy button and then touch the required destination slot and the confirm copy button
Clear
FX - Set the parameters of the FX unit to its default settings - touch the Clear button
Safe
FX - touch the Safe button, it will highlight in red and so will the outline of the FX unit in the FX overview


