11
You need to set the current date and time prior to initiating a recording.
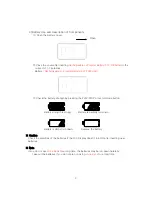
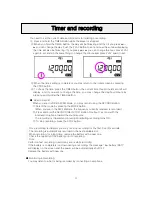
① Press and hold the TIMER Button while the player is stopped.
② When you hold the TIMER Button, the day will be flickering and then if you press
or
you can change the day. Push the PLAY Button to set and now the window displaying
the time will also be flickering. If you press
or
you can change the hour, press PLAY
again to set and do the same thing to change the minute and press PLAY again to set.
③ When the time setting is completed, you may return to the initial screen by pressing
the STOP button.
④ To check the time, press the TIMER button, the current time (hour/minute/second) will
display, and if you want to change the time, you may change the day/hour/minute by
pressing and holding the TIMER Button.
● How to Record
When you are in VOICE/AM/FM Mode, you may record using the RECORD Button.
① Select the mode by pressing the MODE Button.
(When you are in the AM/FM Mode, the frequency currently received is recorded).
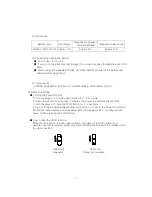
② Press and hold the RECORD (REC/STOP) Button for about 1 second with the
internal microphone toward the sound source.
The recording is initiated and a red light indicating recording turns ON.
③ To stop recording, press the STOP button.
※ Once recording is initiated, you may not stop recording for the first Five (5) seconds.
※ The recording is automatically recorded in the next available slot.
※ When recording for a long time, replace the battery with a new one.
※ Check the capacity of the battery prior to recording.
※ Note
Perform a test recording to avoid any errors while recording.
If the battery is completely run down during a recording, the message “low battery (BAT)”
will display on the screen and the power will be automatically shut OFF.
Replace the battery with new one.
● Monitoring a Recording
You may listen to what is being recorded by connecting an earphone.
Timer and recording


