


Thermal Jet
Section 5: Troubleshooting
5780-320 Operations Manual Rev C
Page 23
Section 5: Troubleshooting
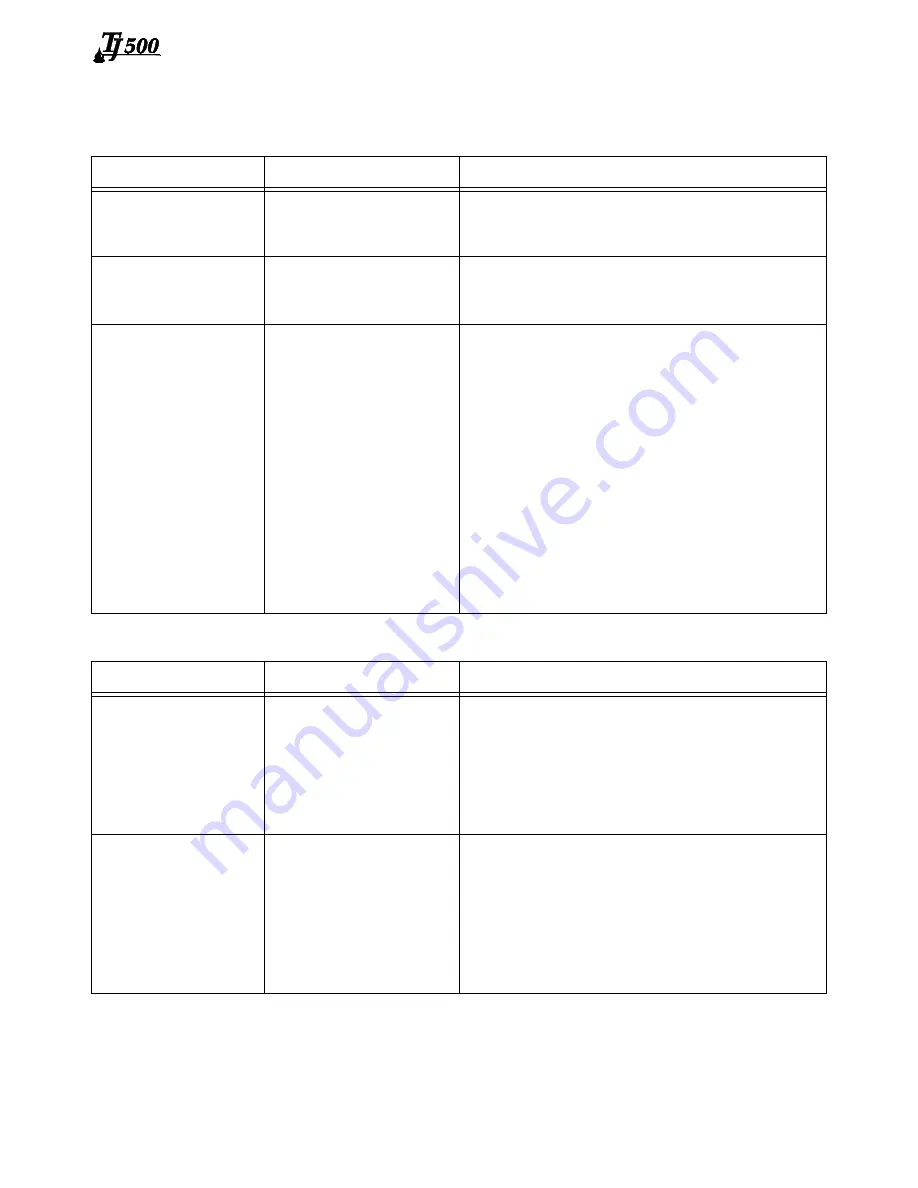
NO PRINT
System Symptom
Possible Cause
Actions
No print head power /
green LED on rear of
print head
•
Power Supply
•
AC Source
•
Check power supply light indicator.
•
Check for AC power source between power sup-
ply input limits.
PURGE button on rear
of head does not
appear to work
•
Ink cartridge is dam-
aged or empty
•
Print head Board
•
Replace with new cartridge and repeat PURGE.
•
Replace print head printed circuit board or print
head.
Print head purges but
won’t print desired mes-
sage
•
Loose or missing
cables
•
Controller or PC soft-
ware not configured for
Serial Print Head
•
Encoder Malfunction
•
Product not triggering
photocell.
•
Tighten or install all cables.
•
Ensure print heads are configured as serial. See
“Section 2: Quick Start”, “Step 6: Cabling, Power,
and Serial Port Setup” on page 7.
•
Ensure encoder is installed and plugged into the
last print head in the daisy chain.
•
If the encoder is installed, navigate to the control-
ler Status screen from the Home screen. While
the encoder is turning, check the line speed for
greater than 0 ft/min or 0 m/min.
•
Ensure the product is within 1/4" of the front face
of the print head.
•
If an external photocell is installed, then validate
the setting from the Control Panels, System
Setup, Task Options Tab.
POOR PRINT QUALITY
System Symptom
Possible Cause
Actions
Print is foggy or light
•
Print head is mounted
greater than an 1/8"
away from the sub-
strate
•
There are large air cur-
rents near the print
head
•
Adjust the print head according to “Section 2:
Quick Start”, See “Step 4: Adjust TJ500 Print
Head to Substrate” on page 5.
•
Locate print head in an area where there are min-
imal currents or provide wind barriers.
Print image is missing
channels or has multiple
fractures
•
Pen cartridge face is
dirty
•
Pen cartridge face is
damaged at the orifice
array
•
Pen cartridge is not
properly seated in the
print head
•
Clean the pen face per “Section 4: Maintenance
& Shutdowns” on page 21.
•
Replace damaged pen cartridge with new.
•
Remover cartridge and reinsert according to
“Section 2: Quick Start”, “Step 5: Insert Cartridge
Pen into Print Head” on page 6.


