www.dfi.com
14
Chapter 2 Hardware Installation
Chapter 2
Installing the Fan and Heat Sink
The CPU must be kept cool by using a CPU fan with heat sink. Without sufficient air circula-
tion across the CPU and heat sink, the CPU will overheat damaging both the CPU and system
board.
1. Before you install the fan / heat sink, you must apply a thermal paste onto the top of the
CPU. The thermal paste is usually supplied when you purchase the fan / heat sink assem-
bly. Do not spread the paste all over the surface. When you later place the heat sink on
top of the CPU, the compound will disperse evenly.
Some heat sinks come with a patch of pre-applied thermal paste. Do not apply thermal
paste if the fan / heat sink already has a patch of thermal paste on its underside. Peel the
strip that covers the paste before you place the fan / heat sink on top of the CPU.
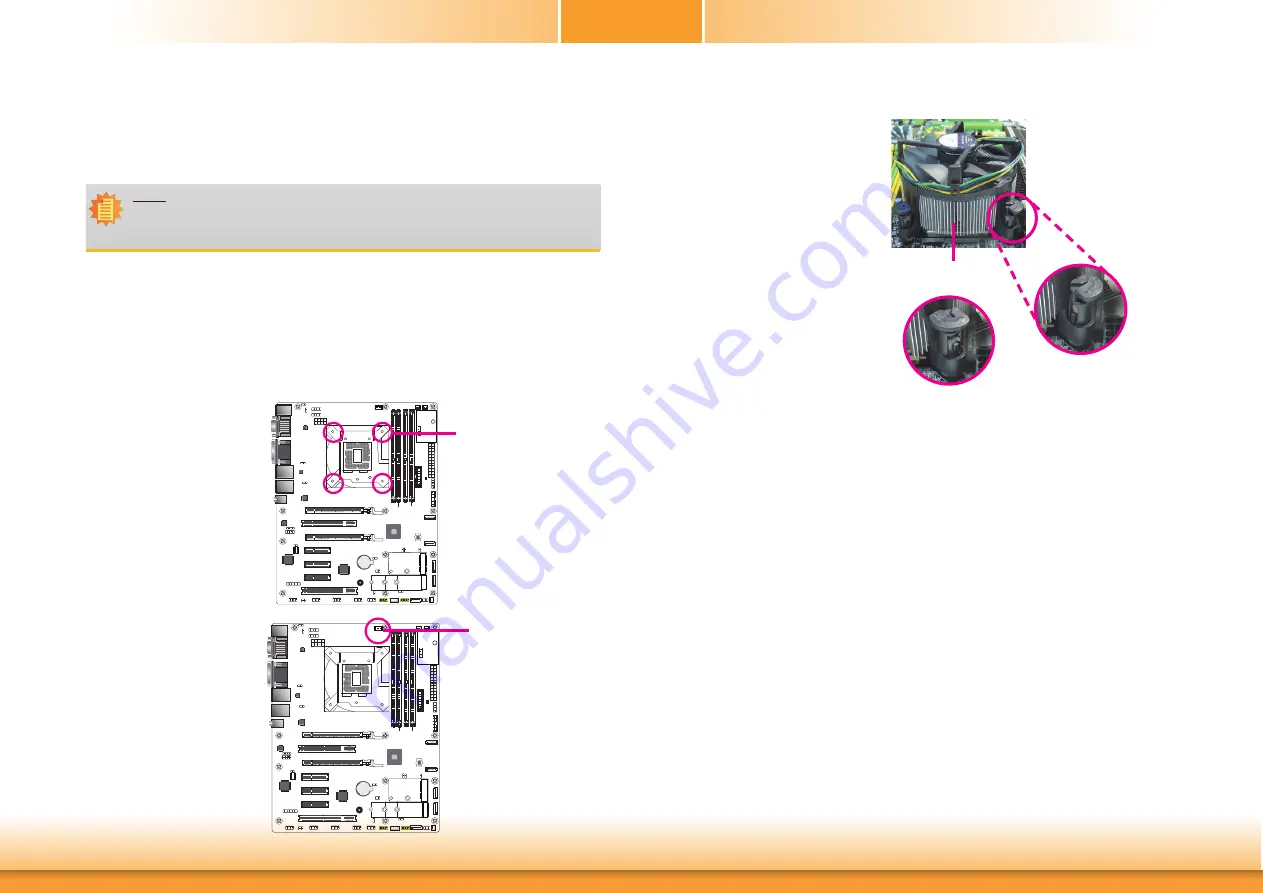
2. Place the heat sink on top
of the CPU. The 4 push-
pins around the heat sink,
which are used to secure
the heat sink onto the sys-
tem board, must match the
4 mounting holes around
the socket.
Mounting hole
3. Orient the heat sink such
that the CPU fan’s cable is
nearest the CPU fan con-
nector.
CPU fan connector
Note:
A boxed Intel
®
processor already includes the CPU fan and heat sink assembly. If your
CPU was purchased separately, make sure to only use Intel
®
-certified fan and heat
sink.
4. Rotate each of the four
push-pins clockwise
to the locked position
first.
Apply firm presure
and press down two
push-pins on the op-
posite corners of the
heat sink. Perform the
same procedure for the
other two push-pins. A
distinctive click can be
heard when a push-pin
is pressed all the way
through the mounting
hole and anchored in
place. Flip the board to
inspect.
Heat sink
“Locked” position of
push-pin
5. Connect the CPU fan’s
cable to the CPU fan
connector on the sys-
tem board.
“Unlocked” position
of push-pin


