Page 9
Behaviour in case of power failure and/or after
switching off
The selected settings are maintained after switching off
the video recorder or in the case of power failure.
After restoring the power supply, channel 1 (CH1) is
always automatically selected.
Tip:
The event recorder has no means of time-controlled
recording; instead it records when motion is detected. If
you wish to record using specified time periods, you can
control the mains power supply using a commercially
available timer. For example, to activate the device from
18:00 to 08:00 Monday to Friday and all the time at the
weekend. The device records when motion is detected
during the activated time. The camera from which the
images are to be recorded must be connected to camera
input Ch1.
16. Playback mode
You can view the stored images on a TV or a video
monitor. Alternatively, you can view the images stored on
the SD card on a PC with image viewer software. Viewing
the images on a digital camera or on a photo printer is not
possible due to the different file structure.
16.1 Playback on a PC
!
Switch off the event recorder using the ON/OFF
switch [14].
!
Remove the SD card from the memory card slot [18].
!
Insert the SD card into a card reader of your switched-
on PC.
!
Select the “DCTV” directory on the corresponding
drive.
!
Select the desired daily directory, e.g. 08-01-09-00
(the daily directory is for 9 January 2008).
!
Select the desired file (AVI format = video sequence,
JPG format = still image), e.g. 22253400.JPG (the still
image was recorded at 22:25). A video viewer
application is needed for viewing video sequences
(Media Player).
16.2 Playback on a video monitor or TV
!
Connect the event recorder to a video monitor or to a
TV using the cable [20] and the SCART adapter [21] if
needed (see Fig. C).
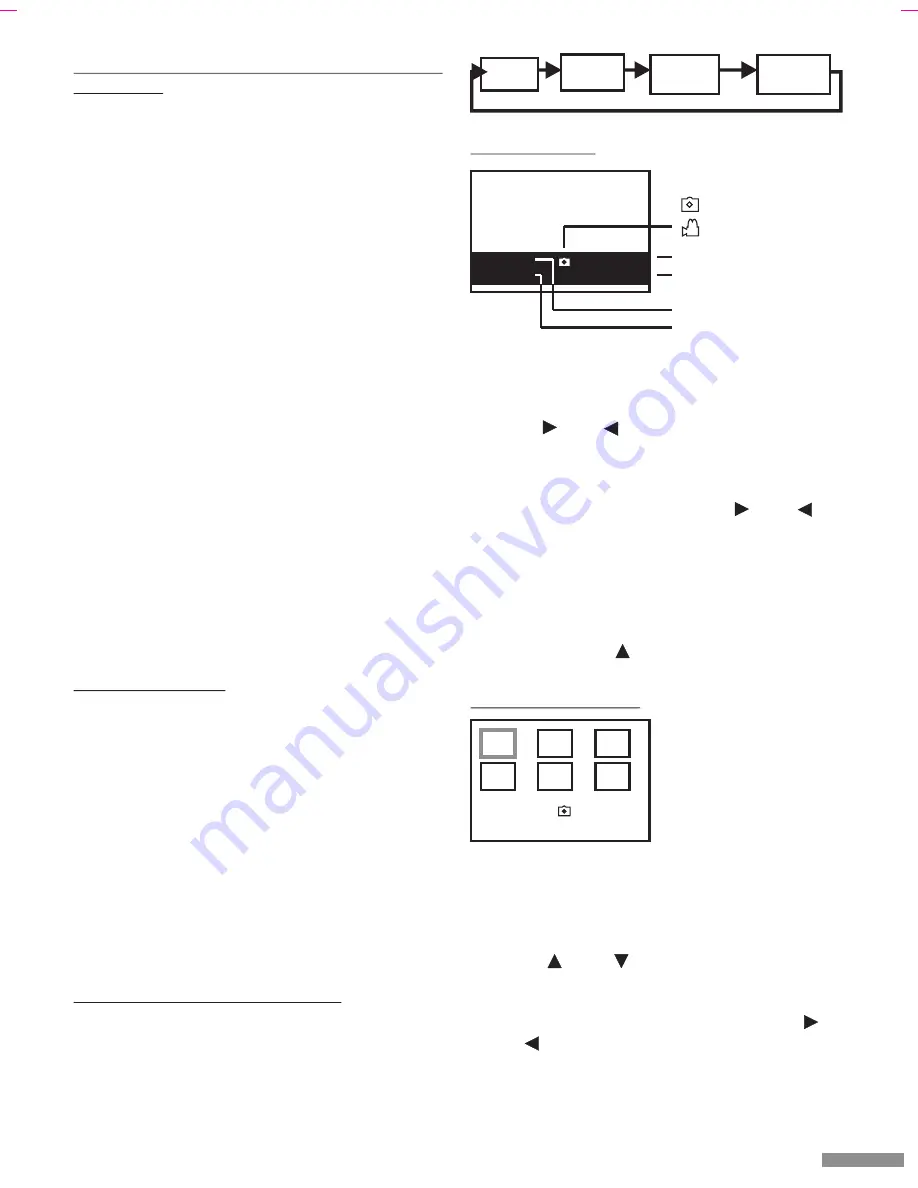
If you press the “Play” button [10] repeatedly (not possible
if a recording is being made), the following sequence is
displayed:
If a power failure lasts longer than approx. 12 hours, the
date and time will be reset to the factory settings.
Note: As the date and time are only retained for approx.
12 hours after disconnection from the power, the switched
off time must be less than 12 hours.
16.2.1 Full screen
The last stored image is displayed by pressing the “Play”
button [10].
!
The “Slide show” program is selected by pressing the
button [4] or [2]. This will automatically display
all the images or video sequences stored in the
directory one after another.
!
If you would like to pause an image or video
sequence, press one of the buttons [4] or [2]
again. Press this button again in order to continue the
slide show (the paused video sequence will not be
resumed, instead the next image or next video
sequence will be displayed).
!
The images will be displayed with an information
window (see Figure H). In order to hide this window,
press the button [3]. Press this button again in
order to display the window again.
16.2.2 6-image overview
!
The last six stored images (or the respective first
frames of the video sequences) in the daily directory
are displayed by pressing the “Play” button [10] again.
!
The pages can be scrolled through by pressing the
buttons [3] and [12].
!
If you would like to view an image or a video
sequence in full screen mode, move the white frame
onto the desired image by pressing the buttons [4]
and [2]. Now press the “OK” button [13] in order to
go into full screen mode (see previous chapter “1. Full
screen”).
GB / IE - 9
Liveimage
mode
Full
screen
Directory
overview
2007/01/09
009
Still image
Video sequence
Image
Number of images in
current daily directory
Date
Time
Fig. H
6-image
overview
2007/01/09
009
Fig. I


